This article was originally posted here at Programmer’s Ranch on 24th July 2014.
Hey people! 🙂
When you’re learning to play an instrument, one thing you need to make sure of is that you’re playing in sync with a regular beat. A device that helps you by producing such a regular beat is a metronome. In this article, we’re going to write a simple metronome application. In doing so, we’ll learn how to use the Console‘s beeping functionality, and we’ll learn to use timers to fire events at regular intervals.
So let’s begin by creating a new Console Application, and adding the following using statement near the top, which will give us access to some of the classes we need:
using System.Threading;
Now, making a quick and dirty metronome is very easy. This is all it takes:
            while (true)
            {
                Console.Beep(4000, 100);
                Thread.Sleep(1000);
            }
That Console.Beep() takes the frequency of the sound as the first parameter (in this case 4000Hz), and the duration of the beep as the second parameter (in this case 100 milliseconds). You can omit the arguments entirely to use default settings.
Thread.Sleep() is used to suspend the program for a specified duration (specified in milliseconds in the parameter). In this case we’re using it to cause a delay between beeps of 1000 milliseconds (i.e. 1 second).
Now, suspending the program like this is not a very good thing. In fact, we can’t give the user an option to quit, and if we were using a GUI (e.g. WPF), then this kind of blocking would be even more problematic.
A better approach for our metronome application is to use Timers. Now there are many different Timer classes we can use, but the one we need in this case is this one. So before we see how we can use these mystical creatures to create a more awesome metronome, let us first add another using statement:
using System.Timers;
Now let’s create an instance of our Timer class:
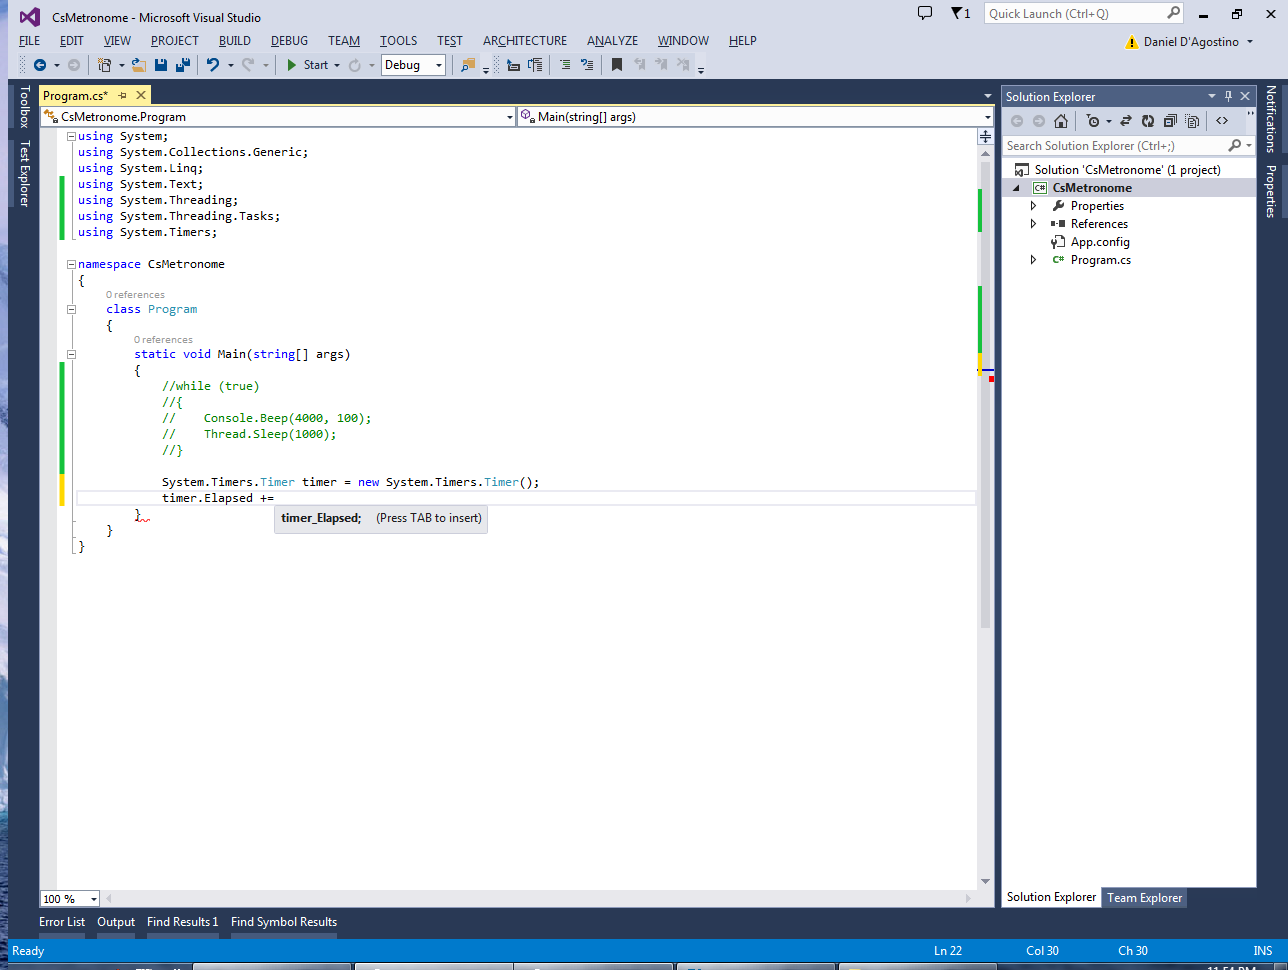
Timer timer = new Timer();
Now you’re going to see Visual Studio complain about this line:
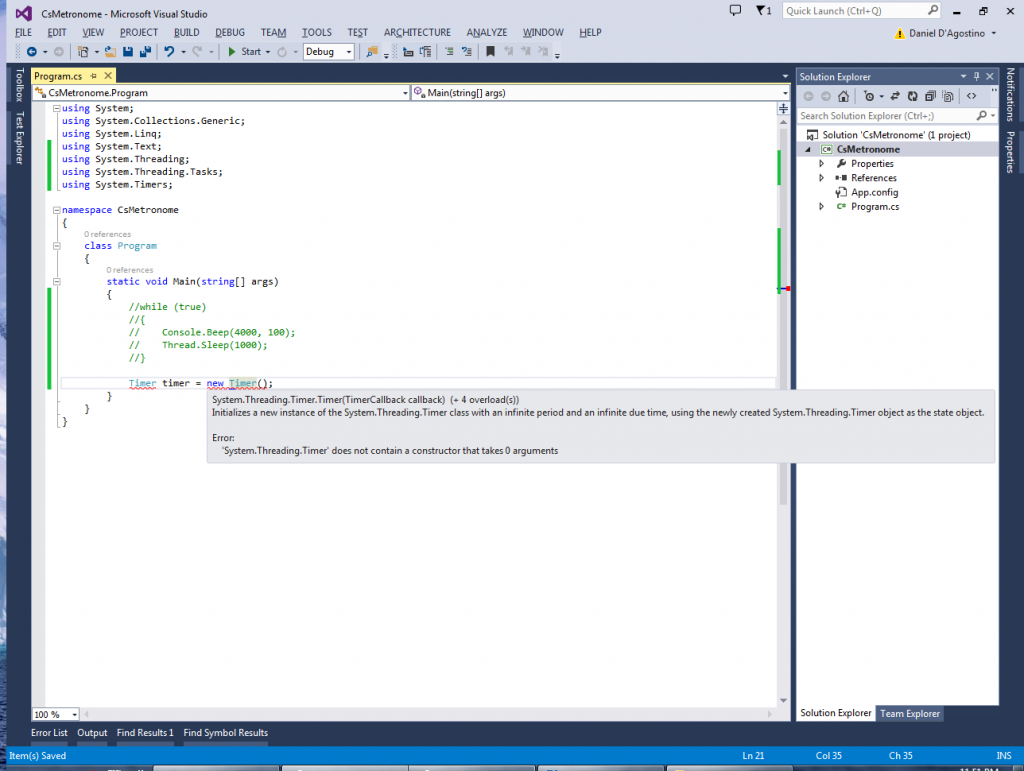
As Visual Studio is telling you, there is also a Timer class in System.Threading, so C# doesn’t know which one to use. You can resolve the ambiguity by using the fully qualified names instead (or in this particular case, just remove System.Threading since we don’t need it any more):
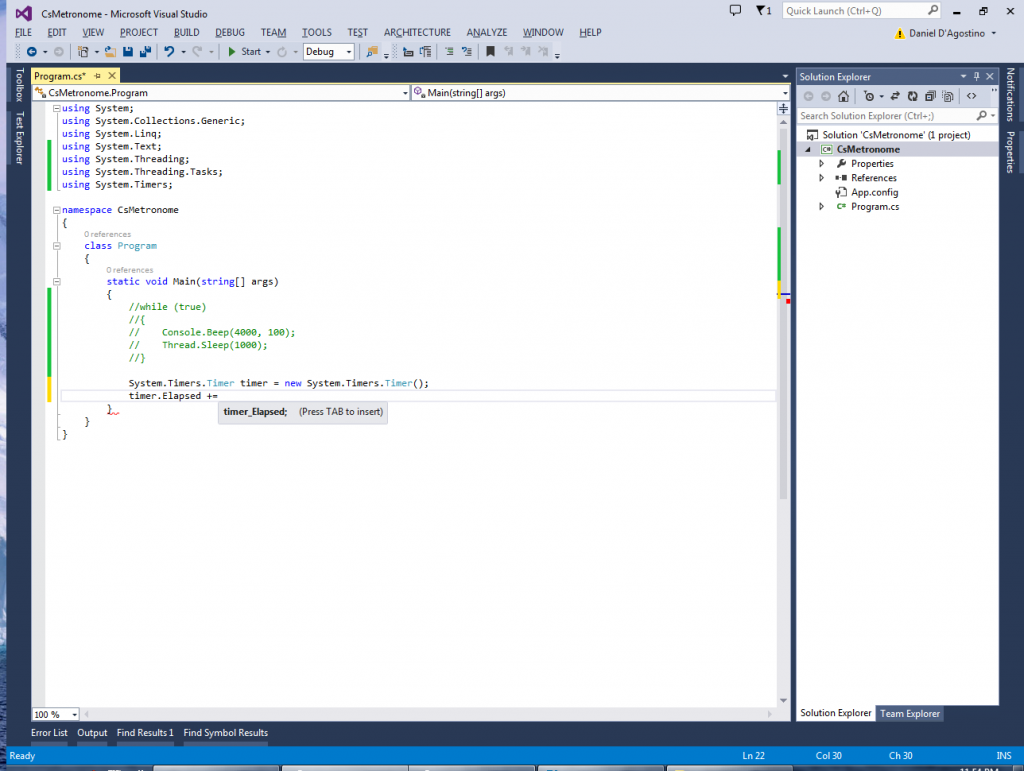
System.Timers.Timer timer = new System.Timers.Timer();
Next, assign a new event handler to the Elapsed event:
timer.Elapsed += timer_Elapsed;
Visual Studio offers to create the event handler for you as you type:
Take it up on the offer, and have the following code generated for you:
        static void timer_Elapsed(object sender, ElapsedEventArgs e)
        {
            throw new NotImplementedException();
        }
Replace the contents of this event handler with our beeping functionality:
        static void timer_Elapsed(object sender, ElapsedEventArgs e)
        {
            Console.Beep(4000, 100);
        }
Back in the Main() method, set an Interval for the timer:
timer.Interval += 1000;
You should begin to understand what we’re doing here. Every time the interval passes (i.e. every second in this case), the Elapsed event will fire, and do whatever we specify in the event handler.
Now all we need to do is start the timer. In the code below, I am also waiting for the user to press ENTER, and once this is done, I am stopping the timer and exiting the application:
            timer.Start();
            Console.ReadLine();
            timer.Stop();
Since the timer runs on a separate thread, it does not interfere with user input. So we can have the timer running in the background while the program waits for user input – similar to what we did last year in “C# Threading: Bouncing Ball” (except that all the threading stuff is handled for you).
So there’s your metronome! Full code below. 🙂
        static void Main(string[] args)
        {
            System.Timers.Timer timer = new System.Timers.Timer();
            timer.Elapsed += timer_Elapsed;
            timer.Interval += 1000;

            timer.Start();
            Console.ReadLine();
            timer.Stop();
        }

        static void timer_Elapsed(object sender, ElapsedEventArgs e)
        {
            Console.Beep(4000, 100);
        }
In this article, we created a very simple metronome application. We first used a sleep-based delay, and learned about the dangers of having it block the program, limiting its interactivity. We then used a Timer from the System.Timers namespace in order to trigger beeps at regular intervals.
There are many ways in which this can be improved (e.g. distinct beep every four beats, configurable beats per minute, etc), but this is a fully functional metronome and a pretty simple demonstration of how to use timers.
The beeping functionality can also come in handy in a wide range of scenarios. One example is to supplement last year’s article “C# Basics: Morse Code Converter Using Dictionaries” with actual sounds to represent the dots and dashes in Morse Code.
I hope you found this useful. Thanks for reading! 🙂