Simple Planetary Orbit Simulation with Unity3D

In this article, I’m going to show you how to make a very simple simulation of planets orbiting the Sun, as well as rotating about their own axes. Even if you’re a beginner, you’ll be surprised how easy this is to set up. Just to set expectations, though: we’re keeping things simple to have fun and learn, so if you’re looking to create a realistic and accurate simulation of the Solar System, I’m afraid you’ve come to the wrong place.

Having said that, create a new 3D project with Unity3D, and let’s get to it! I’m using Unity3D 2021.1.10f1, which is one of the latest versions, but it’s also fine if you use an LTS version.

Creating the Sun and the Earth

From the GameObject menu (or by right-clicking in the Hierarchy window), click “3D Object” and then “Sphere” to create a sphere. Name it “Sun”. It should be positioned at the origin (0, 0, 0) by default, and that’s where we want it.

To add a sphere to the scene, click the GameObject menu, then “3D Object” and “Sphere”.

Repeat this process a second time, and name the second sphere “Earth”. From the Inspector window, set the “Y” component of its position to 5.

With Earth selected, set its position’s Y component to 5.

In order to make the Sun and the Earth look like the real deal, we’ll need textures. A texture is just an image that gets wrapped over the surface of a 3D object, so in our case we want a flat map of the Earth, and an equivalent for the Sun. You can find several on the internet, and in my case I’m using these Solar Textures which look pretty nice. The resolution doesn’t really matter, so pick whichever you like.

In the Project window in Unity3D, create three folders under Assets:

  • Materials
  • Scripts
  • Textures

Drag the Sun and Earth textures from wherever you downloaded them onto the Textures folder you just created, and they will get added to the project there. Next, drag the Sun texture (in my case it’s called “2k_sun”) onto the Sun GameObject in either the Hierarchy or Scene windows. You’ll see that this automatically creates a material in the Materials folder, and the Sun sphere in the Scene window now actually looks like the Sun. Repeat the process for the Earth.

Drag the images you downloaded into the Textures folder, then drag each one onto the respective sphere.

As a final touch, set the Sun’s scale to 2 (i.e. all of the X, Y and Z components). Press Play to admire your work so far:

The Sun and the Earth. Static, not to scale, and with a funny horizon in the distance, but sporting some lovely textures.

Adding Orbit

We’d like the Earth to orbit the Sun, so let’s add a script to do that. Right click on the Scripts folder we created earlier, and select “Create” and then “C# Script”. Name the script “Orbit”. Double-click it in the Project window, or click “Open” in the Inspector window to open it using your default script editor (if you want to change this, go to Edit -> Preferences -> External Tools -> External Script Editor).

To create a script, right click on the “Scripts” folder in the Project window, then click “Create” and “C# Script”. Name it “Orbit”, and then double-click it to edit it.

In the Update() method, add the following code to implement the orbiting behaviour:

    void Update()
    {
        var sun = GameObject.Find("Sun");
        this.transform.RotateAround(sun.transform.position, Vector3.forward,
            100f * Time.deltaTime);
    }

The first line gets a reference to the Sun GameObject via its name. The second line uses the RotateAround() method to make the Earth (this.transform) rotate around the Sun (sun.transform.position) around the axis that the camera is facing in (Vector3.forward) at an angle of 100f * Time.deltaTime.

Wait, why 100f * Time.deltaTime? The Time.deltaTime is the time that elapsed since the last frame was rendered, so with each frame, the Earth will rotate a bit more around the sun. But Time.deltaTime alone makes the orbit a little too slow, so I multiplied it by an arbitrary number, and by trial and error, I settled on 100f. This is actually a common practice, and can be done quite conveniently from the Inspector window if we make a small change to our code.

public class Orbit : MonoBehaviour
{
    [SerializeField]
    float speed = 100f;

    // Start is called before the first frame update
    void Start()
    {
        
    }

    // Update is called once per frame
    void Update()
    {
        var sun = GameObject.Find("Sun");
        this.transform.RotateAround(sun.transform.position, Vector3.forward,
            speed * Time.deltaTime);
    }
}

By declaring a speed variable within the script’s class, marking it with the [SerializeField] attribute, and then using it within the script, we’ve created a parameter that we can configure from the inspector.

Save the script from your editor, and go back to Unity3D, which will pause momentarily to reload and recompile the script. Drag the Orbit script onto the Earth in either the Hierarchy or the Scene window, and you will see it gets added as a component in the Inspector window. Interestingly, you will also see the Speed parameter:

The speed variable exposed by the Orbit script via a [SerializeField] attribute can be tweaked from the Inspector.

If you click Play, you should now see the Earth orbit the Sun. You can also change the value of Speed (even while the game is running), see what difference it makes, and adjust it until you are happy.

Adding Rotation

To make the Earth (and, later, the Sun) spin around its own axis, we just need to follow the same steps as for the Orbit functionality, with a slight change to the script.

  1. Add a new script called Rotation to your Scripts folder.
  2. Open the script.
  3. Add the code below in the Update() method.
  4. Drag the Rotation script onto both the Earth and the Sun.
    void Update()
    {
        this.transform.RotateAround(this.transform.position,
            Vector3.up, 200f * Time.deltaTime);
    }

Here, the Earth or the Sun (this.transform) will spin around itself (this.transform.position) about the Y-axis (Vector3.up) at an angle of 200f * Time.deltaTime. Again, the choice of speed for the angle is arbitrary. As with Orbit, you can expose it to the Inspector and adjust it if you like.

Note that it probably makes sense to use Prefabs rather than attaching the script to each GameObject, but since we don’t have many, I prefer to keep things simple in this particular example.

If you press Play, you should now see the Earth orbiting around the Sun, while both spin independently at the same time.

The Earth orbits the Sun, while both spin independently at the same time.

Finishing Touches

In this section, we’ll make a few tweaks to the project settings to make things look a little nicer.

First, let’s disable the Skybox. To do this, open the Window menu, then click “Rendering” and Lighting:

To open the Lighting window, click on the Window menu, then select Rendering -> Lighting.

In the Lighting window, switch to the Environment tab. The Skybox Material has a value of Default-Skybox. Click on the little circle next to that value and it select None from the new window that comes up.

Disable the Skybox by selecting None as the new value of Skybox Material, in the Environment tab of the Lighting window.

Changing the Skybox has changed the fields in the Environment tab of the Lighting window. There is now an Ambient Color field. Set its value to white (by clicking the top-left part of the colour-picker square, or by setting each of the (R, G, B) values to 255. This makes the objects in the scene somewhat brighter:

Set the Ambient Color to white (255, 255, 255) to make the scene brighter.

Next, we’ll get rid of the annoying blue background colour, which looks as odd in outer space as the Skybox. To do that, select the Main Camera from the Hierarchy window, click on the value of its Background property, and set it to black by either clicking on the bottom portion of the colour-picker square, or by setting each of the (R, G, B) values to zero:

Select the Main Camera, and set its Background to black.

The last thing that’s looking awkward is the lighting: we have a Directional Light that came with the project template, and it’s illuminating both the Sun and the Earth. Delete it.

By either clicking the GameObject menu or else right-clicking inside the Hierarchy window, select Light -> Point Light to create a light that gives off light in all directions.

To create a point light, click the GameObject menu (or right-click inside the Hierarchy window), then select Light -> Point Light.

If you press Play, you’ll notice that the light is a little bit weak, so bump up its Intensity to 10. Then you should see a highlight shine off the Earth.

Set the pint light’s Intensity to 10.

Finally, to make things a little crazier, I suggest adding another planet, such as Venus. To do this, follow the same steps you took when creating the Earth, with a few differences:

  1. Create a new sphere, and name it “Venus”.
  2. Set the Y component of its Position to 3.
  3. Find an appropriate texture and drag it onto the Textures folder.
  4. Drag that texture onto the Venus GameObject in either the Hierarchy or Scene window.
  5. Drag both the Orbit and Rotation scripts onto Venus.
  6. In the Inspector window, change the Speed setting on the Orbit script so that it is faster than the Earth’s speed, e.g. a value of 150.

Press Play and watch as Earth and Venus orbit the Sun with different speeds!

Going Further

This simulation, while very simplistic and not really representing the real behaviour of heavenly bodies, is a fun little exercise showing what you can do in Unity3D with very little effort. There are lots of ways you can take this further. Here are a few ideas:

  1. Learn about Prefabs, use them to create a template for the planets, and create the remaining planets of the Solar System.
  2. Add the Moon orbiting the Earth. Use the same Orbit script, but modify it so that you can plug which GameObject is orbited via the Inspector.
  3. Instead of specifying a different speed for each planet, try to calculate it based on the distance between the planet and the Sun.
  4. Tilt the Earth so that it rotates on something closer to its real axis.
  5. Experiment with elliptical orbits.

Playing Warcraft 3 on Linux

The campaign selection screen in Warcraft III: The Frozen Throne

Over the past week, I’ve played through the Bonus (Orc) Campaign of the Warcraft III: The Frozen Throne expansion… on Linux! It’s both surprising and delightful how many games that could previously run only on Windows can nowadays be run on Linux with little trouble, especially since Windows 10 is no longer able to run some of those older games. In the case of Warcraft III, only the cinematics don’t seem to work on Linux (more on this further below).

In this article, I’ll show how to set up the original Warcraft III: Reign of Chaos and its expansion Warcraft III: The Frozen Throne on Linux, assuming you have the original CDs. I won’t be covering the recent remaster, Warcraft III: Reforged. I’m using Kubuntu 20.04 LTS.

We’ll be using WINE, so the steps are going to be pretty much the same as “Running Legacy Windows Programs on Linux with WINE“, although this will be tailored for Warcraft III. Make sure you already have WINE installed by running:

sudo apt-get install wine

Installing Warcraft III: Reign of Chaos

Start by popping in the Warcraft III: Reign of Chaos CD. When the Device Notifier shows the CD, expand the “Warcraft III” device and click “Open with File Manager” to mount the CD and open it in Dolphin, the file manager application in KDE. This may vary a little if you’re using a different desktop environment (e.g. GNOME).

Expand the “Warcraft III” device and click “Open with File Manager”.

From the file manager application that opened, you can click the URL to find out the location where the CD has been mounted. Open a terminal and cd to that location. Then, run wine install.exe:

Click the URL in Dolphin to find the location where the CD has been mounted. cd to it in a terminal, then run wine install.exe.

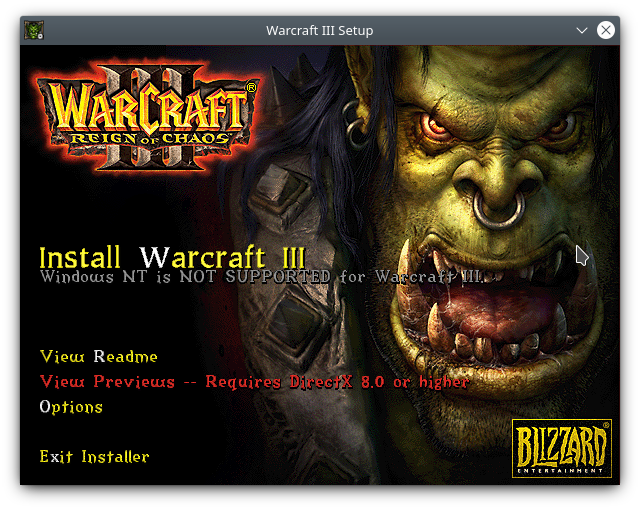
This brings up the autorun screen. From here on, installing Warcraft III is just the same as on Windows.

When it asks you whether you want to create a desktop shortcut, click “Yes”. This creates a shortcut as well as an extra .lnk file, which you can delete. You can use this desktop shortcut, the one added to your start menu, or the autorun screen to run the game.

Installing Warcraft III: The Frozen Throne

Next, pop in the CD for Warcraft III’s The Frozen Throne expansion. Follow the same steps as with Reign of Chaos to bring up the autorun screen. From there, install the game the same way you would on Windows.

Note: if, for any reason, the mounted CD folder appears to be empty, simply eject the CD, put it back in the CD drive, and repeat the same steps.

As with Warcraft III: Reign of Chaos, creating a desktop shortcut will create an extra .lnk file which you can delete.

Installing The Frozen Throne Patch 1.22a

The problem with playing Warcraft III: The Frozen Throne from CD is that… it’s not exactly complete. While you can play through the main campaigns, there’s also a Bonus Campaign based around the Orcs in their new home of Durotar. The CD features only Act One of this RPG/RTS hybrid campaign. To get the other two acts, you’ll have to patch it.

The patch version I’ve been using for all these years is 1.22a. You could possibly install an older or more recent patch, but be aware that very recent patches might impose features from Warcraft III: Reforged that may or may not be welcome.

The two missing acts from the Bonus Campaign were added in patch 1.13, and patch 1.21b no longer requires the CD to play. There are also lots of gameplay changes from all the patches since the initial release.

To patch your game, first download The Frozen Throne Patch 1.22a – I’m not sure whether it’s still available on battle.net, but various third party websites should still be offering it for download; so just Google it. Then, run the patch executable with WINE:

wine War3TFT_122a_English.exe

The patch is quick to install, and when the game runs again, you should see an updated version at the bottom right of the initial screen.

What about Cinematics?

Unfortunately, I haven’t managed to get the beautiful cinematics to play from within Warcraft III. However, you can play them separately with a good media player such as VLC. To do this, first locate your Warcraft III installation folder via the hidden .wine folder in your home directory, as shown in the screenshot below. You’ll find the cinematics in the Movies folder.

The Movies folder, and the Human Campaign intro playing in VLC

Getting Started with Unity3D on Linux

If you have any sort of interest in game development, you’ve probably heard of Unity3D. And if you’ve used it before, you probably know that it has for a long time been restricted to Windows and Mac in terms of development platforms. That changed recently, when they added support for Linux. In this article, I’ll show you how I set up Unity3D on my Kubuntu 20.04 installation, and if the distribution you’re using is close enough, the same steps will likely work for you as well.

First, go to the Unity3D Download page and grab the Unity Hub.

Update 14th May 2023: if you get an error saying the repository isn’t signed, check out this forum post for a solution.

Download the Unity Hub, then open it.

After Unity Hub has finished downloading, run it. It’s a cross-platform AppImage, so you can either double-click it or run it from the terminal.

You have no valid licence… you filthy peasant!

Register an account on the Unity3D website if you don’t have one already. Once Unity Hub loads, it immediately complains about not having a licence. If you click “Manage License”, it will ask you to login. You can click on the resulting “Login” link, or else click the top-right icon and then “Sign in”, to log into Unity3D from Unity Hub.

This is where you sign in.
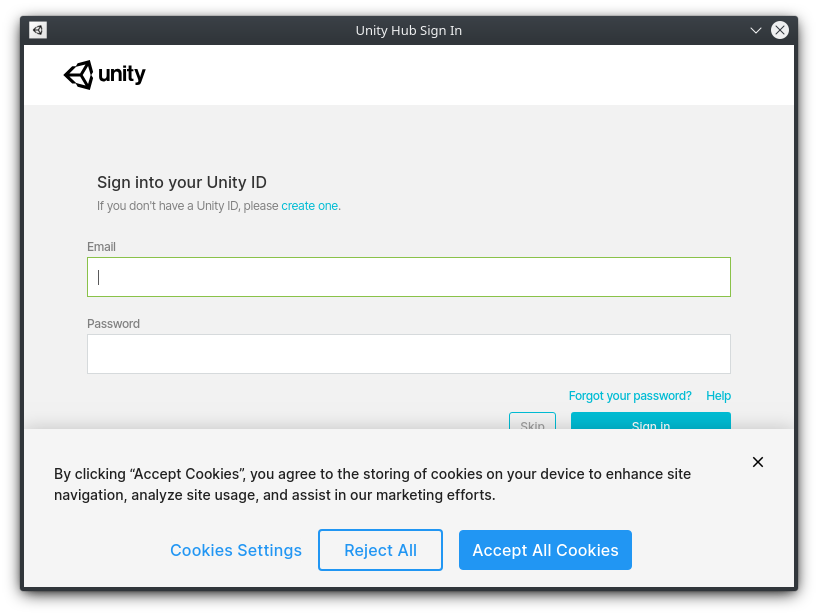
Reject cookies and login. Social providers are under the cookie banner.

Click “Reject All” to opt out of cookies. Then, sign in using your email address and password. Alternatively, if you log into your account using a social identity provider, you’ll find different providers’ icons under the cookie banner.

Now you’re back in the Licence page of Unity Hub. Wait a few seconds for it to activate, then click the “Activate New License” button:

After logging in, you can activate a new licence.

In the next window, select whichever options apply to you. If you’re just a hobbyist, Unity3D is free, so you can select the radio buttons as shown below. Click “Done” when you’re ready.

Choose the relevant options. Unity3D is free unless you’re a company making $100k or more.

You now have a licence! Click the arrow at the top-left to go to the Projects section.

Armed with a licence, go out of Preferences and back to the main sections.

If you try to add a new project, you’ll realise that you need to install a version of the Unity3D editor first. Head over to the Installs section to do this.

You can’t create a new project before you install a version of the Unity3D editor.

In the Installs section, click the “Add” button:

Add a version of the Unity3D editor from here.

Choose whichever version you prefer. The recommended LTS version is best if you need stability; otherwise you can use the latest and greatest version with the newest features.

Choose which version of the Unity3D editor you want to install. The recommended LTS is better for stability; if you’re just starting out, you don’t really need that and can go for the newest one instead.

Click “Next”, and you can now choose which platforms you want your builds to target and what documentation you want. If you’re just starting out, keep it simple and just leave the default “Linux Build Support” enabled. You can always add more stuff later if/when you need it.

Choose which platforms you want to target, and which documentation you want to include. If you’re just starting out, you don’t really care.

Click “Done”, and wait for it to install…

Grab some coffee.

When it’s done, head back to the Projects section. Click the “New” button to create a new project.

In the next window, select the type of project (3D by default), give it a name, and select a folder where your Unity3D projects will go (the new project will be created as a subfolder of this). Then click the “Create” button:

Choose project type, name and location.

Wait for it…

Nice loading screen…

And… that’s it! The editor then comes up, and you can begin creating your game.

The Unity3D editor, finally running on Linux.

If you need a quick place to start, check out my “Unity3D: Moving an Object with Keyboard Input” tutorial here at Gigi Labs, as well as my early Unity3D articles at Programmer’s Ranch.

Highlighting Bitmasks with React

The trend of resources (such as memory and disk space) becoming more abundant is still ongoing, and as a result, software development has become quite wasteful. While it’s quite common for an average application to guzzle several gigabytes of RAM nowadays, many people are not even aware that it’s possible to pack several pieces of information into the same byte. In fact, old games have been able to pack several pixels worth of data in a single byte, and this technique is still quite common for bit flags.

Bitmasks in Practice

Let’s consider a simple example: I have an RPG, where a character’s status can be one of the following values:

  • 1 = Paralysed
  • 2 = Poisoned
  • 4 = Diseased
  • 8 = Blind
  • 16 = Hungry
  • 32 = Fatigued

Using a power of two for each value means that I can use a single number to represent a combination of these values. For example:

  • 12 (decimal) = 001100 (binary) = Diseased and Blind
  • 2 (decimal) = 000010 (binary) = Poisoned
  • 63 (decimal) = 111111 (binary) = all six statuses apply

Each of these individual statuses is a flag with a boolean value. They are independent of each other and can be set simultaneously. By combining them into a single variable (called a bitmask) as shown above, we can store them more efficiently, both in memory and on disk.

The downside is that it becomes less readable. In order to know that a value of 21 means Hungry, Diseased and Paralysed, you need to break it down into individual bits and look up what each one means. That’s not a problem; in fact, we’ll build a little utility with React to help with this.

Listing the Bit Flags

We’re going to create a variation of the Filter List As You Type example that will list the individual flags and then highlight them based on user input. Start by creating a new React app. Once that’s done, open src/App.js and remove the logo import as well as everything inside the <header> tag so that you’re left with just this:

import './App.css';

function App() {
  return (
    <div className="App">
      <header className="App-header">

      </header>
    </div>
  );
}

export default App;

Next, create an object that maps the value of a flag to its description. This is just for display purposes. Inside the <header> element, use a simple map() function to display the flags (value and description) in a table:

import './App.css';

function App() {
  const flags = {
    1: 'Paralysed',
    2: 'Poisoned',
    4: 'Diseased',
    8: 'Blind',
    16: 'Hungry',
    32: 'Fatigued'
  };

  return (
    <div className="App">
      <header className="App-header">
        <table>
          <tbody>
          {
            Object.keys(flags).map(x => (
              <tr key={x}>
                <td>{x}</td>
                <td>{flags[x]}</td>
              </tr>))
          }
          </tbody>
        </table>
      </header>
    </div>
  );
}

export default App;

If you run npm start, you should be able to see the list of flags:

Listing the bit flags

Highlighting Bit Flags

Next, we’ll accept a bitmask (as a decimal number) as user input, and use it to highlight the relevant flags. This is very similar to what we did in Filter List As You Type with React, so start off by adding the relevant imports at the top of the file:

import React, { useState } from 'react';

Next, add the following to capture the state of the input field:

const [input, setInput] = useState('');

Add a text field right above the table:

        <input id="input"
          name="input"
          type="text"
          placeholder="Enter a bitmask in decimal"
          value={input}
          onChange={event => setInput(event.target.value)}
        />

Finally, we need to do the highlighting part. For this, we’ll add a getHighlightStyle() helper function, and use it on each row. The following is the full code for this article:

import React, { useState } from 'react';
import './App.css';

function App() {
  const flags = {
    1: 'Paralysed',
    2: 'Poisoned',
    4: 'Diseased',
    8: 'Blind',
    16: 'Hungry',
    32: 'Fatigued'
  };

  const [input, setInput] = useState('');

  const getHighlightStyle = flagValue =>
    (input & flagValue) > 0 ? { backgroundColor: 'red' } : null;

  return (
    <div className="App">
      <header className="App-header">
        <input id="input"
          name="input"
          type="text"
          placeholder="Enter a bitmask in decimal"
          value={input}
          onChange={event => setInput(event.target.value)}
        />
        <table>
          <tbody>
          {
            Object.keys(flags).map(value => (
              <tr key={value} style={getHighlightStyle(value)}>
                <td>{value}</td>
                <td>{flags[value]}</td>
              </tr>))
          }
          </tbody>
        </table>
      </header>
    </div>
  );
}

export default App;

We’re using the bitwise AND operator (&) to do a binary AND between the input and each flag. Let’s say the user enters 3 as the input. That’s 000011 in binary; so:

  • 000011 AND 000001 (Paralysed) results in 000001 (greater than zero);
  • similarly, 000011 AND 000010 (Poisoned) results in 000010 (also greater than zero);
  • however, 000011 AND 000100 (Diseased) results in 000000 (not greater than zero);
  • and so on.

This is a common way of determining whether individual bits are set, and it works quite nicely:

Flags are highlighted based on the bitmask in the text field

So that’s it: we’ve made a simple tool with React to help make sense of bitmasks, and hopefully learned a bit about bitmasks and bitwise operators along the way.