In Unity3D, we can use prefabs to create a template for an object that we’ll create many times, such as bullets, planets, or – as we’ll see in this article – bricks. Prefabs are handy because each instance will carry the same scripts, materials, transforms, etc. Let’s see how this works in practice by creating a wall made up of many bricks.
To start off, create a new 3D project with Unity3D. I’m using Unity3D 2020.3.13f1 (LTS), although any version is probably fine for this beginner exercise.
Creating a Brick Prefab
We’ll start off by creating a simple brick, which will be the building block for our wall.
Create a Cube, via the menu GameObject -> 3D Object -> Cube. Rename it to “Brick”. In the Transform portion of the Inspector, set the X component of its Scale to 2, so that it looks elongated like… a brick.

Next, we’ll create a material for the brick. In your Project window, right click on Assets and then go Create -> Material. (You could create an appropriate folder structure to separate things like Materials, Scripts etc, but since we’ll have very few of these in this case, I won’t bother.) Name it “Brick Material”, and then set the colour of its Albedo property to something that looks like brick red (in my case I went with RGB(183, 50, 57)).

Drag the Brick Material onto the Brick (in either the Hierarchy or Scene windows) to apply the colour.
Next, drag the Brick GameObject from the Hierarchy window to the Assets folder in the Project window to create a prefab out of it. Note how the Brick is now blue in the Hierarchy window, and it also gets an “Open Prefab” button in the Inspector.

Instantiating a Single Brick
We now have two concepts of “Brick” in this project: the original Brick GameObject (as seen in the Hierarchy and Scene windows), and the Brick prefab (in the Assets folder of the Project window). The Brick GameObject is an instance of the Brick prefab. We can create more instances of the Brick prefab, and they will have the same components (such as materials and transforms) unless we specifically change them.
This makes it very easy to write a script to create lots of bricks using the Brick prefab as a template. In fact, we don’t need the Brick GameObject any more. Go ahead and delete it.
Right click on the Assets folder of the Project window, select Create -> C# Script, and call it WallGenerator. Double-click the script to open it in your script editor.
Add a serializable field for the Brick prefab at the beginning of the class:
public class WallGenerator : MonoBehaviour
{
    [SerializeField]
    GameObject brickPrefab;
Save the script, then go back to the Unity3D editor. Then:
- Drag the WallGenerator script onto your Main Camera.
- Notice the Brick Prefab property for the script in the Inspector.
- Drag the Brick prefab from the Project window into that slot in the Inspector.

With this set up, we can start creating instances of the prefab from the script. Go back to the script editor, and add a call to Instantiate() in the Start() method as follows:
    // Start is called before the first frame update
    void Start()
    {
        Instantiate(brickPrefab);
    }
Back in the Unity3D editor, press Play to run the game. You’ll see that a brick is actually generated at runtime, even though we don’t have any in the Scene window in the editor:

Building a Wall
Now that we know how to create a single brick from a script, we can use simple loops to create more. Let’s create a 5×5 wall by using a different overload of Instantiate() that also takes a position (which we’ll provide) and rotation (which we’ll ignore):
    void Start()
    {
        for (int y = 0; y < 5; y++)
        {
            for (int x = 0; x < 5; x++)
            {
                Vector3 position = new Vector3(x * 2, y, 0);
                Instantiate(brickPrefab, position, Quaternion.identity);
            }
        }
    }
If you press Play, you’ll see the wall, although it’s a little hard to distinguish the bricks because they’re touching each other:

You can tweak the scale of the Brick prefab to get some space between the bricks. For instance, this is how it looks with a scale of (X, Y, Z) = (1.95, 0.95, 1):

Finally, just to give it a bit more style, let’s change the script so that it generates alternating patterns of bricks:
    void Start()
    {
        for (int y = 0; y < 5; y++)
        {
            int xOffset = (y % 2 == 0) ? 1 : 0;

            for (int x = 0; x < 5; x++)
            {
                Vector3 position = new Vector3(x * 2 + xOffset, y, 0);
                Instantiate(brickPrefab, position, Quaternion.identity);
            }
        }
    }
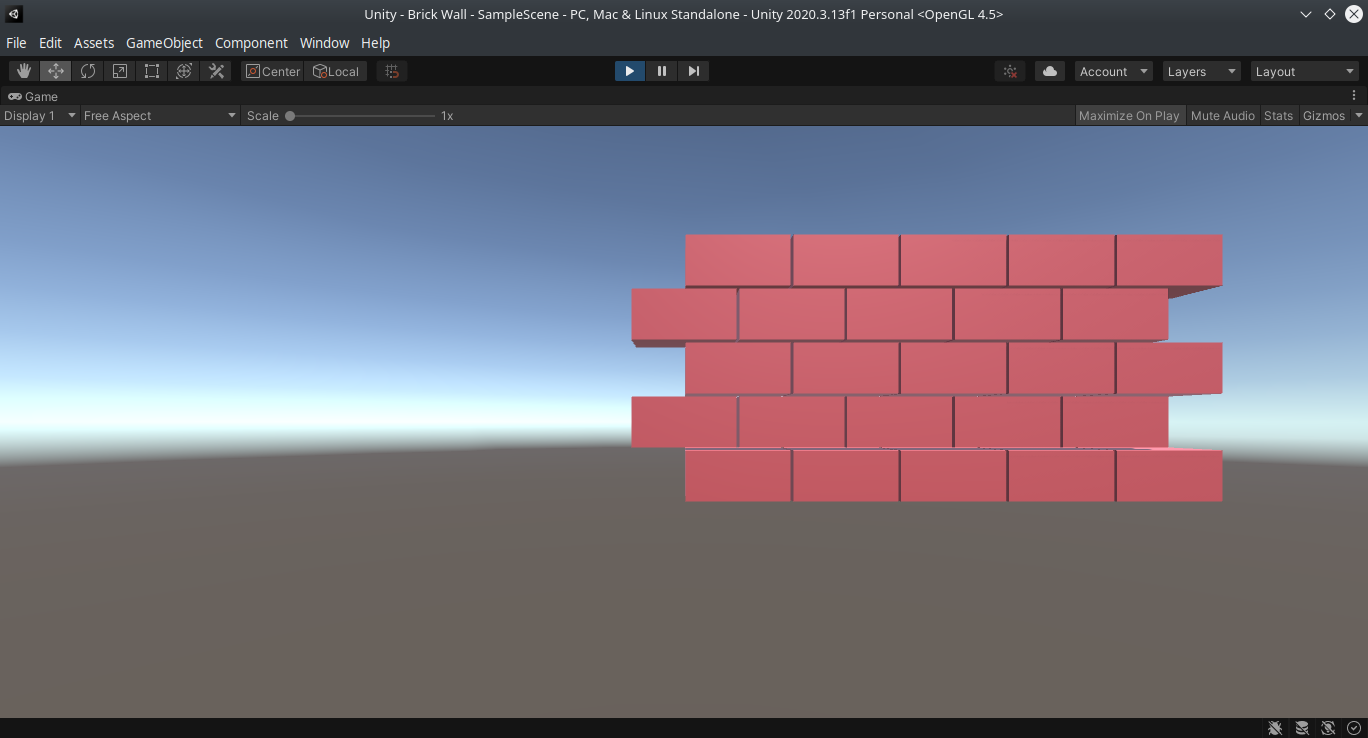
All we did here was use the modulus operator (%) to check whether the row is an even-numbered one, and if so, add an extra 1 to the X position of each brick. This results in the following wall, better than any that Donald himself could ever hope to build:
Summary
A prefab is a template of a GameObject used to create instances of it that share the same or similar components. As we have seen, we can easily call the Instantiate() method to create lots of instances of a GameObject from a script, making this one of the cornerstones of dynamic behaviour in Unity3D.
2 thoughts on “Simple Brick Wall with Unity3D”