Tag Archives: ASP .NET Web API

A Multilevel Cache Retrieval Design for .NET

Caching data is vital for high-performance web applications. However, cache retrieval code can get messy and hard to test without the proper abstractions. In this article, we’ll start an ugly multilevel cache and progressively refine it into something maintainable and testable.

The source code for this article is available at the Gigi Labs BitBucket repository.

Naïve Multilevel Cache Retrieval

A multilevel cache is just a collection of separate caches, listed in order of speed. We typically try to retrieve from the fastest cache first, and failing that, we try the second fastest; and so on.

For the example in this article we’ll use a simple two-level cache where:

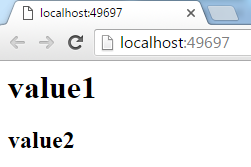
We’re going to build a Web API method that retrieves a list of supported languages. We’ll prepare this data in Redis (e.g. using the command SADD languages en mt) but will leave the MemoryCache empty (so it will have to fall back to the Redis cache).

A simple implementation looks something like this:

    public class LanguagesController : ApiController
    {
        // GET api/languages
        public async Task<IEnumerable<string>> GetAsync()
        {
            // retrieve from MemoryCache

            var valueObj = MemoryCache.Default.Get("languages");

            if (valueObj != null)
                return valueObj as List<string>;
            else
            {
                // retrieve from Redis

                var conn = await ConnectionMultiplexer.ConnectAsync("localhost:6379");
                var db = conn.GetDatabase(0);
                var redisSet = await db.SetMembersAsync("languages");

                if (redisSet == null)
                    return null;
                else
                    return redisSet.Select(item => item.ToString()).ToList();
            }
        }
    }

Note: this is not the best way to create a Redis client connection, but is presented this way for the sake of simplicity.

Data Access Repositories and Multilevel Cache Abstraction

The controller method in the previous section is having to deal with cache fallback logic as well as data access logic that isn’t really its job (see Single Responsibility Principle). This results in bloated controllers, especially if we add additional cache levels (e.g. fall back to database for third-level cache).

To alleviate this, the first thing we should do is move data access logic into repositories (this is called the Repository pattern). So for MemoryCache we do this:

    public class MemoryCacheRepository : IMemoryCacheRepository
    {
        public Task<List<string>> GetLanguagesAsync()
        {
            var valueObj = MemoryCache.Default.Get("languages");
            var value = valueObj as List<string>;
            return Task.FromResult(value);
        }
    }

…and for Redis we have this instead:

    public class RedisCacheRepository : IRedisCacheRepository
    {
        public async Task<List<string>> GetLanguagesAsync()
        {
            var conn = await ConnectionMultiplexer.ConnectAsync("localhost:6379");
            var db = conn.GetDatabase(0);
            var redisSet = await db.SetMembersAsync("languages");

            if (redisSet == null)
                return null;
            else
                return redisSet.Select(item => item.ToString()).ToList();
        }
    }

The repositories each implement their own interfaces, to prepare for dependency injection which is one of our end goals (we’ll get to that later):

    public interface IMemoryCacheRepository
    {
        Task<List<string>> GetLanguagesAsync();
    }

    public interface IRedisCacheRepository
    {
        Task<List<string>> GetLanguagesAsync();
    }

For this simple example, the interfaces look almost identical. If your caches are going to be identical then you can take this article further and simplify things even more. However, I’m not assuming that this is true in general; you might not want to have a multilevel cache everywhere.

Let’s also add a new class to abstract the fallback logic:

    public class MultiLevelCache
    {
        public async Task<T> GetAsync<T>(params Task<T>[] tasks) where T : class
        {
            foreach(var task in tasks)
            {
                var retrievedValue = await task;

                if (retrievedValue != null)
                    return retrievedValue;
            }

            return null;
        }
    }

Basically this allows us to pass in a number of tasks, each corresponding to a cache lookup. Whenever a cache lookup returns null, we know it’s a cache miss, which is why we need the where T : class restriction. In that case we try the next cache level, until we finally run out of options and just return null to the calling code.

This class is async-only to encourage asynchronous retrieval where possible. Synchronous retrieval can use Task.FromResult() (as the MemoryCache retrieval shown earlier does) to conform with this interface.

We can now refactor our controller method into something much simpler:

        public async Task<IEnumerable<string>> GetAsync()
        {
            var memoryCacheRepository = new MemoryCacheRepository();
            var redisCacheRepository = new RedisCacheRepository();
            var cache = new MultiLevelCache();

            var languages = await cache.GetAsync(
                memoryCacheRepository.GetLanguagesAsync(),
                redisCacheRepository.GetLanguagesAsync()
            );

            return languages;
        }

The variable declarations will go away once we introduce dependency injection.

Multilevel Cache Repository

The code looks a lot neater now, but it is still not testable. We’re still technically calling cache retrieval logic from the controller. A cache depends on external resources (e.g. databases) and also potentially on time (if expiry is used), and that’s not good for unit tests.

A cache is not very different from the more tangible data sources (such as Redis or a database). With them it shares the function of retrieving data and the nature of relying on resources external to the application, which makes it incompatible with unit testing. A multilevel cache has the additional property that it is an abstraction for the underlying data sources, and is thus itself a good candidate for the repository pattern:

multilevel-cache-repository

We can now move all our cache retrieval logic into a new MultiLevelCacheRepository class:

    public class MultiLevelCacheRepository : IMultiLevelCacheRepository
    {
        public async Task<List<string>> GetLanguagesAsync()
        {
            var memoryCacheRepository = new MemoryCacheRepository();
            var redisCacheRepository = new RedisCacheRepository();
            var cache = new MultiLevelCache();

            var languages = await cache.GetAsync(
                memoryCacheRepository.GetLanguagesAsync(),
                redisCacheRepository.GetLanguagesAsync()
            );

            return languages;
        }
    }

Our controller now needs only talk to this repository, and carry out any necessary logic after retrieval (in this case we don’t have any):

        public async Task<IEnumerable<string>> GetAsync()
        {
            var repo = new MultiLevelCacheRepository();
            var languages = await repo.GetLanguagesAsync();
            return languages;
        }

Dependency Injection

Our end goal is to be able to write unit tests for our controller methods. A prerequisite for that is to introduce dependency injection.

Follow the instructions in “ASP .NET Web API Dependency Injection with Ninject” to set up Ninject, or use any other dependency injection framework you prefer.

In your dependency injection configuration class (NinjectWebCommon if you’re using Ninject), set up the classes and interfaces you need:

        private static void RegisterServices(IKernel kernel)
        {
            kernel.Bind<IMemoryCacheRepository>().To<MemoryCacheRepository>()
                .InSingletonScope();
            kernel.Bind<IRedisCacheRepository>().To<RedisCacheRepository>()
                .InSingletonScope();
            kernel.Bind<IMultiLevelCacheRepository>().To<MultiLevelCacheRepository>()
                .InSingletonScope();
            kernel.Bind<MultiLevelCache>().To<MultiLevelCache>()
                .InSingletonScope();
        }

Note: you can also set up an interface for MultiLevelCache if you want. I didn’t do that out of pure laziness.

Next, refactor MultiLevelCacheRepository to get the classes it needs via constructor injection:

    public class MultiLevelCacheRepository : IMultiLevelCacheRepository
    {
        private IMemoryCacheRepository memoryCacheRepository;
        private IRedisCacheRepository redisCacheRepository;
        private MultiLevelCache cache;

        public MultiLevelCacheRepository(
            IMemoryCacheRepository memoryCacheRepository,
            IRedisCacheRepository redisCacheRepository,
            MultiLevelCache cache)
        {
            this.memoryCacheRepository = memoryCacheRepository;
            this.redisCacheRepository = redisCacheRepository;
            this.cache = cache;
        }

        public async Task<List<string>> GetLanguagesAsync()
        {
            var languages = await cache.GetAsync(
                memoryCacheRepository.GetLanguagesAsync(),
                redisCacheRepository.GetLanguagesAsync()
            );

            return languages;
        }
    }

Do the same with the controller:

    public class LanguagesController : ApiController
    {
        private IMultiLevelCacheRepository repo;

        public LanguagesController(IMultiLevelCacheRepository repo)
        {
            this.repo = repo;
        }

        // GET api/languages
        public async Task<IEnumerable<string>> GetAsync()
        {
            var languages = await repo.GetLanguagesAsync();
            return languages;
        }
    }

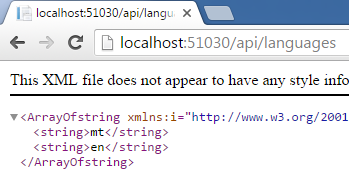
…and make sure it actually works:

multilevel-cache-verify

Unit Test

Thanks to this design, we can now write unit tests. There is not much to test for this simple example, but we can write a simple (!) test to verify that the languages are indeed retrieved and returned:

        [TestMethod]
        public async Task GetLanguagesAsync_LanguagesAvailable_Returned()
        {
            // arrange

            var languagesList = new List<string>() { "mt", "en" };

            var memCacheRepo = new Mock<MemoryCacheRepository>();
            var redisRepo = new Mock<RedisCacheRepository>();
            var cache = new MultiLevelCache();
            var multiLevelCacheRepo = new MultiLevelCacheRepository(
                memCacheRepo.Object, redisRepo.Object, cache);
            var controller = new LanguagesController(multiLevelCacheRepo);

            memCacheRepo.Setup(repo => repo.GetLanguagesAsync())
                        .ReturnsAsync(null);
            redisRepo.Setup(repo => repo.GetLanguagesAsync())
                        .ReturnsAsync(languagesList);

            // act

            var languages = await controller.GetAsync();
            var actualLanguages = new List<string>(languages);

            // assert

            CollectionAssert.AreEqual(languagesList, actualLanguages);
        }

Over here we’re using Moq’s Mock objects to help us with setting up the unit test. In order for this to work, we need to make our GetLanguagesAsync() method virtual in the data repositories:

public virtual Task<List<string>> GetLanguagesAsync()

Conclusion

Caching makes unit testing tricky. However, in this article we have seen how we can treat a cache just like any other repository and hide its retrieval implementation details in order to keep our code testable. We have also seen an abstraction for a multilevel cache, which makes cache fallback straightforward. Where cache levels are identical in terms of data, this approach can probably be simplified even further.

ASP .NET 5 Application Configuration, Part 2

In Part 1, we saw how to retrieve basic application settings from a range of formats available in ASP .NET 5. In this article, we will see techniques used for settings that go beyond simple key-value representation.

Getting a Config Section

Let’s say we have this appsettings.json:

{
  "Title": "configuration",
  "DataSettings": {
    "ConnectionString": "SomeConnectionString",
    "AuditDatabaseName": "AuditDB"
  }
}

…and we want to map the DataSettings to the following C# class:

    public class DataSettings
    {
        public string ConnectionString { get; set; }
        public string AuditDatabaseName { get; set; }
    }

We can start with configuration loading code from the Part 1 article:

        public void ConfigureServices(IServiceCollection services)
        {
            var configurationBuilder = new ConfigurationBuilder();
            configurationBuilder.AddJsonFile("appsettings.json");
            Configuration = configurationBuilder.Build();

            // TODO code goes here
        }

At this point, we need to add the following dependency to our project.json:

    "Microsoft.Extensions.OptionsModel": "1.0.0-rc1-final"

Then, in the TODO part in the code above, we can add the following to read the DataSettings section into its strongly-typed C# class equivalent:

        public void ConfigureServices(IServiceCollection services)
        {
            var configurationBuilder = new ConfigurationBuilder();
            configurationBuilder.AddJsonFile("appsettings.json");
            Configuration = configurationBuilder.Build();

            var section = Configuration.GetSection("DataSettings");
            services.Configure<DataSettings>(section);
        }

You may be disappointed to find that this doesn’t give you an object you can use right away. However, what we are doing is putting our config section in the services collection, which is basically ASP .NET 5’s built-in dependency injection. In the next section, we’ll see how we can actually use this.

Note that by reading a config section, you’re basically pulling out only that section from the config. In the example above, the Title setting is not included in the section we read.

Dependency Injection with the Options Model

One of the most important parts of ASP .NET 5 Configuration is the options model, which is just a fancy way of saying dependency injection. By calling services.Configure() in the previous section, we have set up our settings class with dependency injection. So how do we use it?

Let’s make a simple Web API controller to see this in action. In ASP .NET 5, Web API and MVC are the same thing, so we’ll need the MVC package. Also make sure you have the OptionsModel package from the previous section:

    "Microsoft.Extensions.OptionsModel": "1.0.0-rc1-final",
    "Microsoft.AspNet.Mvc": "6.0.0-rc1-final"

We’ll need to do some simple setup in Startup.cs for MVC to work:

        public void ConfigureServices(IServiceCollection services)
        {
            var configurationBuilder = new ConfigurationBuilder();
            configurationBuilder.AddJsonFile("appsettings.json");
            Configuration = configurationBuilder.Build();

            var section = Configuration.GetSection("DataSettings");
            services.Configure<DataSettings>(section);

            services.AddMvc();
        }

        public void Configure(IApplicationBuilder app)
        {
            app.UseIISPlatformHandler();

            app.UseMvc();
        }

Finally, we can add our controller:

    [Route("api/[controller]")]
    public class DataController : Controller
    {
        IOptions<DataSettings> dataSettings;

        public DataController(IOptions<DataSettings> dataSettings)
        {
            this.dataSettings = dataSettings;
        }

        public IActionResult Index()
        {
            return new ObjectResult(this.dataSettings.Value.ConnectionString);
        }
    }

Notice how by putting an IOptions<DataSettings> in the constructor, we can get our settings class from the dependency injection framework. Accessing its Value gives us the DataSettings instance that we configured earlier.

Sure enough, it works:

aspnet5-web-api-dependency-injection

Strongly-Typed Configuration from Root

We don’t always need to read just a section. Sometimes, it can be handy to read the whole configuration file.

So let’s say I have these settings classes:

    public class MySettings
    {
        public string Title { get; set; }
        public List<string> SupportedFormats { get; set; }
        public List<Hero> Heroes { get; set; }
    }

    public class Hero
    {
        public string CharacterName { get; set; }
        public string ActorName { get; set; }
    }

Our appsettings.json now contains the following:

{
  "Title": "configuration",
  "SupportedFormats": [ "json", "xml", "ini" ],
  "Heroes": [
    {
      "CharacterName": "Luke Skywalker",
      "ActorName": "Mark Hamill"
    },
    {
      "CharacterName": "Han Solo",
      "ActorName": "Harrison Ford"
    }
  ]
}

Then, I can read all this stuff into MySettings as follows:

        public void ConfigureServices(IServiceCollection services)
        {
            var configurationBuilder = new ConfigurationBuilder();
            configurationBuilder.AddJsonFile("appsettings.json");
            Configuration = configurationBuilder.Build();

            var mySettings = new MySettings();
            Configuration.Bind(mySettings);
        }

And… there you go:

aspnet5-config-from-root

If you take a moment to look at the stuff I put into the appsettings.json, you’ll begin to appreciate just how powerful this is. We can read basic strings, arrays, and even lists of entire objects like this. If you’ve experienced what a pain in the ass it is to read a simple list of data from a key in Web.config with the ASP .NET we’re used to, then this should feel like a breath of fresh air.

Custom Configuration Providers

If none of the default setting file formats match what you need, then you’ll probably need to create your own custom configuration provider. The example in the official docs shows a reasonable example: retrieving settings from a database. Unfortunately, however, that example doesn’t work (at the time of writing this article), because the APIs have changed and the official docs have not been updated.

Just for the sake of example, let’s imagine we want to load a file containing pipe-delimited settings. We’ll work with the following pipeconfig.txt:

key1|value1|key2|value2

Our custom provider class needs to:

  1. Inherit from ConfigurationProvider
  2. Override the Load() method
  3. Set the Data dictionary

Here’s an example of what our pipe-delimited-setting loader could look like:

    public class PipeDelimitedConfigSource : ConfigurationProvider
    {
        private string filename;

        public PipeDelimitedConfigSource(string filename)
        {
            this.filename = filename;
        }

        public override void Load()
        {
            string fileContents = File.ReadAllText(filename);
            string[] tokens = fileContents.Split(new char[] { '|' });

            for (int i = 0; i < tokens.Length; i += 2)
            {
                var key = tokens[i];
                var value = tokens[i + 1];
                this.Data[key] = value;
            }
        }
    }

Then, back in Startup.cs, we can feed it to our ConfigurationBuilder using its Add() method:

        public void ConfigureServices(IServiceCollection services)
        {
            var configurationBuilder = new ConfigurationBuilder();
            var configSource = new PipeDelimitedConfigSource("../pipeconfig.txt");
            configurationBuilder.Add(configSource);
            Configuration = configurationBuilder.Build();
        }

        public void Configure(IApplicationBuilder app)
        {
            app.UseIISPlatformHandler();

            app.Run(async (context) =>
            {
                var setting1 = this.Configuration["key1"];
                var setting2 = this.Configuration["key2"];
                string output = $"<h1>{setting1}</h1><h2>{setting2}</h2>";

                await context.Response.WriteAsync(output);
            });
        }

Here’s the output:

aspnet5-custom-config-examplet

Config files and wwwroot

Before ASP .NET 5, configuration resided in Web.config. Having a single file makes it easy to configure web servers not to serve it. The flexibility afforded by having different possible formats and source for configuration in ASP .NET 5 thus begs the question: how do we prevent our config files from being served?

This is easy to deal with if we understand the role of the wwwroot folder. Before ASP .NET 5, the project root and the website root were one and the same. In ASP .NET 5, the website root (called wwwroot by default, but configurable) is a subfolder of the project folder. Thus, to keep files out of reach, it is necessary only to keep them out of wwwroot.

This way, the application code will have access to these files, but they will not be served as static files via simple web requests.

The role of web.config

By reading this article and the previous one, you have hopefully learned that there is no longer a standard web.config file that stores all the web application’s settings. With this in mind, you might be a little surprised to find that standard ASP .NET 5 project templates actually come with a web.config in the wwwroot folder.

At the time of writing this article, the contents of the file (although not important here) are the following:

<?xml version="1.0" encoding="utf-8"?>
<configuration>
  <system.webServer>
    <handlers>
      <add name="httpPlatformHandler" path="*" verb="*" modules="httpPlatformHandler" resourceType="Unspecified"/>
    </handlers>
    <httpPlatform processPath="%DNX_PATH%" arguments="%DNX_ARGS%" stdoutLogEnabled="false" startupTimeLimit="3600"/>
  </system.webServer>
</configuration>

The reason for the presence of the web.config is explained in this StackOverflow answer, which I quote:

“Web.config is strictly for IIS Configuration. It is not needed unless hosting in IIS. It is not used when you run the app from the command line.

“In the past Web.config was used for both IIS configuration and application configuration and settings. But in asp.net 5 it is not used by the application at all, it is only used for IIS configuration.

“This decoupling of the application from IIS is part of what makes cross platform possible.”

Summary

In this article, we have seen more complex ways in which we can read application configuration. The configuration model in ASP .NET 5 is indeed powerful, as we can map settings files to strongly-typed objects, and pass them on to our controllers via dependency injection. Where necessary, we can extend the range of built-in configuration providers by creating our own.

In the final sections, we have also discussed how to protect settings files from being accidentally served over the web, and why there is a web.config file in wwwroot by default despite ASP .NET 5 doing away with web.config.

ASP .NET Web API Dependency Injection with Ninject

In this article, we’re going to set up dependency injection in a new ASP .NET Web API project, using Ninject as our IoC container.

For starters, do the following:

  1. Create a new Web API project.
  2. Install the Ninject.Web.WebApi NuGet package.
  3. Install the Ninject.Web.WebApi.WebHost NuGet package.

Since I need an injectable service to demonstrate this with, I’m also going to install my very own .NET Settings Framework via the Dandago.Settings NuGet package.

When you installed Ninject.Web.WebApi.WebHost, it added a NinjectWebCommon.cs class under the App_Start folder:

ninjectwebapi-ninjectwebcommon

Ignore the boilerplate crap and look for the RegisterServices() method. There, you can set up your dependencies. In my case, it looks like this (needs namespace Dandago.Settings):

        /// <summary>
        /// Load your modules or register your services here!
        /// </summary>
        /// <param name="kernel">The kernel.</param>
        private static void RegisterServices(IKernel kernel)
        {
            kernel.Bind<IConfigKeyReader>().To<AppSettingReader>();
            kernel.Bind<IConfigKeyProvider>().To<ConfigKeyProvider>();
        }     

Great! Now, let’s test it. Find ValuesController and at the following code at the beginning:

        private int x;

        public ValuesController(IConfigKeyProvider configKeyProvider)
        {
            this.x = configKeyProvider.Get<int>("x", 5);
        }

Run it, and we should hit the breakpoint when going to /api/values:

ninjectwebapi-breakpointhit

It’s working, and that’s all you need.

In case it wasn’t that smooth, however, here are a couple of things that might have gone wrong.

ninjectwebapi-parameterless-constructor

If you’re getting the above error complaining about not having a parameterless public constructor, then you probably forgot to install the Ninject.Web.WebApi.WebHost package.

ninjectwebapi-activationexception

If on the other hand you went ahead and installed Ninject.Web.WebApi.WebHost first, that brings in an older version of the Ninject.Web.WebApi package, causing the above ActivationException. The solution is to upgrade Ninject.Web.WebApi.

ASP .NET Web API: A Gentle Introduction

This article was originally posted here at Programmer’s Ranch on 1st August 2014.

Hello! 🙂

Last year, we saw how to intercept HTTP requests in Wireshark, and also how to construct them. As you already know, HTTP is used mainly to retrieve content from the Web; however it is capable of much more than that. In this article, we will learn how HTTP can be used to expose an API that will allow clients to interact with back-end services.

Ideally, you should be using Visual Studio 2013 (VS2013) or later. If you’re using something different, the steps may vary.

Right, so fire up VS2013, and create a new ASP .NET Web Application. In VS2013, Microsoft united various different kinds of web projects under a single banner, which is what people mean when they refer to something called “One ASP .NET“. So there isn’t that much choice in terms of project types:

webapi-intro-newproject

You are given some sort of choice once you click “OK”, however:

webapi-intro-newproject-template

At this stage there are various web project types you can choose from, and in this case you need to select “Web API”. You’ll notice that the “MVC” and “Web API” checkboxes are selected and you can’t change that. That’s because Web API is somewhat based on the ASP .NET MVC technology. Web API is sort of MVC without the View part, so discussing MVC is beyond the scope of this article; however just keep that in mind in case you ever dive into MVC.

Once you click “OK” and create your project, you’ll find a whole load of stuff in your Solution Explorer:

webapi-intro-newproject-created

This may already seem a little confusing. After all, where should we start from? Let’s ignore the code for a moment and press F5 to load up our web application in a browser. This is what we get:

webapi-intro-initialrun-homepage

You’ll notice there is an “API” link at the top. Clicking it takes you to this awesome help page, where things start to clear up:

webapi-intro-initialrun-help

It turns out that the Web API project comes with some sample code that you can work with out of the box, and this help page is telling you how to interact with it. If you look at the first entry, which says “GET api/Values”, that’s something we can point the browser to and see the web application return something:

webapi-intro-initialrun-values

And similarly, we can use the second form (“GET api/Values/{id}”) to retrieve a single item with the specified ID. So if you point your browser to /api/Values/1, you should get the first one:

webapi-intro-initialrun-values-1

That’s all well and good, but where are these values coming from? Let’s go back to the code, and open up the Controllers folder, and then the ValuesController in it:

webapi-intro-initialrun-valuescontroller

You can see how there is a method corresponding to each of the items we saw in the help page. The ASP .NET Web API takes the URL you enter in the web browser and tries to route the request to a method on a controller. So if you’re sending a GET request to /api/Values/, then it’s going to look for a method called Get() in a controller called ValuesController.

Notice how the “Controller” part is omitted from the URL. This is one of many things in Web API that you’re expected to sort of take as obvious – Web API uses something called “convention over configuration”, which is a cool way of saying “it just works that way, and by some kind of magic you should already know that, and good luck trying to change it”. If you’ve read my article about Mystery Meat Navigation, part of which addresses the Windows 8 “content over chrome” design, you’ll notice it’s not very different.

And since, at this point, we have digressed into discussing big buzzphrases designed to impress developers, let’s learn about yet another buzzword: REST. When we use HTTP to browse the web, we mainly use just the GET and POST request methods. But HTTP supports several other request methods. If we take four of them – POST, GET, PUT and DELETE, these map quite smoothly to the CRUD (Create, Read, Update and Delete) operations we know so well from just about any business application. And using these four request methods, we can build APIs that allow us to work with just about any object. That’s what is meant by REST, and is the idea on which the ASP .NET Web API is built. “How I Explained REST to My Wife” is a really good informal explanation of REST, if you want to learn more about it. The irritating thing is that the concept is so simple, yet it’s really hard to find a practical explanation on the web on what REST actually means.

To see this in action, let’s rename our ValuesController to BooksController so that it’s less vague. We’ll also need a sort of simple database to store our records, so let’s declare a static list in our BooksController class:

        private static List<string> books = new List<string>()
        {
            "How to Win Friends and Influence People",
            "The Prince"
        };

Now we can change our Get() methods to return items from our collection. I’m going to leave out error checking altogether to keep this really simple:

        // GET api/Books
        public IEnumerable<string> Get()
        {
            return books;
        }

        // GET api/Books/1
        public string Get(int id)
        {
            return books[id];
        }

We can test this in the browser to see that it works fine:

webapi-intro-books-get

Great! We can now take care of our Create (POST), Update (PUT) and Delete (DELETE) operations by updating the methods accordingly:

        // POST api/Books
        public void Post([FromBody]string value)
        {
            books.Add(value);
        }

        // PUT api/Books/1
        public void Put(int id, [FromBody]string value)
        {
            books[id] = value;
        }

        // DELETE api/Books/1
        public void Delete(int id)
        {
            books.RemoveAt(id);
        }

Good enough, but how are we going to test these? A browser uses a GET request when you browse to a webpage, so we need something to send POST, PUT and DELETE requests. A really good tool for this is Telerik’s FiddlerPostman, a Chrome extension, is also a pretty good REST client.

First, make sure that the Web API is running (F5). Then, start Fiddler. We can easily send requests by entering the request method, the URL, any HTTP headers, in some cases a body, and hitting the Execute button. Let’s see what happens when we try to POST a new book title to our controller:

webapi-fiddler-post1

So here we tried to send a POST request to http://localhost:1817/api/Books, with “The Art of War” in the body. The headers were automatically added by Fiddler. Upon sending this request, an HTTP 415 response appeared in the left pane. What does this mean? To find out, double-click on it:

webapi-fiddler-http415

You can see that HTTP 415 means “Unsupported Media Type”. That’s because we’re sending a string in the body, but we’re not specifying how the Web API should interpret that data. To fix this, add the following header to your request in Fiddler:

Content-Type: application/json

When you send the POST request with this header, you should get an HTTP 204, which means “No Content” – that’s because our Post() method returns void, and thus nothing needs to be returned. We can check that our new book title was added by sending a GET request to http://localhost:1817/api/Books, which now gives us the following in response:

webapi-fiddler-after-post

We can similarly test PUT and DELETE:

  • Sending a PUT request to http://localhost:1817/api/Books/1 with “The Prince by Niccolo’ Machiavelli” in the body updates that entry.
  • Sending a DELETE request to http://localhost:1817/api/Books/0 deletes “How to Win Friends and Influence People”, the first book in our list.
  • Sending a GET request to http://localhost:1817/api/Books again shows the modified list:

webapi-fiddler-after-all

Fantastic! In this unusually long article, we have learned the basics of working with the ASP .NET Web API. Lessons learned include:

  • The ASP .NET Web API is based on the REST concept.
  • The REST concept simply means that you use HTTP POST, GET, PUT and DELETE to represent Create, Read, Update and Delete operations respectively.
  • For each object you want to work with, you create a Controller class.
  • Appropriately named methods in this Controller class give you access to the CRUD operations mentioned above.
  • Use Fiddler or Postman to construct and send HTTP requests to your Web API in order to test it.
  • Add a content type header whenever you need to send something in the body (POST and PUT requests).

Thanks for reading, and please share this with your friends! Below is the full code of the BookController class for ease of reference.

    public class BooksController : ApiController
    {
        private static List<string> books = new List<string>()
        {
            "How to Win Friends and Influence People",
            "The Prince"
        };

        // GET api/Books
        public IEnumerable<string> Get()
        {
            return books;
        }

        // GET api/Books/1
        public string Get(int id)
        {
            return books[id];
        }

        // POST api/Books
        public void Post([FromBody]string value)
        {
            books.Add(value);
        }

        // PUT api/Books/1
        public void Put(int id, [FromBody]string value)
        {
            books[id] = value;
        }

        // DELETE api/Books/1
        public void Delete(int id)
        {
            books.RemoveAt(id);
        }
    }

Streaming Data with ASP .NET Web API and PushContentStream

This article explains how you can subscribe to a data stream and receive data pushed spontaneously by the server, using the ASP .NET Web API. It is intended as nothing more than a learning exercise. Technologies such as WebSockets, SignalR, WCF or even plain sockets may be more suitable for this kind of thing.

Update 2015-03-14: Full source code for server and client applications is now available.

The Server

Our Web API is going to allow clients to subscribe to a service which will send the price of… something every two seconds. To start off, you will need to create a new Web project with a Web API component, and create a new controller (which I called PriceController).

Then, it is simply a matter of sending back a response whose content is a PushStreamContent:

        [HttpGet]
        public HttpResponseMessage Subscribe(HttpRequestMessage request)
        {
            var response = request.CreateResponse();
            response.Content = new PushStreamContent((a, b, c) =>
                { OnStreamAvailable(a, b, c); }, "text/event-stream");
            return response;
        }

The odd arguments in the lambda are a workaround for an unfortunate ambiguity between PushStreamContent constructors in Web API 2.

The implementation for OnStreamAvailable() is pretty simple:

        private void OnStreamAvailable(Stream stream, HttpContent content,
            TransportContext context)
        {
            var client = new StreamWriter(stream);
            clients.Add(client);
        }

We’re simply wrapping a StreamWriter around the stream, and then keeping it in a ConcurrentBag called “clients”.

The last thing we need is a timer to periodically send the price data. This is what the timer’s Elapsed event looks like:

        private async static void timer_Elapsed(object sender, ElapsedEventArgs e)
        {
            var price = 1.0 + random.NextDouble(); // random number between 1 and 2

            foreach (var client in clients)
            {
                try
                {
                    var data = string.Format("data: {0}\n\n", price);
                    await client.WriteAsync(data);
                    await client.FlushAsync();
                }
                catch(Exception)
                {
                    StreamWriter ignore;
                    clients.TryTake(out ignore);
                }
            }
        }

Every 2 seconds, a random number between 1 and 2 is selected, and is sent to all subscribed clients. The data is sent based on the format for Server-Sent Events.

If an exception occurs, then the client is effectively unsubscribed by removing it from the ConcurrentBag. This is necessary because, as Henrik Nielsen states in this discussion:

Detecting that the TCP connection has been reset is something that the Host (ASP, WCF, etc.) monitors but in .NET 4 neither ASP nor WCF tells us (the Web API layer) about it. This means that the only reliable manner to detect a broken connection is to actually write data to it. This is why we have the try/catch around the write operation in the sample. That is, responses will get cleaned up when they fail and not before.

PriceController – Full Code

All you need to get the PriceController working are the member variable declarations and the static constructor which initialises them. I’m providing the entire class below so that you can just copy it and get up and running.

    public class PriceController : ApiController
    {
        private static ConcurrentBag<StreamWriter> clients;
        private static Random random;
        private static Timer timer;

        static PriceController()
        {
            clients = new ConcurrentBag<StreamWriter>();

            timer = new Timer();
            timer.Interval = 2000;
            timer.AutoReset = true;
            timer.Elapsed += timer_Elapsed;
            timer.Start();

            random = new Random();
        }

        private async static void timer_Elapsed(object sender, ElapsedEventArgs e)
        {
            var price = 1.0 + random.NextDouble(); // random number between 1 and 2

            foreach (var client in clients)
            {
                try
                {
                    var data = string.Format("data: {0}\n\n", price);
                    await client.WriteAsync(data);
                    await client.FlushAsync();
                }
                catch(Exception)
                {
                    StreamWriter ignore;
                    clients.TryTake(out ignore);
                }
            }
        }

        [HttpGet]
        public HttpResponseMessage Subscribe(HttpRequestMessage request)
        {
            var response = request.CreateResponse();
            response.Content = new PushStreamContent((a, b, c) =>
                { OnStreamAvailable(a, b, c); }, "text/event-stream");
            return response;
        }

        private void OnStreamAvailable(Stream stream, HttpContent content,
            TransportContext context)
        {
            var client = new StreamWriter(stream);
            clients.Add(client);
        }
    }

Browser Support

To test the PriceController, you could consider firing up a browser and have it do the subscription. However, I’ve found that browser support for this is pretty crap. For instance, Firefox thinks the event stream is something you can download:

pushstreamcontent-firefox

So does IE:

pushstreamcontent-ie

Chrome actually manages to display data; however it sometimes only displays part of a message (the rest is buffered and displayed when the next message is received), and has a habit of giving up:

pushstreamcontent-chrome

When I originally saw these results, I thought I had done something seriously wrong. However, I realised this was not the case when I wrote a client in C# and found that it worked correctly. In fact, let’s do that now.

The Client

This client requires the latest Web API Client Libraries from NuGet. Since writing async Console applications can be a bit messy (see a workaround if you still want to take the Console direction), I wrote a simple WPF application. This just has a “Subscribe” button, and a TextBox which I named “OutputField”.

This is the code that does the subscription and streams the prices from the PriceController:

        private async void SubscribeButton_Click(object sender, RoutedEventArgs e)
        {
            if (this.client == null)
            {
                this.client = new HttpClient();
                var stream = await client.GetStreamAsync("http://localhost:1870/api/Price/Subscribe");

                try
                {
                    using (var reader = new StreamReader(stream))
                    {
                        while (true)
                        {
                            var line = await reader.ReadLineAsync() + Environment.NewLine;

                            this.OutputField.Text += line;
                            this.OutputField.ScrollToEnd();

                        }
                    }
                }
                catch (Exception)
                {
                    this.OutputField.Text += "Stream ended";
                }
            }
        }

Since we’re dealing with a stream, we’re using GetStreamAsync() to talk to the Web API rather than the usual GetAsync(). Then, we can read it as we would any other stream.

And in fact, it works pretty nicely:

pushstreamcontent-wpfclient

Related Links