Category Archives: Software

Announcing Ultima 1 Revenge

I am currently working on an engine port of Ultima 1: The First Age of Darkness, called Ultima 1 Revenge. This means I am reverse engineering the game files and building a new game engine for it, using C++ and SDL2.

Ultima 1: The First Age of Darkness was one of the first open-world Computer Role Playing Games (CRPGs). Originally released in 1981 and remade for the PC in 1986, Ultima 1 was followed by a series of games that lasted almost 30 years, generated a cult following, inspired countless other RPGs, and pushed the boundaries of technology.

Ultima 1 is a fairly weird game, featuring an unusual combination of medieval fantasy and space travel. The world of Sosaria is being ravaged by the monsters of the evil wizard Mondain. Before you can face him in battle, you have to complete dungeoneering quests in the service of the lords of the land, become a space ace, free a princess, and travel back in time using a time machine.

The 1986 PC remake, on which the Ultima 1 Revenge project is based, is very old technology, by today’s standards. Still, it provides a vast array of learning areas. The game’s graphics are made up of three tilesets (CGA, EGA, and Tandy 1000), giving a choice for the differently powered machines of the time. The game world is stored in a small map file, where each four bits is an index into the tileset you’re using. Space travel is a combination of top-down 2D and first-person views. The dungeons are simple 3D-like line drawings, randomly generated based on a seed stored in the savegame file (so they remain consistent for each playthrough, but change if you start a new game). The different parts of the game run in different executables, and a special savegame file is used to pipe the player state from one to the other. Savegames mostly use 16-bit numbers, with the least significant byte stored first. Decoding the game files is an ongoing effort that powers tools such as the online map viewer I built in 2015, and the engine itself.

Today, I have released a demo of the engine. So if you own a copy of Ultima 1 (if you don’t, you can grab a copy from GOG), grab it from the downloads page, set the path to your original Ultima 1 folder in the settings file, and take a tour of Sosaria!

Inconsistent Toggles in Windows 10 Taskbar Menu

There’s something I found really odd about the Windows 10 taskbar. There are two special buttons next to the Start button: the Search button, and the Task View button. You can toggle the visibility of each from the context menu that comes up when you right click on the taskbar.

We can toggle the Task View button by simply clicking on the “Show Task View button” item in the menu. When the Task View button is visible, this item is checked:

win10-show-task-view-on

…and when it’s not visible, the item is not checked:

win10-show-task-view-off

Simple, no? Let’s do the same for the Search button. Right now it’s on…

win10-show-search-on

So when I click “Show search icon”, following the same logic as with the Task View button, I would expect it to disappear, right?

Nope. Clicking that won’t do anything, because you instead have to select “Hidden”. Then, when Search is not visible, it looks like this instead:

win10-show-search-off

Okay, it’s easy to get used to this after tripping on it the first time. But why would anyone ever provide these kinds of confusing and inconsistent options?

Aside from this, that Search submenu is clearly overkill, given that they could have implemented a single toggle menu item as with Task View. This is exactly like using two checkboxes for the opposites of same thing and expecting them to be mutually exclusive. By way of analogy, can you imagine how stupid this would look?

win10-gender-analogy

This would tell you that the Male and Female options are unrelated; you could potentially pick both.

Update 24th December 2015: As pointed out in these comments on Reddit, apparently the reason for having a separate menu for the Search icon is that in regions where Cortana is enabled, there are actually three options. They could have at least used bullets instead of checkmarks though, which would have made them feel like radio buttons (making the mutual exclusion obvious) rather than checkboxes.

ASP .NET 5 Preview: Hello World with Yeoman

ASP.NET 5 (formerly known as ASP .NET vNext) is the next generation of ASP .NET, still in a prerelease state. At the time of writing, the current runtime version is 1.0.0-rc1-update1, and ASP .NET 5 is set to launch in Q1 2016. The APIs seen here may change in the time leading up to that release; in fact, this article is written precisely to address recent API changes.

ASP .NET 5 is a game changer, and everything we’ve learned in ASP .NET so far no longer applies. In this article, we’ll see how to do a basic “Hello World” with ASP .NET 5. This usually sounds like something easy, but given that things are changing pretty quickly (even fundamental things such as the IIS hosting model), it’s not. In fact, I would have liked to say you can create a new project in Visual Studio and select the “Empty” ASP .NET 5 Preview Template:

aspnet5-empty-preview-template

Unfortunately, however, these templates are so outdated that they no longer work. Starting with these and getting them to work is an exercise in frustration. Fortunately, however, there’s an alternative way to easily set up an ASP .NET 5 project. And, surprise surprise, it does not involve Visual Studio.

Update 27th December 2015: If you do want to use the latest Visual Studio templates, install Visual Studio 2015 Update 1 as well as the latest ASP .NET 5 Release Candidate.

Yeoman provides a tool called yo, which allows you to create a new web application from various different templates. Nowadays, with so many tools and technologies, it is sometimes difficult to piece things together. You can use yo and its generators to set up a web application with the bits and pieces you need without much effort. For example:

  • Want to create an AngularJS Single-Page App (SPA)? No problem, there’s a generator for that.
  • Want to create an ASP .NET MVC application? No problem, there’s a generator for that.
  • Want to create an ASP .NET 5 empty application? No problem, there’s a generator for that too.
  • Want a full rack of barbecue ribs with fries? I don’t think there’s a generator for that, but perhaps someone may write one someday.

Like various other web tools, yo and its generators require npm, the node.js package manager. You will first need to install node.js, and npm comes packaged with it. You can then install yo by running the following command from the command prompt:

npm install -g yo

In order to generate a web application template, yo relies on plugins, called generators. At the time of writing, there are several generators for ASP .NET 5, but generator-aspnet is the only one that’s up to date. Let’s also install it using the following command:

npm install -g generator-aspnet

With that done, we can now generate our ASP .NET project. You can either invoke yo and do it interactively:

yeoman-interactive-2

…or just invoke the following command:

yo aspnet

You will then be asked a few questions that allow you to configure your ASP .NET 5 project. For starters, we’ll create an Empty Application:

aspnet5-yeoman-application-type

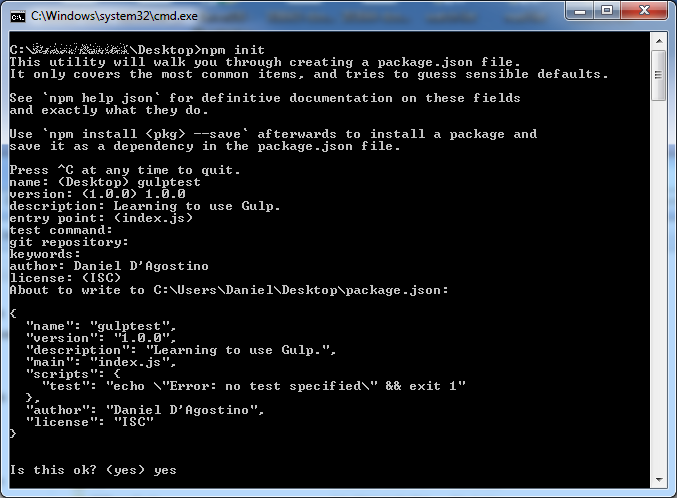
You will then be asked for the name of your application, after which the web app skeleton will be generated, and you will be told the commands you need to build and run it:

aspnet5-yeoman-application-generated

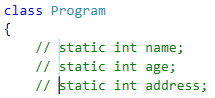
Before we run these commands, let’s take a second to see what our project actually contains. The files we care about are Startup.cs

using System;
using System.Collections.Generic;
using System.Linq;
using System.Threading.Tasks;
using Microsoft.AspNet.Builder;
using Microsoft.AspNet.Hosting;
using Microsoft.AspNet.Http;
using Microsoft.Extensions.DependencyInjection;

namespace myapp
{
    public class Startup
    {
        // This method gets called by the runtime. Use this method to add services to the container.
        // For more information on how to configure your application, visit http://go.microsoft.com/fwlink/?LinkID=398940
        public void ConfigureServices(IServiceCollection services)
        {
        }

        // This method gets called by the runtime. Use this method to configure the HTTP request pipeline.
        public void Configure(IApplicationBuilder app)
        {
            app.UseIISPlatformHandler();

            app.Run(async (context) =>
            {
                await context.Response.WriteAsync("Hello World!");
            });
        }

        // Entry point for the application.
        public static void Main(string[] args) => Microsoft.AspNet.Hosting.WebApplication.Run<Startup>(args);
    }
}

…and project.json:

{
  "version": "1.0.0-*",
  "compilationOptions": {
    "emitEntryPoint": true
  },
  "tooling": {
    "defaultNamespace": "myapp"
  },

  "dependencies": {
    "Microsoft.AspNet.IISPlatformHandler": "1.0.0-rc1-final",
    "Microsoft.AspNet.Server.Kestrel": "1.0.0-rc1-final"
  },

  "commands": {
    "web": "Microsoft.AspNet.Server.Kestrel"
  },

  "frameworks": {
    "dnx451": { },
    "dnxcore50": { }
  },

  "exclude": [
    "wwwroot",
    "node_modules"
  ],
  "publishExclude": [
    "**.user",
    "**.vspscc"
  ]
}

Now, in order to proceed, you need to have the DNX tools (dnu, dnvm and dnx). If you don’t have them, you can get them when you install Visual Studio 2015, or by following the instructions on the ASP .NET 5 Github page. You may also need to upgrade to the latest runtimes (use dnvm list to check what you’re using, dnvm upgrade to get the latest, and dnvm use <runtime> to switch to the latest) – learning to use the DNX tools is beyond the scope of this article.

Once you have DNX in place, you can run the commands suggested by the aspnet generator earlier. First, cd into the application directory:

cd myapp

Then, run the following command to restore packages (essentially works like NuGet):

dnu restore

You can now build the web application using the following command:

dnu build

Finally, the following command runs the application. You’ll notice that web is actually one of the commands defined in the project.json we saw earlier.

dnx web

aspnet5-dnx-web

As shown in the screenshot above, the web application is hosted at localhost:5000 by default. Indeed, we can confirm that this works by going there:

aspnet5-helloworld

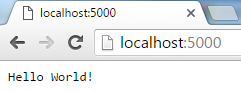
The output we see comes from Startup.cs as we have seen earlier:

        public void Configure(IApplicationBuilder app)
        {
            app.UseIISPlatformHandler();

            app.Run(async (context) =>
            {
                await context.Response.WriteAsync("Hello World!");
            });
        }

The Configure() method allows us to set up our web application pipeline. In here, we define any middleware we need. For example, if we want to use MVC, then we set it up here; but ASP .NET 5 does not assume that any such infrastructure is required by default. In this case, we are always giving a fixed response.

This is as far as I’m going to go with this little “Hello World” setup for ASP .NET 5. We haven’t even begun to see how different ASP .NET 5 is from the ASP .NET we have known so far. But hopefully, this article will save you a lot of frustration in setting things up until the tooling in Visual Studio 2015 catches up.

Block Selection and Column Editing

We’re all very much used to selecting text by clicking and dragging the mouse. But by pressing the Alt key while doing that, you can select a rectangular block. This feature has been around since Visual Studio 2010 – part of it even since Visual Studio 2008 – and it’s available in most modern text editors such as Notepad++. However, most people seem not to be aware of this, which is why I’m writing this article.

Let’s say you created a new Console Application in Visual Studio, and added a few variables within the Program class:

    class Program
    {
        int name;
        int age;
        int address;

        static void Main(string[] args)
        {
            
        }
    }

Oops. Main() can’t access them, because it is static, and they are not. We’re going to have to make them static as well.

Now we can add the static keyword to each variable, one by one. Or, we can place the cursor before the first int, press Alt, click and drag downwards to create a sort of blue cursor that spans multiple lines. It’s a bit hard to see, so I’ve zoomed in a bit here:

column-editing-1

With that, we’ve enabled column editing. This means that whatever you type will now be written in multiple lines:

column-editing-2

You can use this to comment lines in bulk (similar to the Ctrl+K+C or Ctrl+E+C shortcuts, depending on your editor settings):

column-editing-3

Now, column editing is actually a special case of block selection with a width of zero. To see how block editing works, let’s change our variable names to the following:

        static int personName;
        static int personAge;
        static int personAddress;

Now, due to changing requirements, we decided that these shouldn’t be called person*, but customer*. Given that the variable names are nicely aligned underneath each other, we can press Alt, click and drag around person on all three lines, and we’ve made a block selection:

block-selection-1

Press Backspace to remove person from all three lines. The block collapses to zero width, so we’re back to column editing, and we can now easily write customer on all three lines:

block-selection-2

So there you go. Block selection and column editing are nothing new, but they’re very handy and good to know about.

A Gentle Introduction to Gulp

We’re at the end of 2015, and web technology has changed quite  a bit since I started in 2002. Nowadays, for the front end stuff, there is a whole family of tools based on the node.js package manager (npm) that you can use to streamline and automate your workflow.

In this article (based on Windows), we’ll learn to use Gulp to do routine tasks such as concatenating and minifying JavaScript tasks. There’s another tool called Grunt with a similar purpose, and you’ll find all sorts of discussions on the internet comparing Grunt vs Gulp. Basically, Grunt is the older of the two and has a bigger community – an important factor considering that these tools are plugin-driven. However, I’m covering Gulp here as I felt it was more intuitive. For this small demonstration it has all the plugins we need, and performance (a common point of comparison) isn’t even a factor.

Setting up Gulp

The first thing we need is to install node.js:

install-nodejs

There’s a chance you might already have node.js, if you installed it with Visual Studio 2015.

Once you have installed node.js, you should have npm in your path. Open a command prompt, and install Gulp using the following command:

npm install gulp -g

-g means globally, and thanks to this, gulp should now be in your path.

Next, we want to create a package.json file. This is a kind of project file for node.js-related stuff. We can use npm for this too:

npm init

npm will ask a bunch of questions in order to set up the package.json file, suggesting possible answers where it makes sense to do so. name and version are required, but you can leave the rest empty if you like:

npm-init

Next, we need to install Gulp locally in our project:

npm install gulp --save-dev

This installs Gulp; –save-dev updates the package.json with a devDependencies field:

{
  "name": "gulptest",
  "version": "1.0.0",
  "description": "Learning to use Gulp.",
  "main": "index.js",
  "scripts": {
    "test": "echo \"Error: no test specified\" && exit 1"
  },
  "author": "Daniel D'Agostino",
  "license": "ISC",
  "devDependencies": {
    "gulp": "^3.9.0"
  }
}

Plugins and the Gulp file

Gulp itself doesn’t do anything; it is just configured to run tasks. Its capabilities come from the plugins you install, and you configure it to do stuff using a Gulp file. For this simple example, we’re just going to use a few plugins:

npm install gulp-concat gulp-uglify --save-dev

Once again, –save-dev updates your devDependencies in package.json:

  "devDependencies": {
    "gulp": "^3.9.0",
    "gulp-concat": "^2.6.0",
    "gulp-uglify": "^1.5.1"
  }

Next, create a file called gulpfile.js, and put the following code in it:

var gulp = require('gulp'),
    uglify = require('gulp-uglify'),
    concat = require('gulp-concat');
    
gulp.task('default', function() {
  return gulp.src('js/*.js')
    .pipe(concat('all.js'))
    .pipe(gulp.dest('dist/'));
});

To test this out, I downloaded jquery and jquery-ui, and put the uncompressed Javascript files in a “js” folder. Having created the Gulpfile above, all you need is to run Gulp:

gulp

You should find a folder called dist, with a file called all.js in it, containing the contents of the files originally in the js folder:

gulp-concat

Concatenating JavaScript is good for performance because the browser only needs to make a single request, rather than having to retrieve several small files. But we can do even better by minifying the JavaScript (using the gulp-uglify plugin). Just add the following line:

var gulp = require('gulp'),
    uglify = require('gulp-uglify'),
    concat = require('gulp-concat');
    
gulp.task('default', function() {
  return gulp.src('js/*.js')
    .pipe(concat('all.js'))
    .pipe(uglify())
    .pipe(gulp.dest('dist/'));
});

Run Gulp again, and you’ll find that all.js has been updated. In fact, it’s much smaller now, and it’s completely illegible:

gulp-uglify

Conclusion and Further Reading

The purpose of this article was to get you set up with Gulp, and see something working with the least possible hassle. Mark Goodyear’s article (on which this article is partly based) covers a lot of other common operations to carry out with Gulp. If you need to do anything particular – linting your JavaScript files, minifying your CSS, using Less, etc, there’s probably a plugin for it.

Beyond that, all you need to know is how to use Gulp effectively as part of your build process.

  • Running Gulp without arguments makes it look for the “default” task. You can pass the name of a task to run as an argument, allowing you to run a variety of operations.
  • How do you debug your minified JavaScript? You don’t. Use separate tasks for development and for release, and minify only in your release task.
  • Ideally these tasks should be run automatically as part of your continuous integration.
  • An ASP .NET 5 (formerly known as vNext) project in Visual Studio 2015 can easily integrate with npm tools, and you can configure it to run your tasks when you build.
  • Not using Windows? These command line tools are easy to use on other platforms (although installing npm will obviously be different).

Update 8th January 2016: Check out “More Gulp in Practice“, the followup to this article.