Category Archives: Software

Pasting JSON/XML as Classes in Visual Studio

Note: This feature is available as from Visual Studio 2015.

REST and JSON together have revolutionised the way we expose and consume data in recent years. For this reason it has become increasingly common to need to integrate with REST services, and data itself is provided in either XML or JSON format. This typically involves creating a set of classes that match the data provided by the service, so that the application may take care of serialisation and deserialisation, and work with structured data.

Although you can create these data classes manually, Visual Studio provides a shortcut to generate classes from XML or JSON data. For instance, let’s say that we want to work with the data from the GitHub API:

github-api

We can easily generate a class for this by copying that data, and in Visual Studio going into Edit -> Paste Special -> Parse JSON As Classes:

paste-json-as-classes

And as if by magic, the following class gets generated:

        public class Rootobject
        {
            public string current_user_url { get; set; }
            public string current_user_authorizations_html_url { get; set; }
            public string authorizations_url { get; set; }
            public string code_search_url { get; set; }
            public string emails_url { get; set; }
            public string emojis_url { get; set; }
            public string events_url { get; set; }
            public string feeds_url { get; set; }
            public string followers_url { get; set; }
            public string following_url { get; set; }
            public string gists_url { get; set; }
            public string hub_url { get; set; }
            public string issue_search_url { get; set; }
            public string issues_url { get; set; }
            public string keys_url { get; set; }
            public string notifications_url { get; set; }
            public string organization_repositories_url { get; set; }
            public string organization_url { get; set; }
            public string public_gists_url { get; set; }
            public string rate_limit_url { get; set; }
            public string repository_url { get; set; }
            public string repository_search_url { get; set; }
            public string current_user_repositories_url { get; set; }
            public string starred_url { get; set; }
            public string starred_gists_url { get; set; }
            public string team_url { get; set; }
            public string user_url { get; set; }
            public string user_organizations_url { get; set; }
            public string user_repositories_url { get; set; }
            public string user_search_url { get; set; }
        }

Now, the class and property names might not be exactly the way you want them, and you might need to change some things, but this will still save you a lot of typing.

If you’re still not convinced, try it with a more complex example that involves nested data structures. For instance, let’s say we have this JSON data:

{
	"name" : "John Smith",
	"summary" : "Wannabe Superhero",
	"workexperience" : [{
			"title" : "Insurance Guy",
			"company" : "ABC Ltd.",
			"start" : "Feb 2015",
			"description" : "Current job, very bad"
		}, {
			"title" : "Cleaning Guy",
			"company" : "Super Clean Ltd.",
			"start" : "Jan 2013",
			"end" : "Jan 2015",
			"description" : "Dirty work",
			"recommendations" : [{
					"name" : "Boss guy",
					"position" : "Boss"
				}, {
					"name" : "Colleague girl",
					"position" : "Cleaning Girl"
				}
			]
		}
	]
}

With no effort whatsoever, you can get these classes generated for you:

        public class Rootobject
        {
            public string name { get; set; }
            public string summary { get; set; }
            public Workexperience[] workexperience { get; set; }
        }

        public class Workexperience
        {
            public string title { get; set; }
            public string company { get; set; }
            public string start { get; set; }
            public string description { get; set; }
            public string end { get; set; }
            public Recommendation[] recommendations { get; set; }
        }

        public class Recommendation
        {
            public string name { get; set; }
            public string position { get; set; }
        }

And there’s a similar function for XML.

You’re welcome.

Running Games Requiring a CD in DOSBox

Back in 2009, I had written DOSBox for Dummies, a short and simple article explaining how to get old games running in DOSBox, and how to write a batch file so you don’t have to do this every time. A typical batch file might look something like this:

dosbox -c "mount c C:\prophet" -c "C:" -c "prophet"

That will often be good enough. But if your game needs to access resources on CD, such as Ravenloft: Stone Prophet in this case, then that’s not quite going to work:

dosbox-no-cd

To allow the game to access the CD, you’ll need an extra command to mount the CD drive:

-c "mount d D:\ -t cdrom"

The whole thing looks something like this:

dosbox -c "mount c C:\prophet" -c "mount d D:\ -t cdrom" -c "C:" -c "prophet"

That’s much better:

dosbox-ravenloft-stone-prophet

If you don’t want to pop in your CD every time you want to play, just copy the CD onto your hard disk, and mount that folder instead:

dosbox -c "mount c C:\prophet" -c "mount d C:\STONE_V1.0 -t cdrom" -c "C:" -c "prophet"

That works just as well.

On Mystery Meat Navigation and Unusability

This article was originally posted here at Programmer’s Ranch on 12th September 2013. It has been updated since a lot of the original examples are no longer available.

Hello folks! 🙂

Today I’m going to talk about Mystery Meat Navigation (MMN). This term was invented 15 years ago by Vincent Flanders of Web Pages That Suck. It refers to a horrible practice of filling a website’s navigation with meaningless icons. When a user moves his mouse over one of these icons, the icon changes or pops up some text, revealing what it really does.

A classic analogy of mystery meat navigation (which seems to have mostly disappeared from the web) is a road sign that initially looks completely blank, but changes to indicate where you’re going just as you drive past it.

Even now, 15 years later, MMN is still used on the web. Even reputable web design companies here in Malta have fallen in the MMN trap. Alert eBusiness, for instance, used to have the following navigation bar:

alert-mmn

Right, so what do those icons mean? The last one seems pretty clear: a shopping cart. Mousing over it reveals it stands for Alert Payment Gateway, which is close enough. But what about the rest? The first one is a mouse, for instance. Would it ever cross your mind that it actually means “Web Design”?

Another example: Pcionix (now defunct):

pcionix-mmn

The home icon is pretty obvious, so that can be forgiven. But a pie chart that stands for SEO – seriously?

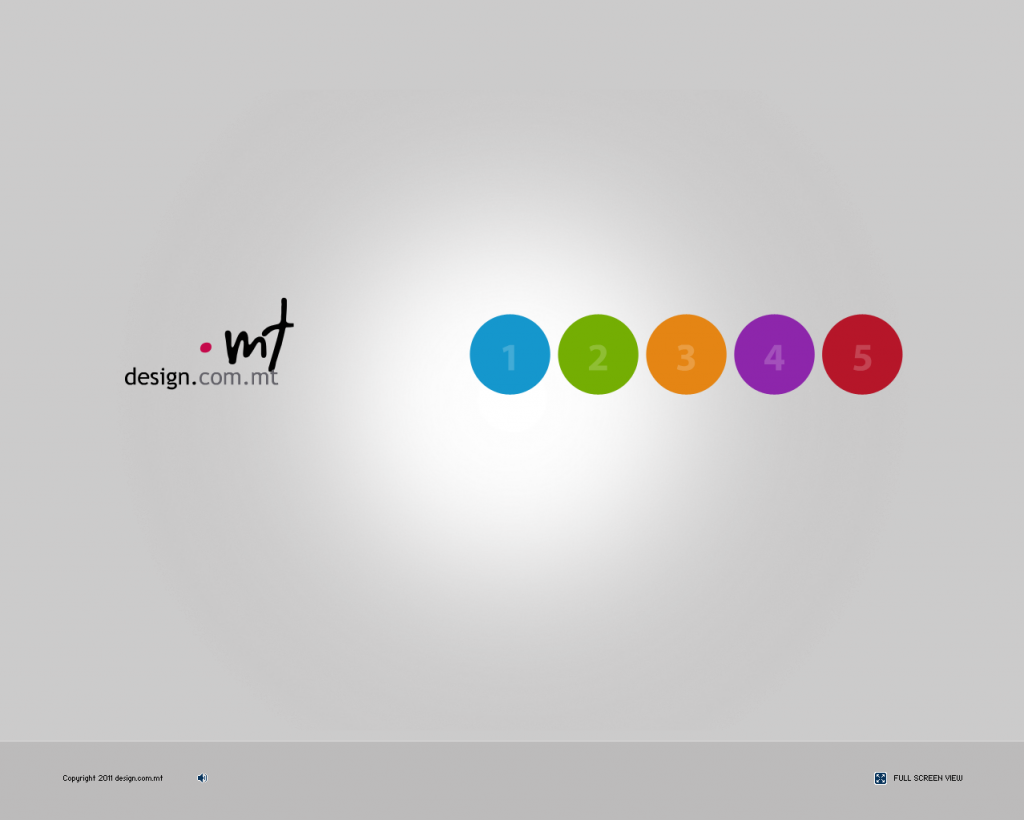
But this, from design.com.mt, is even worse:

design-mmn

This has got to be the worst of them all. Whereas you might be able to somehow guess what the icons in the other sites mean, the navigation here is hidden behind meaningless numbers that you again have to mouse over to understand.

It gets worse: there are videos on YouTube of sites with iconic navigation that actually floats around, so you actually have to find out where that “About Us” cube thingy moved to (examples: Mandarina DuckQualcomm).

So why is MMN bad? In case it isn’t obvious, it is very annoying for users to have to click on stuff to figure out what the page offers. A website should give a clear indication of how it is structured, without the user needing to interact with it just to get an idea. Imagine you’re driving and need to interact with a bunch of direction signs (such as these) one by one to get an idea of the places in the area. Then, after sifting through a dozen, you forget what you saw earlier and have to go back and interact with them again. Sorry, the “just a click away” idea is not an excuse when it comes to navigation, which is really a website’s backbone.

Another great example comes from feedback that Vincent Flanders received, and illustrates how MMN would be if applied to a business’s answering machine:

“You’ve reached XYZ Corporation. To find out what option #1 is, press 1. To find out what option #2 is, press 2. (Etc….) If you’d like to continue doing business with our company after we’ve slapped you around and wasted your valuable time, press 9”

MMN is a slap in the face of usability. It shows meaningless icons in the place of important navigational information. What could possibly worse?

The only thing worse than showing meaningless icons is not showing any icons at all! That’s pretty much the direction taken by Windows 8’s notorious alternate UI, formerly known as Metro. One of its design principles is “Do more with less” which includes “Put content before chrome”. In this case the “chrome” refers to the stuff that makes the application – menus, the ‘X’ button at the top-right, toolbars, etc. So basically you end up with something like this:

ubuntu-pdf-metro

That’s the default PDF viewer on Windows 8 – one full screen Windows 8 Style (the new name for Metro) app with the PDF content and nothing else, not even an ‘X’ to close it. In fact Windows 8 users are somehow expected to know beforehand (“by osmosis”, as this Windows 8.1 review puts it) that to close a Windows 8 Style app you have to grab it from the top and drag downwards with your mouse. Contrast this with the same PDF viewed on Windows 7:

ubuntu-pdf-win7

Needless to say, everything that you can do with a PDF is immediately accessible either from the toolbars or via the menus. There is no hidden stuff, no needing to drag your mouse into a corner to open some Start Screen or Charms Bar. See, the program actually shows you what it can do, and for new users that’s important. The “Content before Chrome” idea is wrong precisely because when you use a program, you want to do stuff, not just see stuff.

So it’s no wonder that Microsoft seems to have made a U-turn on its Windows 8 Style design stuff. If MMN is an example of bad usability, this Windows 8 abomination is an example of… unusability.

Reserving Windows 10 Upgrade

Windows 10 will be released on 29th July, and it’s no secret that it will be a free upgrade from Windows 7 or 8. In fact, a special icon is currently appearing in the system tray, allowing us to reserve our upgrade – possibly to spread out the download rather than have everyone hit the servers on launch day.

When you click on the system tray icon, a small application gives you an overview of what’s coming in Windows 10, and allows you to reserve the upgrade. Below are screenshots of this application (from 3 weeks ago), included here as a historical record. The application is slightly different today, but more or less conveys the same message.

On Redis Desktop Manager and Redis Keys

Update 11th August 2015: As from version 0.8.0 beta 1, Redis Desktop Manager now supports the SCAN command (rather than KEYS) for Redis 2.8 onwards. Although this limits the applicability of this article to older servers, I am more than happy that this shortcoming has been addressed. The original article below remains both for historical purposes and to warn developers of incorrect use of the KEYS command.

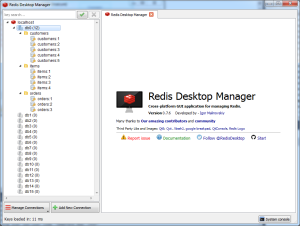
There’s a tool called Redis Desktop Manager which can sometimes be useful to inspect the keys in a Redis database. Indeed one of its features is that it presents a treeview showing a structured representation of the keys in the database:

redis-desktop-manager-treeview

But how is this treeview built? That’s easy to find out, by using the Redis MONITOR command to see the incoming commands:

redis-desktop-manager-keys


The first two commands are executed when Redis Desktop Manager connects to the Redis server, and the other two are executed when the database is expanded in the treeview, revealing the keys in that database.

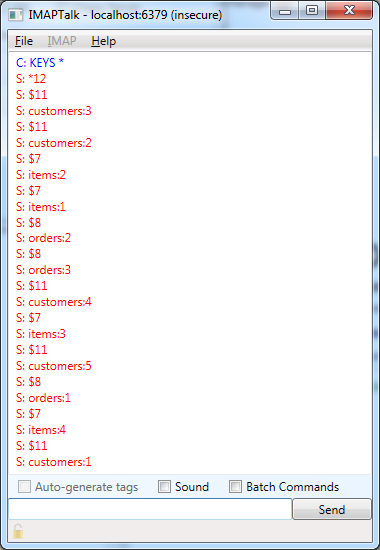
You’ll notice that the last command is a KEYS command, which with its wildcard argument (*) is effectively retrieving every key in the database. We can see an example of what this gives us by running the KEYS command ourselves:

redis-desktop-manager-keys-response

Now, in this case I only have a handful of keys in my Redis database, but it’s pretty normal for real Redis databases to have very large numbers of keys. Retrieving all that data places a large burden on the Redis server, which due to its single-threaded nature will not be able to serve other requests while it is stuck retrieving every key in the database.

In fact, the KEYS command documentation particularly warns against its use in production environments:

“Warning: consider KEYS as a command that should only be used in production environments with extreme care. It may ruin performance when it is executed against large databases. This command is intended for debugging and special operations, such as changing your keyspace layout. Don’t use KEYS in your regular application code. If you’re looking for a way to find keys in a subset of your keyspace, consider using SCAN or sets.”

I understand why Redis Desktop Manager uses the KEYS command: it needs to retrieve all the keys in the database in order to determine how the tree structure will be displayed (since each delimited part of the key is rendered as a node). That’s the whole point of having a treeview.

However, what seems to be a useful feature can actually be very dangerous, especially when used on production servers. So do take care when using Redis Desktop Manager in such environments.

My recommendation to developers using Redis is to keep good documentation of your keys, so you won’t need any Redis command to tell you what keys are in the database. That’s not what Redis is for.

But if you do ever need to inspect your Redis keys on the server, at least follow the advice in the documentation and use SCAN instead. While this may still be expensive to retrieve the entire set of keys, it can be done in small batches, thus allowing other requests to be serviced in between iterations.