Tag Archives: Microsoft Orleans

Getting Started with Microsoft Orleans 2.0 in .NET Core

Microsoft Orleans 2.0 was released less than two weeks ago. The biggest win here is .NET Core/Standard support, meaning that Orleans is cross-platform. In this article, we’ll see how to quickly get up and running with Orleans 2.0.

The configuration and hosting APIs have changed considerably, so the instructions here won’t work for earlier versions. See my old “Getting Started with Microsoft Orleans” article from November 2016 if you’re running Orleans 1.4. Orleans 1.5 is also different so you’ll need to check the documentation for that.

In order to keep this article practical and concise, it is necessary to limit its scope. We will not be covering what Orleans is or what it is used for. We will also not create a full project structure that is typical in Orleans solutions. Instead, we’ll keep it simple so that in a short time we have a starting point to explore what Orleans has to offer.

Tip: Use Ctrl+. (Control dot) to resolve namespaces in Visual Studio.

The source code for this article is the Orleans2GettingStarted folder in the Gigi Labs BitBucket repository.

Update 30th June 2018: The source code for this article needs a little adjusting, in order to gracefully stop the silo and gracefully close the client. Counterintuitively, directly disposing a silo or client is non-graceful and is generally discouraged.

.NET Core Project
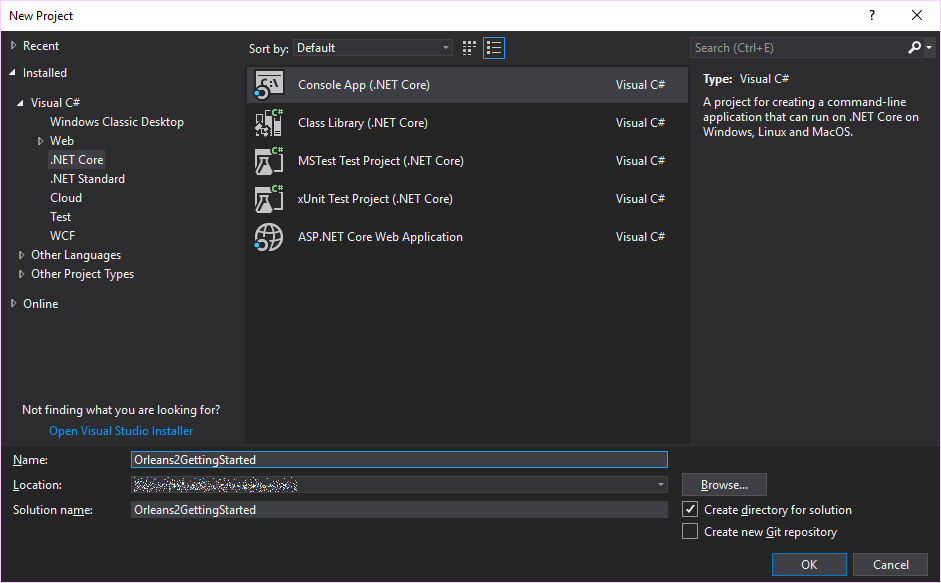
To demonstrate the fact that Orleans 2.0 really supports .NET Core, we’ll create a .NET Core console app and set up everything in it. To keep things simple, we’ll run both the client and the silo (server) from this same application.

Install Packages

There are a few packages we’ll need:

Install-Package Microsoft.Orleans.Server
Install-Package Microsoft.Orleans.Client
Install-Package Microsoft.Orleans.OrleansCodeGenerator.Build
Install-Package Microsoft.Extensions.Logging.Console
Install-Package OrleansDashboard

Here is a summary of what each of these does:

  1. Used by Orleans silo (server).
  2. Used by Orleans client.
  3. Required for build-time code generation. Bad things happen if you don’t include it.
  4. Optional, but allows us to set up logging to console to see what Orleans is doing.
  5. Optional, but allows us to visualise the operation of silos and grains.

Update 28th April 2018: if you’re running on Windows, you can also get CPU and memory telemetry in the Orleans dashboard by installing the Microsoft.Orleans.OrleansTelemetryConsumers.Counters package.

Grain and Grain Interface

We’ll add a simple grain class to the project in order to have a minimal example. Since grains are independent of each other, Internet of Things (IoT) scenarios fit very nicely. Imagine we have a number of temperature sensors deployed in different places. Each one has an ID, and periodically submits temperature readings to a corresponding grain in the Orleans cluster:

    public class TemperatureSensorGrain : Grain, ITemperatureSensorGrain
    {
        public Task SubmitTemperatureAsync(float temperature)
        {
            long grainId = this.GetPrimaryKeyLong();
            Console.WriteLine($"{grainId} received temperature: {temperature}");

            return Task.CompletedTask;
        }
    }

We’re not doing anything special here. We write out the grain ID and the value we received just so we see something going on in the console. It is important that we inherit from the Grain base class, and that all our methods return Task.

We also need a grain interface:

    public interface ITemperatureSensorGrain : IGrainWithIntegerKey
    {
        Task SubmitTemperatureAsync(float temperature);
    }

The interface must inherit from an Orleans-defined interface that tells what type of grain ID (key) it will use. Our grains will have an ID of type long (that’s some misleading naming in the interface), but there are other options including GUID or string.

Silo

Taking a look at the Hello World sample gives an idea of how to set up minimal silo and client. Since this code is going to be async, we’ll need use C# 7.1+ (to support async/await in Main()) or use a workaround. See the last section of “Working with Asynchronous Methods in C#” for how this is done (quick tip: Project Properties -> Build -> Advanced… -> C# latest minor version (latest)).

We can adapt the code from the Hello World sample to run a simple silo:

        static async Task Main(string[] args)
        {
            var siloBuilder = new SiloHostBuilder()
                .UseLocalhostClustering()
                .Configure<ClusterOptions>(options =>
                {
                    options.ClusterId = "dev";
                    options.ServiceId = "Orleans2GettingStarted";
                })
                .Configure<EndpointOptions>(options =>
                    options.AdvertisedIPAddress = IPAddress.Loopback)
                .ConfigureLogging(logging => logging.AddConsole());

            using (var host = siloBuilder.Build())
            {
                await host.StartAsync();

                Console.ReadLine();
            }
        }

Here, we are setting up a local cluster for development. Thanks to the console logging package we installed earlier and the ConfigureLogging() call above, we can see what Orleans is up to:

What is being written out is not important at this stage. The important thing is that the Orleans silo is running.

Client

The same Hello World sample also shows us how to set up a client that connects to the silo. This usually serves as a gateway between the outside world and the Orleans cluster. It could be a Web API, Windows service, etc; but here it will just be in the same console app as the silo.

We’ll wait to start the client after the silo has started. This is easy to do in our case because both are in the same application.

            using (var host = siloBuilder.Build())
            {
                await host.StartAsync();

                var clientBuilder = new ClientBuilder()
                    .UseLocalhostClustering()
                    .Configure<ClusterOptions>(options =>
                    {
                        options.ClusterId = "dev";
                        options.ServiceId = "Orleans2GettingStarted";
                    })
                    .ConfigureLogging(logging => logging.AddConsole());

                using (var client = clientBuilder.Build())
                {
                    await client.Connect();

                    var sensor = client.GetGrain<ITemperatureSensorGrain>(123);
                    await sensor.SubmitTemperatureAsync(32.5f);

                    Console.ReadLine();
                }
            }

The setup for the client is very similar to that of the silo, and quite straightforward since we are using the default localhost configurations. One thing you’ll notice is the unfortunate inconsistent naming between host.StartAsync() and client.Connect(); the latter lacks the –Async() suffix, even though it also returns a Task.

If we run this code, we see that the code in the grain is getting executed, and we see the temperature reading in the console at the end:

Dashboard

Although it works, this example is really boring. We essentially have a Hello World here, styled for IoT. Let’s change the client code to generate some load instead:

                using (var client = clientBuilder.Build())
                {
                    await client.Connect();

                    var random = new Random();
                    string sky = "blue";

                    while (sky == "blue") // if run in Ireland, it exits loop immediately
                    {
                        int grainId = random.Next(0, 500);
                        double temperature = random.NextDouble() * 40;
                        var sensor = client.GetGrain<ITemperatureSensorGrain>(grainId);
                        await sensor.SubmitTemperatureAsync((float)temperature);
                    }
                }

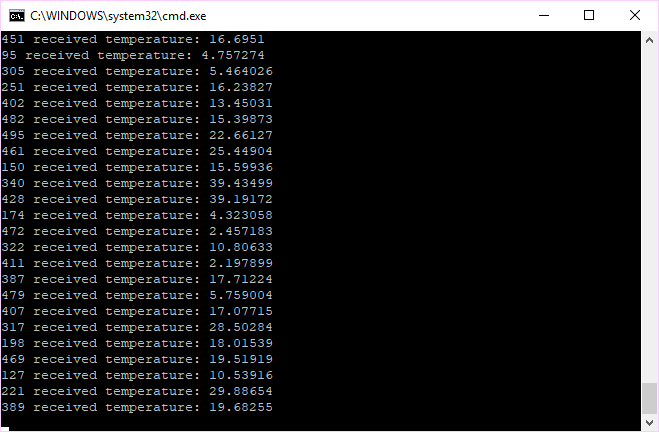
Now we can see the silo brimming with activity, but only in the console:
Now, wouldn’t it be nice if we could see some graphs showing what our grains and silos are doing? As it turns out, we can do that by setting up the Orleans Dashboard, a community-contributed admin dashboard for Microsoft Orleans.

We’ve already installed the package for it, so all we need to do is add it to the silo configuration:

            var siloBuilder = new SiloHostBuilder()
                .UseLocalhostClustering()
                .UseDashboard(options => { })
                .Configure<ClusterOptions>(options =>
                {
                    options.ClusterId = "dev";
                    options.ServiceId = "Orleans2GettingStarted";
                })
                .Configure<EndpointOptions>(options =>
                    options.AdvertisedIPAddress = IPAddress.Loopback)
                .ConfigureLogging(logging => logging.AddConsole());

That sets up the dashboard with all default values (port 8080, no username/password) which you can always change if you need to.

So now, if we run the application again and open localhost:8080 in a browser window, we can get some pretty visualisations.

Here’s the high-level view of the cluster:

And here’s a view of the grains that are running. You’ll see we have 500 instances of our TemperatureSensorGrain, which corresponds to the range of grainIds we’re generating at random as we generate load. You’ll also see some internal system-related grains:

Here’s a view of the grain itself, and the methods being called on it:

We can also get a view of the silo:

We haven’t covered everything the dashboard gives you, but you can already see that it gives a lot of visibility into what’s going on. It’s great to track errors, slow requests, throughput, etc.

Linux

So now we have Orleans in a .NET Core project on Windows. That’s great, but the real benefit of Orleans supporting .NET Core is cross-platform deployment. So after installing .NET Core on a Linux machine (I’m using Ubuntu 17.10.1 here), let’s grab the code and run Orleans:

git clone https://bitbucket.org/dandago/gigilabs.git
cd gigilabs
cd Orleans2GettingStarted
dotnet run

Orleans has no problem starting up on this Ubuntu VM:

And here we can see Orleans running with the Orleans Dashboard in the background:

Summary

Orleans 2.0 is based on .NET Standard 2.0, so Orleans can now run on .NET Core and the full .NET Framework alike. It can be run on any platform capable of running .NET Core, Linux being just one example.

A big thanks goes to the Microsoft Orleans team for making this happen! (And to Richard Astbury for the awesome Orleans Dashboard, which he still claims is alpha quality.)

To recap: in order to have a minimal Orleans sample running, we need to:

  1. Install the necessary packages.
  2. Add a grain and a grain interface.
  3. Set up the silo and client.
  4. Use the grain from the client.
  5. Optionally, set up logging and the Orleans Dashboard.

This example is meant to get you quickly up and running, and does not delve into any proper project structure or optimisations, which you would normally have when building a serious solution around Orleans. In the next Orleans 2.0 article, we’ll see how to properly organise an Orleans 2.0 solution.

Your First Microsoft Orleans Cluster

If you’re planning to use Microsoft Orleans in production, you need to look beyond the lonely silos that we’ve built in the articles thus far. Orleans is designed to work in a cluster, such that a large number of grains can be distributed among multiple silos. In case of silo failure, its grains are reactivated at other silos that are still alive.

In this article, we’ll create a simple silo and run multiple interconnected instances of it in order to set up a cluster.

For the scope of this article, we’ll use the default cluster membership provider: MembershipTableGrain. This is not intended to be used in production, but will allow us to focus on getting a simple cluster up and running. Setting up different cluster membership providers is non-trivial and requires separate articles for each.

Note: this article is based on Orleans 1.4.2 using .NET Framework 4.6.2.

Note: the source code for this article is in the OrleansFirstCluster folder within the Gigi Labs BitBucket repository.

Setting Up An Example

To set up a cluster, the Dev/Test Host project template we’ve been using so far is no longer suitable. Instead, we have to set up the full project structure. This is covered by the latter part of “Getting Started with Microsoft Orleans” and there is no point in repeating it here.

Don’t write any code yet though. I recently learned that all that AppDomain stuff is not necessary unless you’re planning to run Silo and Client in the same application, so we’ll go for a cleaner approach.

We’ll also install the Orleans Dashboard (see: “A Dashboard for Microsoft Orleans“) in the Silo project. This will give us an idea how grains are spread across the cluster later.

Install-Package OrleansDashboard

Hence, when setting up the Silo configuration, remember to include the configuration for the Dashboard:

<?xml version="1.0" encoding="utf-8"?>
<OrleansConfiguration xmlns="urn:orleans">
  <Globals>
    <SeedNode Address="localhost" Port="11111" />
    <BootstrapProviders>
      <Provider Type="OrleansDashboard.Dashboard" Name="Dashboard" />
    </BootstrapProviders>
  </Globals>
  <Defaults>
    <Networking Address="localhost" Port="11111" />
    <ProxyingGateway Address="localhost" Port="30000" />
  </Defaults>
</OrleansConfiguration>

We can now start adding some code. First, we need a grain in our Grains project. What the grain actually does doesn’t matter. We just want to create a large number of grains to see them spread out over the cluster.

    public class UselessGrain : Grain, IUselessGrain
    {
        public Task DoNothingAsync()
        {
            return Task.CompletedTask;
        }
    }

Note: if you’re using a .NET Framework version prior to 4.6, then you’ll need to use TaskDone.Done instead of Task.CompletedTask.

The corresponding interface goes in the Interfaces project:

    public interface IUselessGrain : IGrainWithIntegerKey
    {
        Task DoNothingAsync();
    }

Doing away with all the AppDomain junk, the following code should be enough for a simple Silo:

        static void Main(string[] args)
        {
            Console.Title = "Silo";

            try
            {
                using (var siloHost = new SiloHost("Silo"))
                {
                    siloHost.LoadOrleansConfig();
                    siloHost.InitializeOrleansSilo();
                    var startedOk = siloHost.StartOrleansSilo(catchExceptions: false);
                    Console.WriteLine("Silo started successfully!");

                    Console.WriteLine("Press ENTER to exit...");
                    Console.ReadLine();
                    siloHost.ShutdownOrleansSilo();
                }
            }
            catch (Exception ex)
            {
                Console.WriteLine(ex);
            }
        }

Apart from the AppDomain logic, another thing we’re doing differently from usual here is that we’re calling StartOrleansSilo() with catchExceptions set to false. In case the silo fails to initialise, this gives us the ability to inspect the details of the failure within the exception, rather than have Orleans silently swallow it and simply return false.

On the client side, we can use an adaptation of the client code from “Getting Started with Microsoft Orleans“:

        static void Main(string[] args)
        {
            Console.Title = "Client";

            var random = new Random();
            var config = ClientConfiguration.LoadFromFile("ClientConfiguration.xml");

            while (true)
            {
                try
                {
                    GrainClient.Initialize(config);
                    Console.WriteLine("Connected to silo!");

                    while (true)
                    {
                        var grainId = random.Next();
                        var grain = GrainClient.GrainFactory.GetGrain<IUselessGrain>(grainId);
                        grain.DoNothingAsync();
                    }
                }
                catch (SiloUnavailableException)
                {
                    Console.WriteLine("Silo not available! Retrying in 3 seconds.");
                    Thread.Sleep(3000);
                }
            }
        }

In the inner infinite-while-loop we’re taking random grain IDs and bombarding them with messages. The idea is to create a lot of grain instances that we can visualise. Since this is very heavy, you’ll see Orleans giving warnings, and high latencies from the Dashboard at times.

Running a 3-Node Cluster

We will now run 3 instances of the same silo. Each instance must have different ports configured. This is the configuration for the first silo, which we already set up earlier:

<?xml version="1.0" encoding="utf-8"?>
<OrleansConfiguration xmlns="urn:orleans">
  <Globals>
    <SeedNode Address="localhost" Port="11111" />
    <BootstrapProviders>
      <Provider Type="OrleansDashboard.Dashboard" Name="Dashboard" />
    </BootstrapProviders>
  </Globals>
  <Defaults>
    <Networking Address="localhost" Port="11111" />
    <ProxyingGateway Address="localhost" Port="30000" />
  </Defaults>
</OrleansConfiguration>

A silo needs 2 ports: one to communicate with other silos (the Networking endpoint) and one for clients to connect to it (the ProxyingGateway endpoint). The client can connect to any node on the cluster.

In production scenarios, Orleans silos are all equal, and there is no concept of a primary and secondary silo. However, when you use the default MembershipTableGrain cluster membership, then all information regarding the silos on the cluster is stored within a grain in one of the silos. As a result, the silo containing the MembershipTableGrain is denoted as the Primary Silo. It must be started before the others, and the entire cluster is messed up if it goes down. Naturally, this is not good, and you should look into other cluster membership providers.

In such a setup, the SeedNode configuration specified in all silos must be the endpoint of the Primary silo. Let’s see what the configuration for our second silo instance looks like:

<?xml version="1.0" encoding="utf-8"?>
<OrleansConfiguration xmlns="urn:orleans">
  <Globals>
    <SeedNode Address="localhost" Port="11111" />
    <BootstrapProviders>
      <Provider Type="OrleansDashboard.Dashboard" Name="Dashboard" Port="8081" />
    </BootstrapProviders>
  </Globals>
  <Defaults>
    <Networking Address="localhost" Port="11112" />
    <ProxyingGateway Address="localhost" Port="30001" />
  </Defaults>
</OrleansConfiguration>

Aside from changing the Networking and ProxyingGateway ports, we are also using a different port for the Dashboard (default is 8080). Each silo has its own Dashboard (although they all show the same information), and they cannot all run from the same port.

Similarly, the configuration for our third silo instance is just a matter of changing ports:

<?xml version="1.0" encoding="utf-8"?>
<OrleansConfiguration xmlns="urn:orleans">
  <Globals>
    <SeedNode Address="localhost" Port="11111" />
    <BootstrapProviders>
      <Provider Type="OrleansDashboard.Dashboard" Name="Dashboard" Port="8082" />
    </BootstrapProviders>
  </Globals>
  <Defaults>
    <Networking Address="localhost" Port="11113" />
    <ProxyingGateway Address="localhost" Port="30002" />
  </Defaults>
</OrleansConfiguration>

We can then start the 3 silo instances and the client:

On my system, the load is just too much and Orleans just dies after around 64k activations. So let’s add a little delay in the random message loop to give Orleans some room to breathe:

                    while (true)
                    {
                        var grainId = random.Next();
                        var grain = GrainClient.GrainFactory.GetGrain<IUselessGrain>(grainId);
                        Thread.Sleep(50);
                        grain.DoNothingAsync();
                    }

After running it again, what I see is that grains are allocated mainly to the primary silo initially, but they are distributed more evenly across the other silos after around 1,000 activations:

I am not sure why they are not evenly distributed from the start. My guess is that either it is more efficient to have them all in one place if the number of activations is small, or the silos need time to coordinate between themselves before this happens (which would explain why, without a delay, all activations are allocated on the primary node).

Single Point of Failure

Close the primary silo.

Since the Primary silo contains the MembershipTableGrain, all information about the cluster dies with it. The remaining silos and clients will not recover automatically even if the Primary silo is brought up again. They in turn will have to be restarted. This is because, as we saw earlier, Secondary silos must start after the primary one. When the Primary silo is brought back, it effectively starts a fresh cluster and does not know about any other silos until they join.

Conclusion

We have seen how to get a very basic Orleans cluster working with multiple silos sharing the burden of holding the grains. However, this is hardly an ideal setup because (a) cluster membership information is held in memory and represents a single point of failure, and (b) the fact that I ran all silos on the same machine made them subject to the same physical resource constraints as if I were running a standalone silo.

For better results, run different silos on different machines, and use a decent cluster membership provider. Orleans supports the following:

  • MembershipTableGrain (not realiable, use for testing only)
  • SQL Server
  • Azure Table Storage
  • Apache ZooKeeper
  • Consul
  • DynamoDB

Update 20th June 2017: I am told that Azure Service Fabric should also be supported. As for database implementations of cluster membership, these are not limited to just SQL Server. You may use any supported ADO .NET provider, which at the moment includes SQL Server, MySQL/MariaDB, or PostgreSQL. To clarify: while the PostgreSQL storage provider for grain persistence is not yet available, its use as a cluster membership provider is supported.

How to Update All Orleans Packages

Sometimes, you will want to upgrade to a newer Microsoft Orleans version. Like today, since Orleans 1.4.2 has just been released.

Thing is, it can be a bit of a pain to update all these packages manually across different projects. It’s also quite error-prone. It has happened in the past that some of those packages ended up on one version, and others ended up on another, causing runtime mayhem.

Fortunately, there’s a simple way to get them all in sync with minimal effort. Just use the following command (taken from the Grain Persistence documentation) in the Package Manager Console:

Get-Package | where Id -like 'Microsoft.Orleans.*' | foreach { update-package $_.Id }

This will go through all the packages that start with “Microsoft.Orleans.” and update them.

Orleans Grain Persistence with the ADO .NET Storage Provider

Yesterday, we introduced grain persistence in Microsoft Orleans, using the volatile MemoryStorage provider to quickly and easily learn how to set up and work with storage providers.

Today, we will use the ADO .NET Storage Provider in order to save our grain state to a database. Currently, we can use this with either SQL Server or MySQL.

Note: MariaDB is a drop-in replacement for MySQL. Thus, the ADO .NET Storage Provider works with it too.

Note: While there is a partial script for PostgreSQL, it is not yet supported.

Update 9th June 2017: Some material from this article was contributed towards the official Grain Persistence documentation.

Example Scenario

Like in yesterday’s article, we’ll use a very simple setup based on the Orleans Dev/Test Host project. We’ll use the same classes and interface:

    public interface IPersonGrain : IGrainWithStringKey
    {
        Task SayHelloAsync();
    }

    public class PersonGrainState
    {
        public bool SaidHello { get; set; }
    }

    [StorageProvider(ProviderName = "OrleansStorage")]
    public class PersonGrain : Grain<PersonGrainState>, IPersonGrain
    {
        public async Task SayHelloAsync()
        {
            string primaryKey = this.GetPrimaryKeyString();

            bool saidHelloBefore = this.State.SaidHello;
            string saidHelloBeforeStr = saidHelloBefore ? " already" : null;

            Console.WriteLine($"{primaryKey}{saidHelloBeforeStr} said hello!");

            this.State.SaidHello = true;
            await this.WriteStateAsync();
        }
    }

If we give our PersonGrain the name of “Joe” and call SayHelloAsync(), then it will write “Joe said hello!” to the console. After that, it sets the SaidHello property in its grain state to true, and saves the updated state to the database via the configured storage provider. The next time SayHelloAsync() is called, it will find that the value of SaidHello is true, so the output will be “Joe already said hello!” instead.

In the main program, let’s add the following code (same as in yesterday’s article) to invoke SayHelloAsync() on a grain. This needs to go in the place of the TODO comment that was generated as part of the project template.

            var joe = GrainClient.GrainFactory.GetGrain<IPersonGrain>("Joe");
            joe.SayHelloAsync();

Now, let’s move on to configure our storage provider.

Setting up the ADO .NET Storage Provider

Install the following package:

Install-Package Microsoft.Orleans.OrleansSqlUtils

Navigate to the folder where the package was installed alongside the project, and you’ll find folders in there for different databases.

In there you’ll find scripts you’ll need to run in order to set up the Orleans database, for different database vendors. Each script contains a table for storage and several others for cluster membership and other internal Orleans operations. For the scope of this article, we’re only concerned with storage.

Note: while there is a script for PostgreSQL, at the time of writing this article, it does not support storage.

The steps to configure an ADO .NET Storage Provider are as follows:

  1. Create the database specific for the database vendor you want.
  2. Install a NuGet package specific for the database vendor you want.
  3. Set up the storage provider in code or XML configuration. Set the AdoInvariant setting (optional only if you’re using SQL Server).

Using SQL Server for Grain Persistence

Setting Up the Database

When using SQL Server, you’ll want to use the SQLServer\CreateOrleansTables_SqlServer.sql script.

Open SQL Server Management Studio. Right click on Databases, and create a new one.

Call it whatever you like, e.g. OrleansStorage.

Open a query window based on your new database. Copy in the aforementioned script, and run it.

Installing the NuGet Package

Next, install the following package:

Install-Package System.Data.SqlClient

Configuring via Code

Finally, we need to configure the storage provider itself. We can do this in code by replacing the following line in OrleansHostWrapper.cs:

config.AddMemoryStorageProvider();

…with code that sets up an ADO .NET storage provider. First, we declare a connection string:

const string connStr = "Server=.\SQLEXPRESS;Database=OrleansStorage;Integrated Security=True";

Then, we can set up the ADO .NET storage provider using either a registration call that takes the storage provider’s type name as a string:

            var typeName = "Orleans.Storage.AdoNetStorageProvider";
            var properties = new Dictionary<string, string>()
            {
                ["DataConnectionString"] = connStr,
                ["AdoInvariant"] = "System.Data.SqlClient"
            };

            config.Globals.RegisterStorageProvider(typeName, "OrleansStorage", properties);

…or its generic equivalent:

config.Globals.RegisterStorageProvider<AdoNetStorageProvider>("OrleansStorage", properties);

Note that there is also a generic extension method we could use as a shortcut:

config.AddAdoNetStorageProvider("OrleansStorage", connStr);

However, I recommend against using this method. As per an issue I just opened, there is no way to set the AdoInvariant (which is optional for SQL Server but necessary when working with other database vendors), and the default serialization format is XML (whereas the default is usually binary). Thus, if you switch between this method and the earlier ones while relying on defaults, you will get deserialization errors.

Configuring via XML

On the other hand, to configure the storage provider using an XML configuration file (which is generally a better approach), first we have to add a file named OrleansConfiguration.xml and set it to copy to the output directory.

Add the following to the file:

<?xml version="1.0" encoding="utf-8"?>
<OrleansConfiguration xmlns="urn:orleans">
  <Globals>
    <StorageProviders>
      <Provider Type="Orleans.Storage.AdoNetStorageProvider"
                Name="OrleansStorage"
                AdoInvariant="System.Data.SqlClient"
                DataConnectionString="Server=.\SQLEXPRESS;Database=OrleansStorage;Integrated Security=True"/>
    </StorageProviders>
    <SeedNode Address="localhost" Port="22222" />
  </Globals>
  <Defaults>
    <Networking Address="localhost" Port="22222" />
    <ProxyingGateway Address="localhost" Port="40000" />
  </Defaults>
</OrleansConfiguration>

Then, replace the following code in OrleansHostWrapper.cs:

            var config = ClusterConfiguration.LocalhostPrimarySilo();
            config.AddMemoryStorageProvider();
            siloHost = new SiloHost(siloName, config);

…with this:

            siloHost = new SiloHost(siloName);
            siloHost.ConfigFileName = "OrleansConfiguration.xml";

Testing It Out

Once you have configured everything, run the program:

It says “Joe said hello!” Remember that the state should have been updated at the end of the method that writes that message. Let’s verify it by closing the program, and running it again:

This time, it says “Joe already said hello!” That means that the state was correctly read from the database.

Using MySQL for Grain Persistence

Note: this also works for MariaDB, which is a drop-in replacement for MySQL.

Setting Up the Database

Deep beneath the folder where the Microsoft.Orleans.SqlUtils package gets installed, you’ll find a MySql\CreateOrleansTables_MySql.sql script. We’ll use this for MySQL or MariaDB.

Use your favourite administrative tool to create a new database, and give it a name (e.g. “orleansstorage”). Paste the script in a query window, and run it against the new database.

Installing the NuGet Package

Install the following package:

Install-Package MySql.Data

Configuring via Code

We can replace the AddMemoryStorageProvider() call in OrleansHostWrapper.cs with code to set up our ADO .NET provider. First, let’s put our connection string in a variable to keep the rest of the setup code concise:

const string connStr = "Server=localhost;Database=orleansstorage;uid=xxx;pwd=xxx";

We can now configure the storage provider, using either a named type:

            var typeName = "Orleans.Storage.AdoNetStorageProvider";
            var properties = new Dictionary<string, string>()
            {
                ["DataConnectionString"] = connStr,
                ["AdoInvariant"] = "MySql.Data.MySqlClient"
            };

            config.Globals.RegisterStorageProvider(typeName, "OrleansStorage", properties);

…or a generic method based on the type itself:

config.Globals.RegisterStorageProvider<AdoNetStorageProvider>("OrleansStorage", properties);

As you can see, this is almost identical to the configuration for SQL Server. We’re using the exact same ADO .NET storage provider, and changing just the connection string and the AdoInvariant which identifies the underlying database vendor.

Configuring via XML

Instead of hardcoding our configuration, we have the option to read it from an XML file. Let’s create a file named OrleansConfiguration.xml, set it to copy to the output directory, and give it the following content:

<?xml version="1.0" encoding="utf-8"?>
<OrleansConfiguration xmlns="urn:orleans">
  <Globals>
    <StorageProviders>
      <Provider Type="Orleans.Storage.AdoNetStorageProvider"
                Name="OrleansStorage"
                AdoInvariant="MySql.Data.MySqlClient"
                DataConnectionString="Server=localhost;Database=orleansstorage;Uid=xxx;Pwd=xxx"/>
    </StorageProviders>
    <SeedNode Address="localhost" Port="22222" />
  </Globals>
  <Defaults>
    <Networking Address="localhost" Port="22222" />
    <ProxyingGateway Address="localhost" Port="40000" />
  </Defaults>
</OrleansConfiguration>

Then, as we did before in the SQL Server section, replace the following code in OrleansHostWrapper.cs:

            var config = ClusterConfiguration.LocalhostPrimarySilo();
            config.AddMemoryStorageProvider();
            siloHost = new SiloHost(siloName, config);

…with this:

            siloHost = new SiloHost(siloName);
            siloHost.ConfigFileName = "OrleansConfiguration.xml";

This allows us to bypass the default localhost silo configuration and read the configuration from our file instead.

A Word On Formats

ADO .NET Storage providers can save data in one of three formats: JSON, XML, or a compact binary format.

The default format is binary, and while it is compact, it means the data is opaque and you can’t really work with it directly. This could be a problem if you need to patch, migrate, or troubleshoot the data. XML is bloated, so I generally recommend using JSON. It’s lightweight (although not as much as the binary format) and is easy to work with.

You can switch between them by setting the appropriate property in either code or XML configuration:

  • UseJsonFormat="true" uses JSON.
  • UseXmlFormat="true" uses XML.
  • UseBinaryFormat="true" uses binary, which is the default setting.

Ideally you should set this only the first time. If you change this setting when you already have data, you’ll have a mess of formats and will not be able to read old data.

Summary

Install the base package for the ADO .NET Storage Provider:

Install-Package Microsoft.Orleans.OrleansSqlUtils

Then set up as follows depending on the database vendor:

SQL Server MySQL
Script SQLServer\CreateOrleansTables_SqlServer.sql MySql\CreateOrleansTables_MySql.sql
NuGet Package System.Data.SqlClient MySql.Data
AdoInvariant System.Data.SqlClient MySql.Data.MySqlClient

You can set the following propeties:

Name Type Description
Name String Arbitrary name that persistent grains will use to refer to this storage provider
Type String Set to Orleans.Storage.AdoNetStorageProvider
AdoInvariant String Identifies the database vendor (see above table for values; default is System.Data.SqlClient)
DataConnectionString String Vendor-specific database connection string (required)
UseJsonFormat Boolean Use JSON format
UseXmlFormat Boolean Use XML format
UseBinaryFormat Boolean Use compact binary format (default)

When configuring via code, prefer the generic registration call, as it avoids magic strings and potential runtime errors by using a type provided at compile time. Avoid the shortcut extension method since it does not let you configure the AdoInvariant and has a different default format from the other API methods.

Introduction to Grain Persistence with Microsoft Orleans

In this article, we’re going to take a look how the state of virtual grains can be saved to and loaded from a data store. Since there are various storage providers available for Microsoft Orleans, we will use the in-memory storage provider to introduce the concepts in a simple manner. This is not a real storage provider, and its state is lost if the silo goes down, but it gives us an easy way to learn to set up and interact with storage providers.

The source code for this article is available in the Gigi Labs BitBucket repository. Look for the OrleansMemoryStorage folder.

Update 9th June 2017: Some material from this article was contributed towards the official Grain Persistence documentation.

A Simple Sample

Before we can see how grain persistence works, we need a minimal example. Let’s create a new Orleans Dev/Test Host project using the project templates from the Microsoft Orleans Tools for Visual Studio extension.

Let’s add a new interface that our grain will implement:

    public interface IPersonGrain : IGrainWithStringKey
    {
        Task SayHelloAsync();
    }

Next, we’ll implement a really simple grain:

    public class PersonGrain : Grain, IPersonGrain
    {
        public Task SayHelloAsync()
        {
            string primaryKey = this.GetPrimaryKeyString();

            Console.WriteLine($"{primaryKey} said hello!");

            return Task.CompletedTask;
        }
    }

Note: if you’re using a .NET Framework version prior to 4.6, use TaskDone.Done instead of Task.CompletedTask.

All we need to do now is actually use our grain. Locate the following comment in the template code generated in Main():

            // TODO: once the previous call returns, the silo is up and running.
            //       This is the place your custom logic, for example calling client logic
            //       or initializing an HTTP front end for accepting incoming requests.

…and replace it with the following:

            var joe = GrainClient.GrainFactory.GetGrain<IPersonGrain>("Joe");
            joe.SayHelloAsync();

We can now run the program to ensure that the grain’s SayHelloAsync() is actually called:

Adding State

While it is perfectly valid to have grain state in member variables within the grain itself, if we want to persist that state, we need something a little different.

The first thing we need to do is create a class that holds the state:

    public class PersonGrainState
    {
        public bool SaidHello { get; set; }
    }

Then, we need to change the definition of our grain class to inherit not from Grain, but from Grain<T>, where T is the grain state class:

    public class PersonGrain : Grain<PersonGrainState>, IPersonGrain

We can then change the code within our grain to save its state and do something a little more interesting:

    public class PersonGrain : Grain<PersonGrainState>, IPersonGrain
    {
        public async Task SayHelloAsync()
        {
            string primaryKey = this.GetPrimaryKeyString();

            bool saidHelloBefore = this.State.SaidHello;
            string saidHelloBeforeStr = saidHelloBefore ? " already" : null;

            Console.WriteLine($"{primaryKey}{saidHelloBeforeStr} said hello!");

            this.State.SaidHello = true;
            await this.WriteStateAsync();
        }
    }

All we’re doing here is that if the SaidHello property was set, then we write “Joe already said hello!” instead of “Joe said hello!”. However, note the last two lines. We’re setting the value of SaidHello to true, and then calling WriteStateAsync().

Orleans provides a very simple API for dealing with persistent state, as you can see above. You can access your grain’s state object using the State property. The WriteStateAsync(), ReadStateAsync() and ClearStateAsync() methods allow you to save, load, and clear the grain’s state from the data store respectively.

Note: we haven’t yet set up our data store, but we’ll do that shortly.

The logic for saving state is entirely up to you. You can save state with every message you receive (i.e. with every method call), or periodically, or in whatever manner makes most sense for your application. For instance, in our example above, we are saving state every time the SayHello() method is called. However, it would save unnecessary writes to the data store to do a simple check on the value of SaidHello, and write to the data store only if the value was previously false.

State is loaded automatically from the data store when the grain is activated, so you don’t actually need to call ReadStateAsync() unless it makes logical sense to do so, e.g. if your grain has ended up in an inconsistent state due to errors and you need to reload its original state from the data store.

Configuring a Persistence Store

Let’s run the application as it is now:

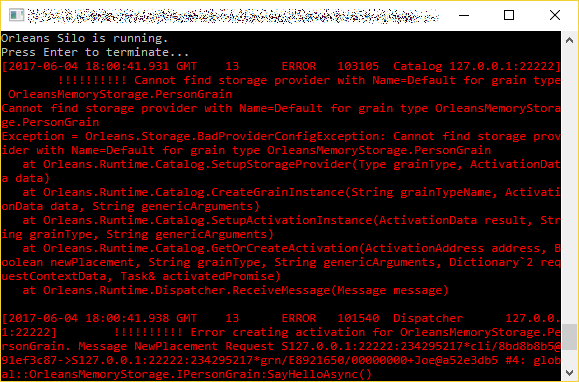
It is failing because we haven’t configured our storage provider yet. A grain having persistent state will by default look for a storage provider configured with the name “Default”. We can use an arbitrarily named storage provider by using an attribute:

    [StorageProvider(ProviderName = "OrleansStorage")]
    public class Person : Grain<PersonState>, IPerson

We now have to configure that OrleansStorage data store so that Orleans will know where to find it and how to interact with it. There are various different storage providers, as you can see from the Grain Persistence documentation. All of these can be configured either in code or using XML configuration.

In this example, we’ll use the MemoryStorage provider. This is not a real persistent data store, in the sense that it holds data in memory which is lost when the silo stops. While this does not allow for very interesting storage-and-retrieval scenarios, it allows us to experiment with storage providers without the hassle of setting up a real database. We’ll see how to set up proper storage providers with an underlying database in an upcoming article.

Configuring MemoryStorage in Code

You should have an OrleansHostWrapper class that was automatically created as part of the project template. In the Init() method, we can add the configuration code we need:

        private void Init()
        {
            siloHost.LoadOrleansConfig();

            siloHost.Config.AddMemoryStorageProvider("OrleansStorage");
        }

If you run it now, there will be no error:

The AddMemoryStorageProvider() is just a shortcut method. It takes a name and an optional number of grains used to store the state, which we can leave well enough alone with its default of 10:

The real way to set up any configuration provider is to use RegisterStorageProvider(), and pass in the type of the provider (either as a typename string or as a generic parameter), along with the storage provider name (in our case, “OrleansStorage”) and any additional parameters (in the case of MemoryStorage, we can set that NumStorageGrains here).

Using generics, it looks like this:

        private void Init()
        {
            siloHost.LoadOrleansConfig();

            siloHost.Config.Globals.RegisterStorageProvider<MemoryStorage>("OrleansStorage");
        }

On the other hand, this is how you’d do it if you specified the type name as a string:

        private void Init()
        {
            siloHost.LoadOrleansConfig();

            siloHost.Config.Globals.RegisterStorageProvider("Orleans.Storage.MemoryStorage",
                "OrleansStorage");
        }

Configuring MemoryStorage in XML

Instead of hardcoding your configuration, you can set it up in an OrleansConfiguration.xml file that your silo will then pick up.

Let’s add an OrleansConfiguration.xml file to the project. We also need to set the file’s Copy to Output Directory property to either Copy always or Copy if newer. Then, we can add the following to it:

<?xml version="1.0" encoding="utf-8"?>
<OrleansConfiguration xmlns="urn:orleans">
  <Globals>
    <StorageProviders>
      <Provider Type="Orleans.Storage.MemoryStorage"
                Name="OrleansStorage"
                NumStorageGrains="10" />
    </StorageProviders>
    <SeedNode Address="localhost" Port="22222" />
  </Globals>
  <Defaults>
    <Networking Address="localhost" Port="22222" />
    <ProxyingGateway Address="localhost" Port="40000" />
  </Defaults>
</OrleansConfiguration>

You can see how we’re configuring pretty much the same things that we did earlier in code. Any optional parameters, such as NumStorageGrains in this case, can also be added.

The StorageProviders section is all we need to set up a storage provider, but you’ll notice we have a lot more configuration in the file. The Dev/Test Host project template uses LocalhostPrimarySilo() configuration, which is good to set something up quickly, but it’s a bit of a pain to get to work with configuration files. Thus, we’ll remove it and replace its default configuration with that in the file. With a proper Orleans project setup, you won’t need to do the following steps.

Locate the following code in OrleansHostWrapper.cs:

            var config = ClusterConfiguration.LocalhostPrimarySilo();
            config.AddMemoryStorageProvider();
            siloHost = new SiloHost(siloName, config);

Replace it with the following:

            siloHost = new SiloHost(siloName);
            siloHost.ConfigFileName = "OrleansConfiguration.xml";

The Init() method should be left as it originally was:

        private void Init()
        {
            siloHost.LoadOrleansConfig();
        }

You can now run the program. It should work without problems, using the configuration from the file to set up the storage provider.

Summary

In order to persist a grain’s state, it is necessary to:

  1. Create a class that holds the grain’s state.
  2. Have the grain inherit from Grain<T>, where T is the grain state class.
  3. Access the grain’s state object using the State property.
  4. Use WriteStateAsync(), ReadStateAsync() and ClearStateAsync() to write, read or clear the grain’s state in the data store respectively.
  5. A grain’s state is automatically loaded from the data store when it is activated.
  6. A grain’s storage provider name is set using the StorageProvider attribute, in absence of which it uses one named “Default”.
  7. There are various storage providers available that work with different data stores. We have so far used only MemoryStorage, which is a volatile implementation to be used only for testing.
  8. Storage providers may be configured either in code or using an XML configuration file.