Tag Archives: Security

Bypassing a Login Form using SQL Injection

This article was originally posted as “C# Security: Bypassing a Login Form using SQL Injection” on 5th January 2014 at Programmer’s Ranch. The article is based on ASP .NET Web Forms and ADO .NET, and the code example was originally written using Visual Studio Express for Web 2013 and SQL Server 2012 Express. This updated version removes references to particular software versions, adds syntax highlighting, and includes other simple edits where necessary.

In this article, we’re going to learn about SQL injection. We’ll use it to bypass a login form on a website, and you’ll see just how easy it is. Despite its simplicity, this article is going to be a little bit long – because we’ll need to set up a simple login form with a database that we can then use to try out the SQL injection. Naturally, you should never try out these types of attacks on someone else’s website; so when you want to learn something in practice, set up a vulnerable system of your own.

To demonstrate SQL injection, we’re going to be using ASP .NET (for the web form) and SQL Server (for the database). However, SQL injection is not tied to any technology in particular, so you could, for example, use PHP and MySQL instead. You are expected to know a little something about databases (SQL) and websites, although rest assured that there’s nothing complicated in this article.

Setting up the database

sqlinj-newdatabase

In order to create and set up our database, we’ll need to use SQL Server Management Studio. Launch it, and from the Object Explorer on the left, right click on the Databases node, and click on “New Database…”. Enter a name for your database (I’m using “sqlinjection”) and click OK.

sqlinj-newquery

You should now be able to right click on the newly created database and select “New Query”. This brings up a text editor where you can enter and run queries against the database. Enter the following script into this editor:

create table users (
    id int not null primary key identity(1,1),
    username varchar(50) not null,
    password varchar(50) not null
);

…and press F5 to execute it:

sqlinj-createtable

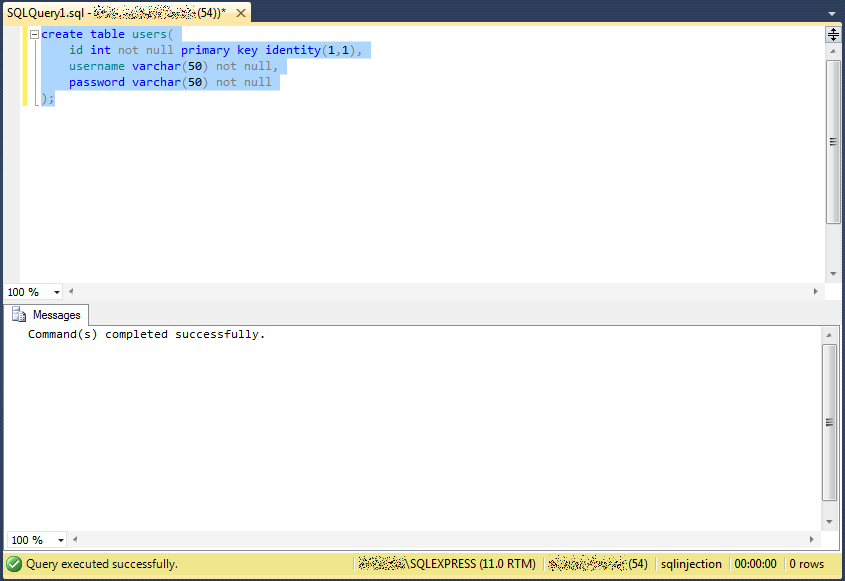
You should now have your users table with an id field as well as the username and password. Now, replace the script with the following:

insert into users(username, password)
values('hankmarvin', 'theshadows');

Press F5 to insert a new row where the username is “hankmarvin” and the password is “theshadows”. The id column should be filled automatically since we are using an IDENTITY on that column. Note that in this case we’re storing a password as cleartext for simplicity, but this is never a good idea – see my article “Securing Passwords by Salting and Hashing” if you don’t know why.

Creating the login form

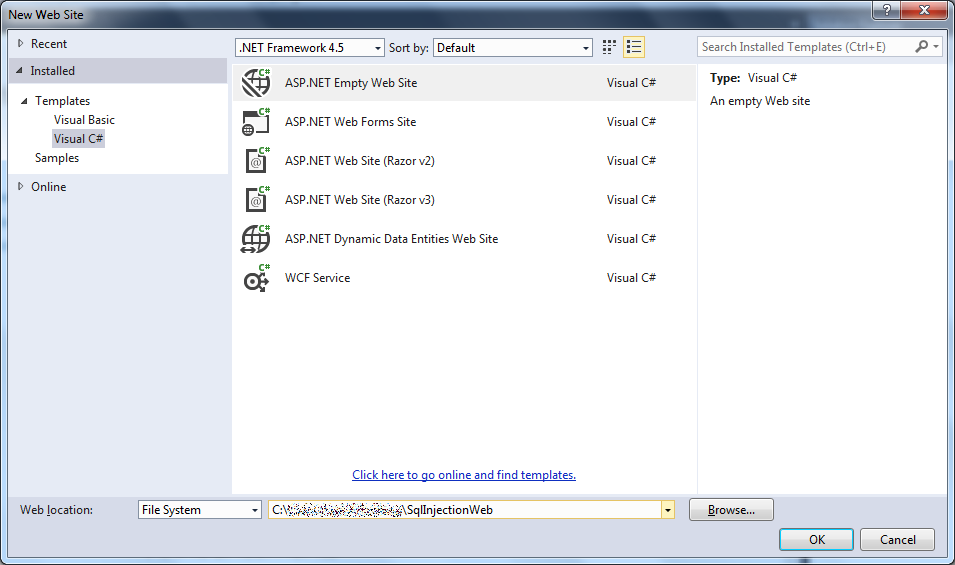
In Visual Studio, go on File -> New Website… and create a new project of type ASP .NET Empty Web Site:

sqlinj-newproject

Next, right click on the project in Solution Explorer, and select Add -> Add New Item…, and then pick Web Form from the list of templates. Leave the name as Default.aspx.

Set up the markup in Default.aspx so that it looks like this:

<%@ Page Language="C#" AutoEventWireup="true" CodeFile="Default.aspx.cs" Inherits="_Default" %>

<!DOCTYPE html>

<html xmlns="http://www.w3.org/1999/xhtml">
<head runat="server">
    <title></title>
</head>
<body>
    <form id="form1" runat="server">
        <div>
            Username: <asp:TextBox ID="usernameField" runat="server" />
        </div>
        <div>
            Password: <asp:TextBox ID="passwordField" runat="server" />
        </div>
        <div>
            <asp:Button ID="loginButton" runat="server" Text="Login" OnClick="loginButton_Click" />
        </div>
        <div>
            <asp:Label ID="resultField" runat="server" />
        </div>
    </form>
</body>
</html>

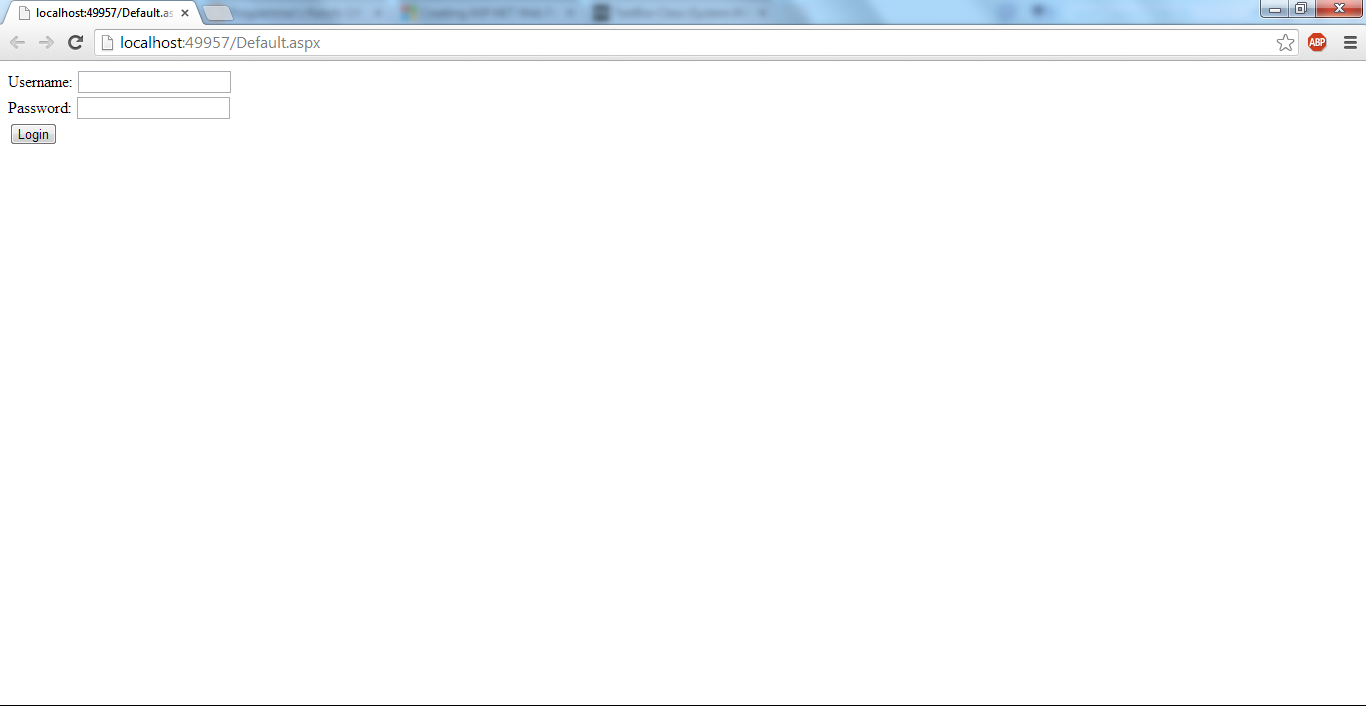
It’s not wonderful HTML, and not exactly pretty, but it’s the simple login form that we need. You can see the result by pressing F5 to launch the project in your web browser:

sqlinj-loginform

Next, go into your webpage’s codebehind file (that would be Default.aspx.cs). Add the following statement near the top:

using System.Data.SqlClient;

Add the following event handler that actually takes care of the logic for logging in (your actual connection string may vary depending on how you installed SQL Server – see this if you run into issues):

    protected void loginButton_Click(object sender, EventArgs e)
    {
        String connStr = @"Data Source=localhost\SqlExpress;Initial Catalog=sqlinjection;Integrated Security=True;";
        String username = this.usernameField.Text;
        String password = this.passwordField.Text;
        String query = "select count(*) from users where username = '" + username
            + "' and password = '" + password + "'";

        try
        {
            using (SqlConnection conn = new SqlConnection(connStr))
            {
                conn.Open();

                using (SqlCommand command = new SqlCommand(query, conn))
                {
                    int result = (int)command.ExecuteScalar();
                    if (result > 0)
                        resultField.Text = "Login successful.";
                    else
                        resultField.Text = "Login failed! Go away!";
                }
            }
        }
        catch(Exception ex)
        {
            resultField.Text = ex.Message;
        }
    }

SQL Injection

You can now press F5 and test out the login form. If you enter the correct credentials, which are “hankmarvin” for username and “theshadows” as the password, then you should see the message “Login successful.” just below the form. For any other input, the login will fail.

It should be pretty evident that the code in loginButton_Click is constructing dynamic SQL based on the credentials provided. So for the correct credentials, this would build the SQL string:

select count(*) from users where username = 'hankmarvin' and password = 'theshadows'

The weakness in this is that we can write whatever we want into the username and password fields, and they’ll be included in the SQL query. Let’s see what happens when we use the following input in the password field:

' OR 1=1 --

Using this, we are logged in just fine:

sqlinj-injected-sql

Oops! What just happened here? If we take a look at the dynamic SQL that is being constructed, it becomes clear:

select count(*) from users where username = '' and password = '' OR 1=1 --'

The stuff we entered in the password field is closing off the SQL string (with the apostrophe at the beginning) and is adding a condition that will always be true (1=1). A comment (–) at the end gets rid of the remaining SQL, in this case a closing apostrophe. The query’s WHERE clause can now be read as follows:

((username = '') AND (password = '')) OR 1=1

Well, it turns out that 1=1 is always true, so the query ends up returning every row in the database. The count is greater than zero, and so the login is successful, even though we didn’t actually provide valid credentials.

Prepared Statements

The correct way to fight SQL injection is to use prepared statements. This means that the event handler changes as follows:

    protected void loginButton_Click(object sender, EventArgs e)
    {
        String connStr = @"Data Source=localhost\SqlExpress;Initial Catalog=sqlinjection;Integrated Security=True;";
        String username = this.usernameField.Text;
        String password = this.passwordField.Text;
        String query = "select count(*) from users where username = @username and password = @password";

        try
        {
            using (SqlConnection conn = new SqlConnection(connStr))
            {
                conn.Open();

                using (SqlCommand command = new SqlCommand(query, conn))
                {
                    command.Parameters.Add(new SqlParameter("@username", username));
                    command.Parameters.Add(new SqlParameter("@password", password));

                    int result = (int)command.ExecuteScalar();
                    if (result > 0)
                        resultField.Text = "Login successful.";
                    else
                        resultField.Text = "Login failed! Go away!";
                }
            }
        }
        catch(Exception ex)
        {
            resultField.Text = ex.Message;
        }
    }

Instead of building dynamic SQL, we insert named placeholders, such as @username, to stand in for parameters in the query. We then provide these values via the SqlCommand‘s Parameters property, where the values are paired up with the corresponding parameter names. Since these parameters are strongly typed, things like escaping apostrophes in strings are handled automatically, and so users can’t inject SQL via input fields.

In fact, if you try the same SQL injection attack as above, you’ll see that it doesn’t work any more:

sqlinj-injection-failed

Summary

As we have seen in this article, SQL injection is a really simple technique that can be used to breach security in vulnerable websites and applications. Bypassing login forms is only one of many things you can do with SQL injection, which is so dangerous that it has topped the OWASP Top 10 Risks for years.

To protect against SQL injection, use prepared statements to provide strongly-typed parameters in your SQL queries, and avoid dynamic SQL built directly by concatenating strings.

Securing Passwords by Salting and Hashing

This article was originally posted as “C# Security: Securing Passwords by Salting and Hashing” on 11th November 2013 at Programmer’s Ranch. This republished version is slightly edited. Although using silly passwords and the MD5 hash function is not recommended, they are used in this article to illustrate the point more easily.

Password security is often quite challenging to understand for those who are new to it (I’ve been there too, as you can see from my question about salting on StackOverflow). In this article, I am hoping to make this fascinating topic a little easier to understand. We’ll be covering two important techniques called hashing and salting. Although passwords are typically stored in a database, we’ll be using a C# dictionary to keep it simple.

Clear Text Passwords

To get started, create a new Console Application. Add the following near the top, so that we can use dictionaries:

using System.Collections.Generic;

Just inside your class Program, before your Main() method, add the following dictionary to store our users and their corresponding passwords (see “Morse Code Converter Using Dictionaries” if this seems in any way new to you):

        public static Dictionary<string, string> users = new Dictionary<string, string>()
        {
            { "johnny", "password" },
            { "mary", "flowers" },
            { "chuck", "roundhousekick" },
            { "larry", "password123" }
        };

It is now pretty simple to add a method that can check whether a given username and password result in a successful login:

        public static bool Login(string username, string password)
        {
            if (users.ContainsKey(username) && users[username] == password)
                return true;
            else
                return false;
        }

This code first checks that the username actually exists in the dictionary, and then checks whether the corresponding password matches.

We can now test this code by replacing the contents of Main() with the following code:

        public static void Main(string[] args)
        {
            Console.Write("Username: ");
            string username = Console.ReadLine();
          
            Console.Write("Password: ");
            Console.ForegroundColor = ConsoleColor.Black;
            string password = Console.ReadLine();
            Console.ResetColor();
          
            bool loggedIn = Login(username, password);
            if (loggedIn)
                Console.WriteLine("You have successfully logged in!");
            else
                Console.WriteLine("Bugger off!");
          
            Console.ReadLine();
        }

Notice that when requesting the password, we’re setting the console’s text colour to black. The console’s background colour is also black, so the password won’t show as you type, fending off people trying to spy it while looking over your shoulder.

Press F5 to try it out:

cspwsec-naive-output

Awesome – we have just written a very simple login system.

The problem with this system is that the passwords are stored as clear text. If we imagine for a moment that our usernames and passwords were stored in a database, then the actual passwords can easily be obtained by a hacker gaining illegal access to the database, or any administrator with access to the database. We can see this by writing a simple method that shows the users’ data, simulating what a hacker would see if he managed to breach the database:

        public static void Hack()
        {
            foreach (string username in users.Keys)
                Console.WriteLine("{0}: {1}", username, users[username]);
        }

We can then add the following code just before the final Console.ReadLine() in Main() to test it out:

Console.WriteLine();
Hack();

This gives us all the details, as we are expecting:

cspwsec-breach-cleartext

This isn’t a nice thing to have – anyone who can somehow gain access to the database can see the passwords. How can we make this better?

Hashing

One way is to hash the passwords. A hash function is something that takes a piece of text and transforms it into another piece of text:

cspwsec-hashfunc-1

A hash function is one-way in the sense that you can use it to transform “Hello” to “8b1a9953c4611296a827abf8c47804d7”, but not the other way around. So if someone gets his hands on the hash of a password, it doesn’t mean that he has the password.

Another property of hash functions is that their output changes considerably even with a very small change in the input. Take a look at the following, for instance:

cspwsec-hashfunc-2

You can see how “8b1a9953c4611296a827abf8c47804d7” is very different from “5d41402abc4b2a76b9719d911017c592”. The hashes bear no relationship with each other, even though the passwords are almost identical. This means that a hacker won’t be able to notice patterns in the hashes that might allow him to guess one password based on another.

One popular hashing algorithm (though not the most secure) is MD5, which was used to produce the examples above. You can find online tools (such as this one) that allow you to compute an MD5 hash for any string you want.

In order to use MD5 in our code, we’ll need to add the following statement near the top of our program code:

using System.Security.Cryptography;

At the beginning of the Program class, we can now create an instance of the MD5 class to use whenever we need:

private static MD5 hashFunction = MD5.Create();

If you look at the intellisense for MD5, you’ll see that it has a ComputeHash() method, which returns an byte array, rather than a string:

cspwsec-md5-computehash

We’re going to do some string work, so add the following near the top:

using System.Text;

Let’s write a little helper method to hash our passwords, using strings for both input and output:

        public static string Hash(String input)
        {
            // code goes here
        }

In this method, the first thing we need to do is convert the input string to a byte array, so that ComputeHash() can work with it. This is done using the System.Text.Encoding class, which provides several useful members for converting between strings and bytes. In our case we can work with the ASCII encoding as follows:

byte[] inputBytes = Encoding.ASCII.GetBytes(input);

We can then compute the hash itself:

byte[] hashBytes = hashFunction.ComputeHash(inputBytes);

Since we don’t like working with raw bytes, we then convert it to a hexadecimal string:

StringBuilder sb = new StringBuilder();
foreach(byte b in hashBytes)
sb.Append(b.ToString("x2").ToLower());

The “x2” bit converts each byte into two hexadecimal characters. If you think about it for a moment, hexadecimal digits are from 0 to f (representing 0-15 in decimal), which fit into four bits. But each byte is eight bits, so each byte is made up of two hex digits.

Anyway, after that, all we need to do is return the string, so here’s the entire code for the method:

        public static String Hash(String input)
        {
            byte[] inputBytes = Encoding.ASCII.GetBytes(input);
            byte[] hashBytes = hashFunction.ComputeHash(inputBytes);
          
            StringBuilder sb = new StringBuilder();
            foreach(byte b in hashBytes)
                sb.Append(b.ToString("x2").ToLower());
          
            return sb.ToString();
        }

We can now change our database to use hashed passwords:

        public static Dictionary<string, string> users = new Dictionary<string, string>()
        {
            { "johnny", Hash("password") },
            { "mary", Hash("flowers") },
            { "chuck", Hash("roundhousekick") },
            { "larry", Hash("password123") }
        };

In this way, we aren’t storing the passwords themselves, but their hashes. For example, we’re storing “5f4dcc3b5aa765d61d8327deb882cf99” instead of “password”. That means we don’t store the password itself any more (if you ever signed up to an internet forum or something, and it told you that your password can be reset but not recovered, you now know why). However, we can hash any input password and compare the hashes.

In our Login() method, we now change the line that checks username and password as follows:

if (users.ContainsKey(username) && users[username] == Hash(password))

Let’s try this out (F5):

cspwsec-hash-output

When the user types “johnny” as the username and “password” as the password, the password is hashed, giving us “5f4dcc3b5aa765d61d8327deb882cf99”. Since the passwords were also stored as hashes in our database, it matches. In reality our login is doing the same thing as it was doing before – just that we added a hash step (a) when storing our passwords and (b) when receiving a password as input. Ultimately the password in our database and that entered by the user both end up being hashes, and will match if the actual password was the same.

How does this help us? As you can see from the hack output (last four lines in the screenshot above), someone who manages to breach the database cannot see the passwords; he can only get to the hashes. He can’t login using a hash, since that will in turn be hashed, producing a completely different value that won’t match the hash in the database.

Although hashing won’t make the system 100% secure, it’s sure to give any potential hacker a hard time.

Salting

You may have noticed that in the example I used, I had some pretty dumb passwords, such as “password” and “password123”. Using a dictionary word such as “flowers” is also not a very good idea. Someone may be able to gain access to one of the accounts by attempting several common passwords such as “password”. These attempts can be automated by simple programs, allowing hackers to attempt entire dictionaries of words as passwords in a relatively short period of time.

Likewise, if you know the hash for common passwords (e.g. “5f4dcc3b5aa765d61d8327deb882cf99” is the hash for “password”), it becomes easy to recognise such passwords when you see the expected hash. Hackers can generate dictionaries of hashes for common passwords, known as rainbow tables, and find hashes for common words used as passwords.

We can combat such attacks by a process known as salting. When we compute our hashes, we add some string that we invent. This means changing the first line of our Hash() function as follows:

byte[] inputBytes = Encoding.ASCII.GetBytes("chuck" + input);

Both the database password and the one entered by the user will be a hash of “chuck” concatenated with the password itself. When the user tries to login, it will still work, but look at what happens now:

cspwsec-salt-output

The login worked, but the hashes have changed because of the salt! This means that even for a password as common as “password”, a hacker cannot identify it from the hash, making rainbow tables much less effective.

Summary

This article described how to store passwords securely. It started off by doing the easiest and worst thing you can do: store them as clear text. A hash function was subsequently introduced, to transform the passwords into text from which the password cannot be retrieved. When a user logs in, the hash of the password he enters is compared with the password hash stored in the database.

Finally, the hashes were salted, by adding an arbitrary piece of text to them, in order to transform the hashes into different values that can’t be used to identify common passwords.

Additional Notes

It is interesting to note that with hashes, it does not matter how long your password is. The hash is typically fixed-length (depending on the hash function you use). So if you create an account on some airline’s website and it tells you that your password is too long because they have some maximum limit… well, they don’t know what they are doing.

Hashing and salting make password storage a lot more secure. The next level is using a slow hash algorithm with a work function. You can read about this in my followup article, “Secure Authentication with BCrypt“.

Secure Authentication with BCrypt

Introduction

Implementing authentication (i.e. user login) in a system sounds simple. Just compare username and password with what is stored in the database, right?

Actually, it’s not nearly as simple as it looks to the user logging in. Storing and checking user credentials is a process with different levels of security (and I’m no expert, so there may be more):

  1. Store passwords in plain text. Very bad idea.
  2. Hash the passwords. They won’t be easily readable, but can be cracked by rainbow tables.
  3. Salt and hash the passwords. Protects against rainbow tables as well, but still vulnerable to high-performance brute force attacks.
  4. Use a slow hash algorithm to limit the effectiveness of brute force attacks.

My article “Securing Passwords by Salting and Hashing” covers the first three items. This article will deal with the fourth item, and introduce BCrypt, which gives you all four.

The source code for this article is available at the Gigi Labs BitBucket repository.

Authentication with BCrypt

Before we discuss the merits of using BCrypt, let’s see how to use it.

You first need to include the BCrypt library in your project. You can do this via NuGet:

bcrypt-nuget

The functionality we need to use is all in a class called BCryptHelper, which you get access to by including the following namespace:

using DevOne.Security.Cryptography.BCrypt;

With that, it is very easy to generate a salt, hash a password with it, and validate the password against its salted hashed version:

        static void Main(string[] args)
        {
            Console.Title = "BCryptTest";

            string password = "My$ecureP@$sW0Rd";

            string salt = BCryptHelper.GenerateSalt();
            string hashedPassword = BCryptHelper.HashPassword(password, salt);

            bool valid = BCryptHelper.CheckPassword(password, hashedPassword);

            Console.WriteLine("Salt:            {0}", salt);
            Console.WriteLine("Hashed Password: {0}", hashedPassword);
            Console.WriteLine("Valid:           {0}", valid);

            Console.ReadLine();
        }

Here’s the output of this little program:

bcrypt-auth

The BCrypt hashed password is typically a 60-byte string. As you can see, the salt is actually embedded within the hashed password (this StackOverflow answer explains more about how this works). This means you don’t need to store the salt separately.

Why BCrypt?

The functionality we have seen in the previous section doesn’t really give us anything more than hashing and salting with any other reasonably strong hash function. So why use BCrypt?

In many programming situations, writing code that executes fast is a good thing. Authentication is not one of those. If the algorithms you use to authenticate your users are fast, that means that brute force attacks may attempt large amounts of combinations per second – more so with modern hardware and GPUs.

Algorithms such as PBKDF2 and BCrypt differ from traditional hash algorithms such as MD5 or SHA256 in that they take a work factor as an input. That is, you can decide how fast or slow the algorithm runs. So if, for instance, you set up your algorithm to take 1 second to validate a password, that greatly limits the possibilities of brute force attacks when compared to algorithms that can run several hundreds or thousands of times per second. Read more about why BCrypt is badass at this Security StackExchange answer.

In BCrypt, the GenerateSalt() method takes an optional logRounds parameter that affects the performance of subsequent hash operations. It has a default value of 10 and can be set to a number between 4 and 31. The algorithm will run 2 to the power of logRounds times, making it run exponentially slower. To get an idea of this, I wrote some simple benchmarking code with the help of my trusted ScopedTimer class (from “Scope Bound Resource Management in C#“):

        static void GenerateSaltBenchmarks(string password)
        {
            for (int i = 10; i < 16; i++)
            {
                using (var scopedTimer = new ScopedTimer($"GenerateSalt({i})"))
                {
                    string salt = BCryptHelper.GenerateSalt(i);
                    string hashedPassword = BCryptHelper.HashPassword(password, salt);
                }
            }
        }

Here are the results:

bcrypt-benchmark

Summary

Use BCrypt to securely store and validate your passwords. It’s easy to use, easy to store, and hard to break. Also importantly, you can make it as slow as you like.

Computing File Hashes in C#

This article was originally posted at Programmer’s Ranch as “C# Security: Computing File Hashes” on 2nd May 2014, which was the blog’s first anniversary. In this version of the article, I’ve removed anniversary references and made other slight edits where they were needed.

In this article, we’re going to learn a little about hashing: what it does, and how to use it to verify the integrity of a downloaded file (which is just one application where it is useful).

We’ve already seen seen in “C# Security: Securing Passwords by Salting and Hashing” that a hash function transforms an input string into a totally different piece of data (a hash):

cspwsec-hashfunc-1

If you make even a slight change to the input, such as changing the first character from uppercase to lowercase, you get a totally different output:

cspwsec-hashfunc-2

Also, if you use a decent hash function (i.e. not MD5), it is normally not possible to get the input string from the hash.

In today’s article, we’re going to use hashes for something much simpler than securing passwords. We’re going to hash the content of files, and then use that hash to check whether the file changed. Since I haven’t been very impressed with SharpDevelop 5 Beta, I’m going to ditch it and use Visual Studio 2013 instead. You can use whatever you like – SharpDevelop, Visual Studio Express for Desktop, or maybe even MonoDevelop.

Create a new Console Application, and add the following at the top:

using System.Security.Cryptography;

This will allow you to use a variety of hash functions, which all derive from the HashAlgorithm class.

We’ll also need a little helper function to convert our hashes from a byte array to a string, so that they may be displayed in hex in the command line. We’ll use the following, which is a modified version of the Hash() method from “C# Security: Securing Passwords by Salting and Hashing“:

        public static string ToHexString(byte[] bytes)
        {
            StringBuilder sb = new StringBuilder();
            foreach (byte b in bytes)
            sb.Append(b.ToString("x2").ToLower());

            return sb.ToString();
        }

Now, let’s create a text file in the same folder as our .sln file and name it “test.txt”, and put the following lyrics from the Eagles’ “Hotel California” in it:

So I called up the Captain,
"Please bring me my wine"
He said, "We haven't had that spirit here since nineteen sixty nine"
And still those voices are calling from far away,
Wake you up in the middle of the night
Just to hear them say...

Let’s read that file into memory. First, we need to add the following

using System.IO;

We can now read the contents of the file into a string:

string fileContents = File.ReadAllText(@"../../../test.txt");

…and quite easily compute the hash of those contents:

            using (HashAlgorithm hashAlgorithm = SHA256.Create())
            {
                byte[] plainText = Encoding.UTF8.GetBytes(fileContents);
                byte[] hash = hashAlgorithm.ComputeHash(plainText);
                Console.WriteLine(ToHexString(hash));
            }

            Console.ReadLine();

Note that I’m using SHA256 as the hash function this time – it’s a lot more robust than MD5. If you check the documentation for the HashAlgorithm class, you can find a bunch of different hash algorithms you can use. As it is, we get the following output:

cshashfile-output-1

Now, let’s see what happens if your little toddler manages to climb onto your keyboard and modify the file. Let’s remove the first character in the file (the initial “S”) – that might be within a toddler’s ability – and save the file. When we rerun the program, the output is quite different:

cshashfile-output-2

And here we have already seen how hashing gives us the means to verify a file’s integrity, or in other words, check whether it has been tampered with. In fact, popular Linux distributions such as Ubuntu distribute MD5 hashes for the files they release, so that the people who can download them can check that they are really downloading the file they wanted, and not some weird video of goats yelling like humans:

cshashfile-ubuntu-hashes

So let’s actually see this in action. After downloading an Ubuntu distribution, let’s change the filename to that of the Ubuntu file we downloaded, and the hash algorithm to MD5:

            string fileContents = File.ReadAllText(@"../../../../ubuntu-14.04-desktop-amd64.iso");

            using (HashAlgorithm hashAlgorithm = MD5.Create())

Now, let’s try to compute a hash of the Ubuntu file:

cshashfile-out-of-memory

Oops! We tried to read a ~1GB file into memory, and that’s a pretty stupid thing to do. Unless you’ve got a pretty awesome computer, you’ll see the memory usage spike until you get an OutOfMemoryException, as above. And even if you do have a pretty awesome computer, you shouldn’t load an entire massive file just to perform an operation on its contents.

In one of my first articles at Programmer’s Ranch, “C#: Working with Streams“, I explained how you could read a file bit by bit (e.g. line by line) and work on those parts without having to have the entire file in memory at any one time. And quite conveniently, the hash algorithms have a variant of the ComputeHash() method that takes a stream as a parameter.

So let’s change our code as follows:

        static void Main(string[] args)
        {
            using (FileStream fs = File.OpenRead(@"../../../../ubuntu-14.04-desktop-amd64.iso"))
            using (HashAlgorithm hashAlgorithm = MD5.Create())
            {
                byte[] hash = hashAlgorithm.ComputeHash(fs);
                Console.WriteLine(ToHexString(hash));
            }

            Console.ReadLine();
        }

And let’s run it:

cshashfile-streamed-hash

There are a few things to note from the output:

  • It computes pretty quickly, despite the fact that it’s going through a ~1GB file.
  • Memory levels remain at a pretty decent level (in fact the memory used by the program is negligible).
  • The output matches the first hash in the list of hashes on the Ubuntu webpage (in the background of the above screenshot).

In this article, we revisited the concept of hashing, and learned the following:

  • There are several different hash algorithms provided by .NET that you can use, including MD5, SHA256, and others.
  • A hash gives you a way to verify whether a file has been tampered with.
  • Streaming provides the ability to process large files quickly and with very little memory overhead.

Lessons Learned from the Patreon Security Breach

Patreon is a popular crowdfunding platform, providing “recurring funding for artists and creators”. I was considering using it myself. I’m glad I didn’t.

Almost two months ago, Patreon suffered a security breach, and several gigabytes of data including a copy of their production database and their source code were leaked on the internet. An article at Ars Technica covers some of the details of the breach.

As I read the press release from Patreon about this incident, my feeling was of utter disbelief, particularly when reading these two points (emphasis mine):

  • “The unauthorized access was confirmed to have taken place on September 28th via a debug version of our website that was visible to the public. Once we identified this, we shut down the server and moved all of our non-production servers behind our firewall.
  • “There was no unauthorized access of our production servers. The development server included a snapshot of our production database, which included encrypted data.”

I’m not sure whether I need to explain why having your development environment publicly accessible, and why using production data in your development environment, are both very stupid things to do. Either way, now I don’t need to explain that. What happened to Patreon shows exactly why no one in his right state of mind would do this.

Further down, Jack Conte, CEO/Co-founder of Patreon, writes:

“I take our creators’ and patrons’ privacy very seriously.”

Sorry, but given what happened here, I find that very hard to believe. It doesn’t matter what steps are being taken to increase security. It’s already too late. People’s private data are now on the internet, and there’s no going back.

So if you want to spare your company a lot of embarrassment, here’s what you need to take away from this incident:

  • Keep your development environment isolated from your production environment.
  • Use dummy data, not production data, in your development environment.