All posts by Gigi

Nasty const bug in ASP .NET 5

Recently, Microsoft released some much-anticipated software including Visual Studio 2015 and .NET 4.6. This has not been without hiccups though: the guys at Stack Exchange identified a serious flaw in the new .NET’s RyuJIT compiler, which was promptly fixed by Microsoft.

And if, like me, you happen to be playing around with the prerelease technologies, you’re bound to run into other odd behaviour. Specifically, I ran into an issue where debugging information would stop working in an ASP .NET 5 Web Application. I posted a question on Stack Overflow about it before realising it was caused by the presence of a const.

To reproduce the issue, let’s create a new Web Application. In the template selector, we’ll use one of the ASP .NET 5 Preview Templates:

aspnet5constbug-newproject

Locate the Index() method in HomeController, and add some code involving a const:

        public IActionResult Index()
        {
            const int x = 1;
            ViewData["x"] = x;

            return View();
        }

Put a breakpoint somewhere. Run the application, and you’ll notice two things:

  1. If you hover over the constant, you won’t get any tooltip showing its value.
  2. If you try to get that information from the Immediate Window or watches, you’ll get the following error:
error CS0648: '' is a type not supported by the language

aspnet5constbug-noconstinfo

In the above screenshot you can’t see that my cursor is actually on x and I’m not getting any intellisense, but you can see the message in the Immediate Window.

If we instead go to the About page, though, debugging tooltips work fine:

aspnet5constbug-infoavailableonothermethod

In fact, if you add some code in the Index() method (e.g. before the const is declared), you’ll notice that you can’t see the value of any variables or constants in the whole method. Other methods, however, are unaffected.

Let us now remove the const keyword and make x a variable instead:

aspnet5constbug-variableworks

There you go, it was the const keyword that messed up debugging information for the whole method. Removing it made everything work again.

I have no idea what’s causing this bug, but it’s clearly in ASP .NET 5. Console applications do not have this problem, nor do ASP .NET web applications prior to version 5.

Update 2015.09.30: There seems to be an open issue about this, posted just a few days ago.

Retrieving Table Metadata from SQL Server Catalog Views

Introduction

All database systems that I’ve worked with have some sort of system tables that provide information about the tables, columns, indexes, constraints, etc in a database. SQL Server is no exception; in fact there are different ways of querying its System Catalog. We’re going to look at one of these: Catalog Views, which can be queried easily.

Being able to retrieve this metadata can be very useful in various situations, such as developing tools to work with and visualize data (like SQL Server Management Studio), or automating rote tasks (such as creating Entity classes for each table).

List of Table Names

Querying catalog views is as easy as querying any table. The easiest thing you can do is get a list of table names. Use this query:

select *
from sys.tables;

Here’s the result:

systables

So if all you want is the name of the table, just refine the query to select only that:

select name
from sys.tables;

Retrieving data using ADO .NET

It is easy to run simple queries using the good old ADO .NET technology. Below is a sample you could use to retrieve the table names from a C# application.

        static void Main(string[] args)
        {
            const string connStr = @"server=.\SQLEXPRESS;database=BookStore;Trusted_Connection=True;";

            using (var conn = new SqlConnection(connStr))
            {
                conn.Open();

                using (var command = new SqlCommand())
                {
                    command.Connection = conn;

                    command.CommandText = "select name from sys.tables;";

                    using (var reader = command.ExecuteReader())
                    {
                        while (reader.Read())
                        {
                            string name = reader["name"].ToString();
                            Console.WriteLine(name);
                        }
                    }
                }
            }

            Console.ReadLine();
        }

This code can be similarly adapted to fetch additional data from the queries we will see next.

More Advanced Queries

Retrieving other table metadata such as indexes, foreign keys, etc is not as straightforward as retrieving table names. However, you can get queries for just about any metadata you need from the Querying the SQL Server System Catalog FAQ.

Here’s the query to get column data types:

SELECT c.name AS column_name
    ,c.column_id
    ,SCHEMA_NAME(t.schema_id) AS type_schema
    ,t.name AS type_name
    ,t.is_user_defined
    ,t.is_assembly_type
    ,c.max_length
    ,c.precision
    ,c.scale
FROM sys.columns AS c 
JOIN sys.types AS t ON c.user_type_id=t.user_type_id
WHERE c.object_id = OBJECT_ID('<schema_name.table_name>')
ORDER BY c.column_id;

Here’s the result:

syscolumns

This is how you get the indexes for a table (which may include primary keys):

SELECT i.name AS index_name
    ,i.type_desc
    ,is_unique
    ,ds.type_desc AS filegroup_or_partition_scheme
    ,ds.name AS filegroup_or_partition_scheme_name
    ,ignore_dup_key
    ,is_primary_key
    ,is_unique_constraint
    ,fill_factor
    ,is_padded
    ,is_disabled
    ,allow_row_locks
    ,allow_page_locks
FROM sys.indexes AS i
INNER JOIN sys.data_spaces AS ds ON i.data_space_id = ds.data_space_id
WHERE is_hypothetical = 0 AND i.index_id <> 0 
AND i.object_id = OBJECT_ID('<schema_name.table_name>');

Here’s an example result:

sysindexes

And finally, here’s how you get info on the foreign keys:

SELECT 
    f.name AS foreign_key_name
   ,OBJECT_NAME(f.parent_object_id) AS table_name
   ,COL_NAME(fc.parent_object_id, fc.parent_column_id) AS constraint_column_name
   ,OBJECT_NAME (f.referenced_object_id) AS referenced_object
   ,COL_NAME(fc.referenced_object_id, fc.referenced_column_id) AS referenced_column_name
   ,is_disabled
   ,delete_referential_action_desc
   ,update_referential_action_desc
FROM sys.foreign_keys AS f
INNER JOIN sys.foreign_key_columns AS fc 
   ON f.object_id = fc.constraint_object_id 
WHERE f.parent_object_id = OBJECT_ID('<schema_name.table_name>');

Here’s the result of that:

sysforeign_keys

So even though these queries aren’t trivial to cook up, you can find just about anything you need from the Querying the SQL Server System Catalog FAQ, and just adapt it from there.

One Query to Rule Them

If you’re going to do something like code generation, you probably want to build one query that retrieves all the above metadata in one go. You can do that by combining the above queries. Fortunately, I’ve done that for you. Here you go:

SELECT
	-- columns / data types
	c.name AS column_name
    ,c.column_id
    ,SCHEMA_NAME(t.schema_id) AS type_schema
    ,t.name AS type_name
    ,c.max_length
    ,c.precision
    ,c.scale
	-- primary key / indexes
	,i.name AS index_name
    ,is_identity
	,i.is_primary_key
	-- foreign key
    ,f.name AS foreign_key_name
   ,OBJECT_NAME (f.referenced_object_id) AS referenced_object
   ,COL_NAME(fc.referenced_object_id, fc.referenced_column_id) AS referenced_column_name
FROM sys.columns AS c 
INNER JOIN sys.types AS t
	ON c.user_type_id=t.user_type_id
LEFT OUTER JOIN sys.index_columns AS ic
	ON ic.object_id = c.object_id
	AND c.column_id = ic.column_id
LEFT OUTER JOIN sys.indexes AS i
	ON i.object_id = ic.object_id
	AND i.index_id = ic.index_id
LEFT OUTER JOIN sys.foreign_key_columns AS fc
	ON fc.parent_object_id = c.object_id
	AND COL_NAME(fc.parent_object_id, fc.parent_column_id) = c.name
LEFT OUTER JOIN sys.foreign_keys AS f
	ON f.parent_object_id = c.object_id
	AND fc.constraint_object_id = f.object_id
WHERE c.object_id = OBJECT_ID('dbo.Book')
ORDER BY c.column_id;

Here’s what you’ll get:

sysquerycombined

That includes column names, column types (along with stuff like decimal precision), indexes, primary keys, auto-increment (that’s is_identity), and foreign key info (constraint name, referenced table, and referenced column).

I’ve only tested this on a very simple scenario, so I’m pretty sure there are improvements to be made. While this can be considered a starting point, feedback is more than welcome.

On Mystery Meat Navigation and Unusability

This article was originally posted here at Programmer’s Ranch on 12th September 2013. It has been updated since a lot of the original examples are no longer available.

Hello folks! 🙂

Today I’m going to talk about Mystery Meat Navigation (MMN). This term was invented 15 years ago by Vincent Flanders of Web Pages That Suck. It refers to a horrible practice of filling a website’s navigation with meaningless icons. When a user moves his mouse over one of these icons, the icon changes or pops up some text, revealing what it really does.

A classic analogy of mystery meat navigation (which seems to have mostly disappeared from the web) is a road sign that initially looks completely blank, but changes to indicate where you’re going just as you drive past it.

Even now, 15 years later, MMN is still used on the web. Even reputable web design companies here in Malta have fallen in the MMN trap. Alert eBusiness, for instance, used to have the following navigation bar:

alert-mmn

Right, so what do those icons mean? The last one seems pretty clear: a shopping cart. Mousing over it reveals it stands for Alert Payment Gateway, which is close enough. But what about the rest? The first one is a mouse, for instance. Would it ever cross your mind that it actually means “Web Design”?

Another example: Pcionix (now defunct):

pcionix-mmn

The home icon is pretty obvious, so that can be forgiven. But a pie chart that stands for SEO – seriously?

But this, from design.com.mt, is even worse:

design-mmn

This has got to be the worst of them all. Whereas you might be able to somehow guess what the icons in the other sites mean, the navigation here is hidden behind meaningless numbers that you again have to mouse over to understand.

It gets worse: there are videos on YouTube of sites with iconic navigation that actually floats around, so you actually have to find out where that “About Us” cube thingy moved to (examples: Mandarina DuckQualcomm).

So why is MMN bad? In case it isn’t obvious, it is very annoying for users to have to click on stuff to figure out what the page offers. A website should give a clear indication of how it is structured, without the user needing to interact with it just to get an idea. Imagine you’re driving and need to interact with a bunch of direction signs (such as these) one by one to get an idea of the places in the area. Then, after sifting through a dozen, you forget what you saw earlier and have to go back and interact with them again. Sorry, the “just a click away” idea is not an excuse when it comes to navigation, which is really a website’s backbone.

Another great example comes from feedback that Vincent Flanders received, and illustrates how MMN would be if applied to a business’s answering machine:

“You’ve reached XYZ Corporation. To find out what option #1 is, press 1. To find out what option #2 is, press 2. (Etc….) If you’d like to continue doing business with our company after we’ve slapped you around and wasted your valuable time, press 9”

MMN is a slap in the face of usability. It shows meaningless icons in the place of important navigational information. What could possibly worse?

The only thing worse than showing meaningless icons is not showing any icons at all! That’s pretty much the direction taken by Windows 8’s notorious alternate UI, formerly known as Metro. One of its design principles is “Do more with less” which includes “Put content before chrome”. In this case the “chrome” refers to the stuff that makes the application – menus, the ‘X’ button at the top-right, toolbars, etc. So basically you end up with something like this:

ubuntu-pdf-metro

That’s the default PDF viewer on Windows 8 – one full screen Windows 8 Style (the new name for Metro) app with the PDF content and nothing else, not even an ‘X’ to close it. In fact Windows 8 users are somehow expected to know beforehand (“by osmosis”, as this Windows 8.1 review puts it) that to close a Windows 8 Style app you have to grab it from the top and drag downwards with your mouse. Contrast this with the same PDF viewed on Windows 7:

ubuntu-pdf-win7

Needless to say, everything that you can do with a PDF is immediately accessible either from the toolbars or via the menus. There is no hidden stuff, no needing to drag your mouse into a corner to open some Start Screen or Charms Bar. See, the program actually shows you what it can do, and for new users that’s important. The “Content before Chrome” idea is wrong precisely because when you use a program, you want to do stuff, not just see stuff.

So it’s no wonder that Microsoft seems to have made a U-turn on its Windows 8 Style design stuff. If MMN is an example of bad usability, this Windows 8 abomination is an example of… unusability.

XML Serialization in C#

This article was originally posted here at Programmer’s Ranch on 6th November 2013.

Hi guys and gals! 🙂

In this article, we’re going to see how to do XML serialization, which is really just a fancy way of saying we want to load and save objects as files in XML format.

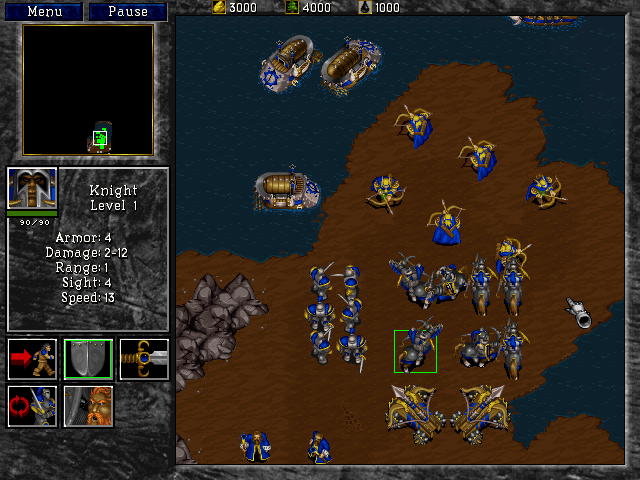
So you see, I’ve been a big fan of Warcraft 2 for a long time… probably about 15 years. In this game, you command different units (e.g. peasants, knights, etc), and each of them has different attributes such as Damage, Speed, etc. For instance, this is the mage:

csxmlser-war2-mage

Don’t mess with that guy – he can turn you into a sheep! And here’s the knight… not exactly a mild-mannered fellow, either:

csxmlser-war2-knight

If we represent those units and their attributes in XML, we might end up with something like this (I took out some of the extra crap that appears at the beginning when you actually save a file using XML serialization):

<UnitDatabase>
  <units>
    <Unit>
      <Name>Mage</Name>
      <Armor>0</Armor>
      <MinDamage>5</MinDamage>
      <MaxDamage>9</MaxDamage>
      <Range>2</Range>
      <Sight>9</Sight>
      <Speed>8</Speed>
    </Unit>
    <Unit>
      <Name>Knight</Name>
      <Armor>4</Armor>
      <MinDamage>2</MinDamage>
      <MaxDamage>12</MaxDamage>
      <Range>1</Range>
      <Sight>4</Sight>
      <Speed>13</Speed>
    </Unit>
  </units>
</UnitDatabase>

So, let’s see how we can actually read and write a file like this in C#. Create a new Console Application in your favourite IDE.

We first need to create a class to represent our units with their attributes. Create a class and call it Unit. For convenience, we can implement the attributes as auto-implemented properties as follows:

public String Name { get; set; }
public int Armor { get; set; }
public int MinDamage { get; set; }
public int MaxDamage { get; set; }
public int Range { get; set; }
public int Sight { get; set; }
public int Speed { get; set; }

This is just a quick alternative to declaring a member variable and a corresponding read-write property (available from .NET 3.0 onwards). For example, the Name property above is more or less equivalent to the following (just for demonstration – don’t actually add it to your code):

private String name;

public String Name
{
    get
    {
        return this.name;
    }
    set
    {
        this.name = value;
    }
}

Next, add a constructor to set the attributes, so we can easily create Unit instances from our main program code:

public Unit(String name, int armor, int minDamage, int maxDamage,
    int range, int sight, int speed)
{
    this.Name = name;
    this.Armor = armor;
    this.MinDamage = minDamage;
    this.MaxDamage = maxDamage;
    this.Range = range;
    this.Sight = sight;
    this.Speed = speed;
}

Now we need to create another class to hold an array of these units. Create a new class and call it UnitDatabase (admittedly a bit of a poor choice of a name, since it’s not actually a database, but anyway). Give it a Units property as follows:

public Unit[] Units { get; set; }

A constructor to assign this directly can also be pretty convenient. Add the following:

public UnitDatabase(Unit[] units)
{
    this.Units = units;
}

Now we can implement our loading and saving code in UnitDatabase itself. Start by adding the code to save the UnitDatabase to a file:

public void Save(String filename)
{
    XmlSerializer ser = new XmlSerializer(typeof(UnitDatabase));

    using (StreamWriter sw = File.CreateText(filename))
        ser.Serialize(sw, this);
}

You can see that we’re making use of the XmlSerializer class. The file is saved by using its Serialize() method, which takes a TextWriter and the object to serialize. The StreamWriter returned by File.CreateText() quite conveniently is a subclass of TextWriter, so we can pass it as the first parameter to Serialize(). The second parameter is this: the UnitDatabase itself.

To get this code to compile, you’ll have to add the following using statements at the top:

using System.Xml.Serialization;
using System.IO;

Loading an XML file as a UnitDatabase is just as easy. In this case we make the method static since it isn’t tied to any particular UnitDatabase instance:

public static UnitDatabase Load(String filename)
{
    XmlSerializer ser = new XmlSerializer(typeof(UnitDatabase));
    
    using (StreamReader sr = File.OpenText(filename))
        return ser.Deserialize(sr) as UnitDatabase;
}

You can see that we’re still using the XmlSerializer, but this time we use the Deserialize() method to read the file from disk and create a UnitDatabase from it. Deserialize() takes a TextReader, which again is a base class of the StreamReader that we get by calling File.OpenText(), so everything fits like magic. Deserialize() returns an Object, so as a last touch we cast this to a UnitDatabase using the as keyword. It’s just the same as writing it like this:

return (UnitDatabase) ser.Deserialize(sr);

That’s all we need! Now, let’s add some functionality to make it easy to write our units to the console output. All classes inherit from Object, and Object defines this ToString() method which we can use to return a string representation of our objects. This is very convenient in our case, so we can implement Unit‘s ToString() method as follows:

public override string ToString()
{
    StringBuilder sb = new StringBuilder();
    sb.AppendFormat("Name:      {0}", this.Name);
    sb.AppendLine();
    sb.AppendFormat("Armor:     {0}", this.Armor);
    sb.AppendLine();
    sb.AppendFormat("MinDamage: {0}", this.MinDamage);
    sb.AppendLine();
    sb.AppendFormat("MaxDamage: {0}", this.MaxDamage);
    sb.AppendLine();
    sb.AppendFormat("Range:     {0}", this.Range);
    sb.AppendLine();
    sb.AppendFormat("Sight:     {0}", this.Sight);
    sb.AppendLine();
    sb.AppendFormat("Speed:     {0}", this.Speed);
    sb.AppendLine();
    
    return sb.ToString();
}

Note the override keyword in the method’s signature. This means that we are replacing ToString()‘s default functionality (which usually just returns the name of the class) with our own, in this case showing the unit’s name and attributes.

Let’s do the same for UnitDatabase. In this case we return a concatenation of all the units’ string representations:

public override string ToString()
{
    StringBuilder sb = new StringBuilder();
    foreach (Unit unit in this.Units)
        sb.AppendLine(unit.ToString());
    return sb.ToString();
}

To compile this code, you’ll need to add the following line at the top of both files (because of the StringBuilder):

using System.Text;

Now all we have left to do is write code in Main() that actually uses these classes. We can start by creating our two units:

Unit mage = new Unit("Mage", 0, 5, 9, 2, 9, 8);
Unit knight = new Unit("Knight", 4, 2, 12, 1, 4, 13);

We can then combine these into an array using collection initializer syntax (see “C# Basics: Morse Code Converter Using Dictionaries” if you forgot what that is):

Unit[] units = new Unit[] { mage, knight };

Then, we create a UnitDatabase out of this array:

UnitDatabase db = new UnitDatabase(units);

…and finally save it to a file called units.xml:

db.Save("units.xml");

You can now press F5 to run the program and see that it works. If you’re using Visual Studio, you might have run into this error:

csxmlser-ctor-error

That’s because XML serialization needs classes to have an empty constructor. SharpDevelop creates one for you when you create a new class, but Visual Studio does not. So if you’re missing those, add them in. One for Unit:

public Unit()
{

}

…and one for UnitDatabase:

public UnitDatabase()
{

}

Good. Now press F5 to run the program, and then go to the project’s bin\Debug folder to check that the units.xml file has been created. When you open it, it should look like this:

<?xml version="1.0" encoding="utf-8"?>
<UnitDatabase xmlns:xsi="http://www.w3.org/2001/XMLSchema-instance" xmlns:xsd="http://www.w3.org/2001/XMLSchema">
  <Units>
    <Unit>
      <Name>Mage</Name>
      <Armor>0</Armor>
      <MinDamage>5</MinDamage>
      <MaxDamage>9</MaxDamage>
      <Range>2</Range>
      <Sight>9</Sight>
      <Speed>8</Speed>
    </Unit>
    <Unit>
      <Name>Knight</Name>
      <Armor>4</Armor>
      <MinDamage>2</MinDamage>
      <MaxDamage>12</MaxDamage>
      <Range>1</Range>
      <Sight>4</Sight>
      <Speed>13</Speed>
    </Unit>
  </Units>
</UnitDatabase>

It’s got some more stuff in the first two lines than I showed you at the beginning, but that’s just added there to make it a valid XML document and you can just ignore it.

At the end of Main(), let us now add code to load the file and display the unit data:

UnitDatabase loadedDb = UnitDatabase.Load("units.xml");
Console.WriteLine(loadedDb.ToString());
Console.ReadLine();

Press F5 to see the result:

csxmlser-result

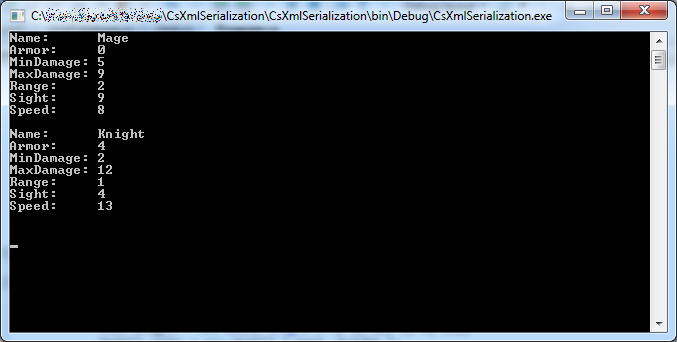
If you omit the ToString() as follows:

Console.WriteLine(loadedDb);

…then the program works all the same, because Console.WriteLine() uses the ToString() method of the objects it is meant to write.

Great! 🙂 In this article, we have seen how we can very easily save (serialize) objects as XML files, and load (deserialize) them back from XML files. To do this we need classes that match the XML structure, as well as the handy XmlSerializer class. Classes to be serialized must have a parameterless constructor. It is possible to do a lot more with XML serialization – there are several attributes that allow you to control the actual XML nodes and attributes that are written to the file.

We have also seen other aspects of C#, such as the ToString() method available in every object; how to override inherited methods; the as keyword which is an elegant alias for type casting; and auto-implemented properties.

Thanks for reading, and come visit Programmer’s Ranch Gigi Labs again in future! 🙂

To Always Use Braces for Conditionals and Loops… or not

This article was originally posted here at Programmer’s Ranch on 25th September 2013. The original article mentions Jesse Liberty as “one of many who suggest always using braces” with conditional statements. However, Jesse Liberty changed his view after reading the article (as you can see in the comments of the original article). As such, the article presented here has been slightly edited to remove this statement.

Hi everyone! 🙂

While following a number of Pluralsight courses by Jesse Liberty (which I highly recommend), I was reminded of the long-running debate about whether one should always use braces when control flow statements (conditionals and loops) are involved. So let’s say we have the following conditional:

if (x == 0)
    Console.WriteLine("x is zero");
else if (x < 0)
    Console.WriteLine("x is negative");
else if (x > 0)
    Console.WriteLine("x is positive");

The proponents of the always-use-braces camp would have us write them like this:

if (x == 0)
{
    Console.WriteLine("x is zero");
}
else if (x < 0)
{
    Console.WriteLine("x is negative");
}
else if (x > 0)
{
    Console.WriteLine("x is positive");
}

In this article, I’m going to discuss the advantages and disadvantages of this approach, as well as my personal opinion based on my experience. I want to say from the beginning that this article is subjective and not completely factual or objective – so take it for what it is. There is no general consensus on this matter precisely because it is a matter of personal taste.

Brace styles

Braces (or curly brackets) are a feature in just about any programming language that uses the C-style syntax, including C, C++, Java, C#, JavaScript, PHP, and many others. They define a scoped block that can be executed as a single statement as part of control flow (conditionals and loops). There are many different styles in which they can be used.

The Java folks seem to like this kind of style:

if (x == 0) {
    Console.WriteLine("x is zero");
}

The .NET camp, on the other hand, seems to prefer aligning braces vertically:

if (x == 0)
{
    Console.WriteLine("x is zero");
}

If you have just one statement, you can technically leave out the braces, so you can write your code like this:

if (x == 0)
    Console.WriteLine("x is zero");

…or like this.

if (x == 0) Console.WriteLine("x is zero");

Personally, I think the first and last options aren’t the best in terms of readability (especially when code becomes complex) so I’ll focus on the second and third. I normally use the second option (with braces) when I have multiple statements, and the third option (no braces) when I have just one. Many people recommend always using braces, and dismiss the third option as bad practice. Let’s take a look at the reasons why.

If you need to add statements, you’ll find the braces ready

So let’s take the same example as before, where you have this statement:

if (x == 0)
    Console.WriteLine("x is zero");

If you need to add additional statements to be executed as part of the conditional, the braces will have to be added anyway. Some people recommend always using braces so that you’ll find them ready when you need to add additional statements.

In that case, I suppose, we shouldn’t use empty element syntax in XML:

<RowDefinition Height="30" />

…and instead always write our tags in full:

<RowDefinition Height="30"></RowDefinition>

…simply because we might need to add something inside the element at some point. I think this is a very weak argument, because it disregards a language feature that may be very convenient, and at the same time bloats code with something that adds no meaning to the code. Take a look at the first two code snippets in this article – the one that uses braces is twice as long (in terms of lines) as the other one. And for what? Because people are too lazy to type in the braces when they are eventually needed? Wat.

Adding statements can be error-prone

Another reason why omitting braces is considered bad practice is that it may be easy to introduce logical errors when maintaining such code (see this question on Programmers StackExchange and this other one on Stack Overflow). Let’s say you have this:

if (x == 0)
    Console.WriteLine("x is zero");

Then, you add an additional statement intended to be within the conditional, and you do it like this:

if (x == 0)
    Console.WriteLine("x is zero");
    Console.WriteLine(" which means it's neither positive nor negative");

Oops! The second Console.WriteLine() isn’t actually part of the conditional, so it always gets executed, no matter what. This is a valid argument. But let’s dissect it a little further.

First, let’s start again from our simple single-line conditional:

if (x == 0)
    Console.WriteLine("x is zero");

Now, if you want to add code at this point, you have two courses of action. If you want to add statements as part of the conditional, you know that there’s just one statement and no braces, so adding them should be a pretty automatic response:

if (x == 0)
{
    Console.WriteLine("x is zero");
    Console.WriteLine(" which means it's neither positive nor negative");
}

On the other hand, if you want to add a statement that is not a part of the conditional, you add it at the same level as the if statement:

if (x == 0)
    Console.WriteLine("x is zero");
Console.WriteLine(" which means it's neither positive nor negative");

Even in absence of braces, the indentation shows clearly that one statement belongs to the conditional and the other does not. So actually, when seeing this kind of code:

if (x == 0)
    Console.WriteLine("x is zero");
    Console.WriteLine(" which means it's neither positive nor negative");

…I can’t help but think that the readability problem (which results in incorrect control flow) is one of indentation, not of whether to use braces or not.

I can certainly imagine beginning programmers making this kind of mistake, but I find it hard to believe that more seasoned programmers find it hard to read basic conditionals. As one of the answers to this question states:

“I even find it implausible that this should be a common mistake: blocks are a fundamental part of programming. Block level resolution and scoping is an automatic, ingrained mental process for programmers. The brain just does it (otherwise, reasoning about programming would be much harder). There is no additional mental effort required to remember putting the braces: the programmer also remembers to indent the newly added statement correctly, after all; so the programmer has already mentally processed that a block is involved.” — Konrad Rudolph

Also, one of the sections in this article states that:

“Programmers with enough discipline to always notice the braces (and put them in when needed) don’t need this idiom [always using braces].

“Auto-indent editors make it obvious whether your new statement is part of the else clause, making it unlikely you’ll have the bug this idiom tries to prevent.”

Summary

Personally, I think that using braces when they aren’t necessary is a waste of space, resulting in a lot of unnecessary lines of code. I use them when needed, and don’t use them for single statements. I find nothing wrong with omitting braces when they aren’t needed. This has worked for me for many years, and you may or may not agree with me. Different people find themselves comfortable using different approaches, and there is no general consensus on what is best.

So find out what works best for you, and don’t let anyone tell you how you should write your code based on subjective arguments. While you should definitely learn from more experienced programmers and best practices based on rational and logical arguments, be practical and don’t get too religious about your code.