Tag Archives: Programmer’s Ranch

Displaying Text in SDL2 with SDL_ttf

This is an updated version of the article originally posted on 29th March 2014 at Programmer’s Ranch. The source code for this article is available at the Gigi Labs BitBucket repository.

In this article, we’re going to learn how we can write text in our window. To do this, we’ll use the SDL_ttf library. Setting it up is almost identical to how we set up SDL_image in “Loading Images in SDL2 with SDL_image“. You need to download the Visual C++ development libraries from the SDL_ttf homepage:

sdl2ttf-download

Then, extract the lib and include folders over the ones you have in your sdl2 folder. You should end up with an SDL_ttf.h in your include folder, and you should get SDL2_ttf.lib and a few DLLs including SDL_ttf.dll in your lib\x86 and lib\x64 folders.

In your Linker -> Input, you’ll then need to add SDL2_ttf.lib:

sdl2ttf-linker-input

Good. Now, let’s start with the following code which is a modified version of the code from about halfway through “Displaying an Image in an SDL2 Window“:

#include <SDL.h>

int main(int argc, char ** argv)
{
    bool quit = false;
    SDL_Event event;

    SDL_Init(SDL_INIT_VIDEO);

    SDL_Window * window = SDL_CreateWindow("SDL_ttf in SDL2",
        SDL_WINDOWPOS_UNDEFINED, SDL_WINDOWPOS_UNDEFINED, 640,
        480, 0);
    SDL_Renderer * renderer = SDL_CreateRenderer(window, -1, 0);

    while (!quit)
    {
        SDL_WaitEvent(&event);

        switch (event.type)
        {
            case SDL_QUIT:
                quit = true;
                break;
        }
    }

    SDL_DestroyRenderer(renderer);
    SDL_DestroyWindow(window);
    SDL_Quit();

    return 0;
}

The first thing we need to do in order to use SDL_ttf is include the relevant header file:

#include <SDL_ttf.h>

Then, we initialise the SDL_ttf library right after we call SDL_Init():

TTF_Init();

…and we clean it up just before we call SDL_Quit():

TTF_Quit();

Right after we initialise our renderer, we can now load a font into memory:

 TTF_Font * font = TTF_OpenFont("arial.ttf", 25);

TTF_OpenFont() takes two parameters. The first is the path to the TrueType Font (TTF) that it needs to load. The second is the font size (in points, not pixels). In this case we’re loading Arial with a size of 25.

A font is a resource like any other, so we need to free the resources it uses near the end:

TTF_CloseFont(font);

We can now render some text to an SDL_Surface using TTF_RenderText_Solid(). which takes the font we just created, a string to render, and an SDL_Color which we are passing in as white in this case:

 SDL_Color color = { 255, 255, 255 };
 SDL_Surface * surface = TTF_RenderText_Solid(font,
  "Welcome to Gigi Labs", color);

We can then create a texture from this surface as we did in “Displaying an Image in an SDL2 Window“:

    SDL_Texture * texture = SDL_CreateTextureFromSurface(renderer, surface);

And yet again, we should not forget to release the resources we just allocated near the end, so let’s do that right away:

 SDL_DestroyTexture(texture);
 SDL_FreeSurface(surface);

Now all we need is to actually render the texture. We’ve done this before; just add the following just before the end of your while loop:

  SDL_RenderCopy(renderer, texture, NULL, NULL);
  SDL_RenderPresent(renderer);

Okay, now before we actually run this program, we need to put our Arial TTF font somewhere where our program can find it. Go to C:\Windows\Fonts, and from there copy the Arial font into the Debug folder where your executable is compiled. This will result in several TTF files, although we’re only going to use arial.ttf. We will also need the usual SDL2.dll, along with the SDL_ttf DLLs (libfreetype-6.dll, zlib1.dll and SDL2_ttf.dll):

sdl2ttf-fonts

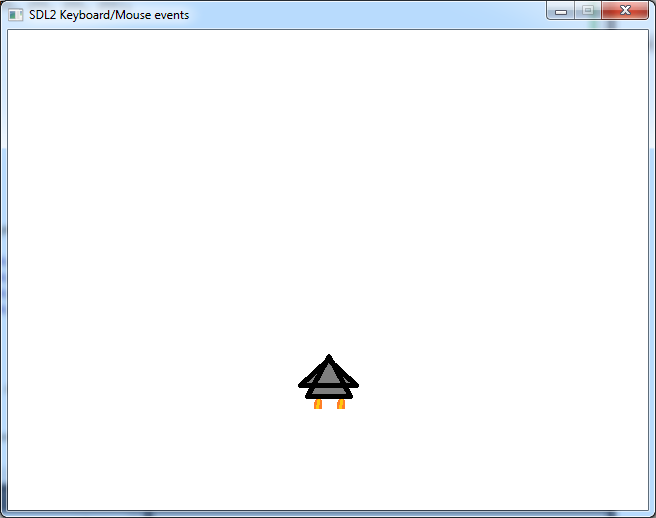
Great, now let’s admire the fruit of our work:

sdl2ttf-blocky2

Nooooooooooooooo! This isn’t quite what we were expecting, right? This is happening because the texture is being stretched to fill the contents of the window. The solution is to supply the dimensions occupied by the text in the dstrect parameter of SDL_RenderCopy() (as we did in “Displaying an Image in an SDL2 Window“). But how can we know these dimensions?

If you check out Will Usher’s SDL_ttf tutorial, you’ll realise that a function called SDL_QueryTexture() can give you exactly this information (and more). So before our while loop, let’s add the following code:

    int texW = 0;
    int texH = 0;
    SDL_QueryTexture(texture, NULL, NULL, &texW, &texH);
    SDL_Rect dstrect = { 0, 0, texW, texH };

Finally, we can pass dstrect in our call to SDL_RenderCopy():

SDL_RenderCopy(renderer, texture, NULL, &dstrect);

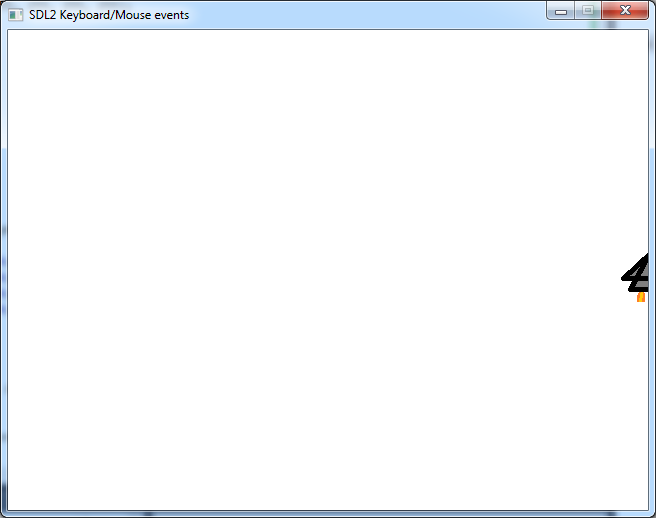
Let’s run the program now:

sdl2ttf-text2

Much better! 🙂

In this article, we learned how to use the SDL_ttf to render text using TTF fonts in SDL2. Using the SDL_ttf library in a project was just the same as with SDL_image. To actually use fonts, we first rendered text to a surface, then passed it to a texture, and finally to the GPU. We used SDL_QueryTexture() to obtain the dimensions of the texture, so that we could render the text in exactly as much space as it needed. We also learned how we can set up our project to use the same path regardless of whether we’re running from Visual Studio or directly from the executable.

Introduction to Indexing and Search

This article was originally posted as “Indexing and Search (C#)” on 15th June 2013 at Programmer’s Ranch. It has been slightly updated here. The source code is available at the Gigi Labs BitBucket repository.

This article is about indexing and search: what is it that allows you to search through thousands of documents in less than a second?

In order to understand how indexing works, we will use an example where we have the following three documents:

doc1.txt contains:
The Three Little Pigs
doc2.txt contains:
The Little Red Riding Hood
doc3.txt contains:
Beauty And The Beast

Now, let’s say you want to find out which of these documents contain a particular word, e.g. “Little”. The easiest way to do this would be to go through each word in each document, one by one, and see if the word “Little” is in that document. Conceptually, we’re talking about this:

indexingsearch-donkeyway

Doing this in C# is very easy:

            string[] documents = { "doc1.txt", "doc2.txt", "doc3.txt" };

            string keyword = Console.ReadLine();

            foreach (string document in documents)
            {
                if (File.ReadAllText(document).Contains(keyword))
                {
                    Console.WriteLine(document);
                }
            }

            Console.ReadKey(true);

Remember to put in a using System.IO; at the top, to be able to use File. If you press F5 and test this program, you’ll see that it works:

indexingsearch-donkeyout

However, this method isn’t good because it will take longer as the documents get larger (more words) and more numerous (more documents).

The proper way to process search requests quickly is to build an index. This would look something like this:

indexingsearch-index

The index stores a list of all words, each with a list of documents that contain it. If you compare it with the first diagram, you’ll notice that we reversed the mapping of words and documents; this is why we call this an inverted index.

We can do this in C# by first building the index (remember to add using System.Collections.Generic; at the top):

            // Build the index

            string[] documents = { "doc1.txt", "doc2.txt", "doc3.txt" };
            Dictionary<string, List<string>> index = new Dictionary<string, List<string>>();

            foreach (string document in documents)
            {
                string documentStr = File.ReadAllText(document);
                string[] words = documentStr.Split();

                foreach (string word in words)
                {
                    if (!index.ContainsKey(word))
                        index[word] = new List<string>();

                    index[word].Add(document);
                }
            }

…and then using the index to search the documents quickly and efficiently:

            // Query the index

            string keyword = Console.ReadLine();

            if (index.ContainsKey(keyword))
            {
                foreach (string document in index[keyword])
                {
                    Console.WriteLine(document);
                }
            }
            else
                Console.WriteLine("Not found!");

            Console.ReadKey(true);

In this way, there is no need to search every document for the keyword each time the user wants to search for a word. The keyword is simply located in the index (if it exists), and a list of documents that contain it is immediately available:

indexingsearch-indexout

This was a simple proof of concept of how indexing and search works, but here are a few additional notes:

  • The index is usually built as documents are added to it, and then stored in one or more files (unlike in this program, where the index is rebuilt every time the program is run – that’s just to make the illustration easier).
  • Words such as “and” and “the” which are very common are called stop words and are normally excluded from the index.
  • It is common practice to make searches case insensitive, e.g. by converting indexed words and query keywords to lowercase.

This article presented the concept of indexing and how it is used to search for a single keyword. Although there are other techniques used in text search, indexing is definitely one of the most important, and has many applications including databases and text retrieval (e.g. search engines). A fundamental concept to remember is that the whole point of indexing is to make search fast!

Converting an Image to Grayscale using SDL2

This article was originally posted on 22nd February 2014 at Programmer’s Ranch. It has been slightly updated here. The source code is available at the Gigi Labs BitBucket repository.

In the previous article, “SDL2 Pixel Drawing“, we saw how to draw pixels onto a blank texture that we created in code. Today, on the other hand, we’ll see how we can manipulate pixels on an existing image, such as a photo we loaded from disk. We’ll also learn how to manipulate individual bits in an integer using what are called bitwise operators, and ultimately we’ll convert an image to grayscale.

The first thing we’re going to do is load an image from disk. Fortunately, we’ve covered that already in “Loading Images in SDL2 with SDL_image“, so refer back to it to set things up. We’ll also start off with the code from the article, which, adapted a little bit, is this:

#include <SDL.h>
#include <SDL_image.h>

int main(int argc, char ** argv)
{
    bool quit = false;
    SDL_Event event;

    SDL_Init(SDL_INIT_VIDEO);
    IMG_Init(IMG_INIT_JPG);

    SDL_Window * window = SDL_CreateWindow("SDL2 Grayscale",
        SDL_WINDOWPOS_UNDEFINED, SDL_WINDOWPOS_UNDEFINED, 640, 480, 0);
    SDL_Renderer * renderer = SDL_CreateRenderer(window, -1, 0);
    SDL_Surface * image = IMG_Load("PICT3159.JPG");
    SDL_Texture * texture = SDL_CreateTextureFromSurface(renderer,
        image);

    while (!quit)
    {
        SDL_WaitEvent(&event);

        switch (event.type)
        {
            case SDL_QUIT:
                quit = true;
                break;
        }

        SDL_RenderCopy(renderer, texture, NULL, NULL);
        SDL_RenderPresent(renderer);
    }

    SDL_DestroyTexture(texture);
    SDL_FreeSurface(image);
    SDL_DestroyRenderer(renderer);
    SDL_DestroyWindow(window);
    IMG_Quit();
    SDL_Quit();

    return 0;
}

You see, the problem here is that we can’t quite touch the texture pixels directly. So instead, we need to work a little bit similarly to “SDL2 Pixel Drawing“: we create our own texture, and then copy the surface pixels over to it. So we throw out the line calling SDL_CreateTextureFromSurface(), and replace it with the following:

    SDL_Texture * texture = SDL_CreateTexture(renderer,
        SDL_PIXELFORMAT_ARGB8888, SDL_TEXTUREACCESS_STATIC,
        image->w, image->h);

Then, at the beginning of the while loop, add this:

        SDL_UpdateTexture(texture, NULL, image->pixels,
            image->w * sizeof(Uint32));

If you try and run program now, it will pretty much explode. That’s because our code is assuming that our image uses 4 bytes per pixel (ARGB – see “SDL2 Pixel Drawing“). That’s something that depends on the image, and this particular JPG image is most likely 3 bytes per pixel. I don’t know much about the JPG format, but I’m certain that it doesn’t support transparency, so the alpha channel is out.

The good news is that it’s possible to convert the surface into one that has a familiar pixel format. To do this, we use SDL_ConvertSurfaceFormat(). Add the following before the while loop:

    SDL_Surface * originalImage = image;
    image = SDL_ConvertSurfaceFormat(image, SDL_PIXELFORMAT_ARGB8888, 0);
    SDL_FreeSurface(originalImage);

What this does is take our surface (in this case the one that image points to) and return an equivalent surface with the pixel format we specify. Now that the new image has the familiar ARGB format, we can easily access and manipulate the pixels. Add the following after the line you just added (before the while loop) to typecast the surface pixels from void * to Uint32 * which we can work with:

    Uint32 * pixels = (Uint32 *)image->pixels;

So far so good:

sdl2-grayscale-display-normal-image

Now, let’s add some code do our grayscale conversion. We’re going to convert the image to grayscale when the user presses the ‘G’ key, so let us first add some code within the switch statement to handle that:

        case SDL_KEYDOWN:
            switch (event.key.keysym.sym)
            {
            case SDLK_g:
                for (int y = 0; y < image->h; y++)
                {
                    for (int x = 0; x < image->w; x++)
                    {
                        Uint32 pixel = pixels[y * image->w + x];
                        // TODO convert pixel to grayscale here
                    }
                }
                break;
            }
            break;

This is where bit manipulation comes in. You see, each pixel is a 32-bit integer which in concept looks something like this (actual values are invented, just for illustration):

Alpha Red Green Blue
11111111 10110101 10101000 01101111

So let’s say we want to extract the Red component. Its value is 10110101 in binary, or 181 in decimal. But since it’s in the third byte from right, its value is much greater than that. So we first shift the bits to the right by 16 spaces to move it to the first byte from right:

Alpha Red
00000000 00000000 11111111 10110101

…but we still can’t interpret the integer as just red, since the alpha value is still there. We want to extract just that last byte. To do that, we perform a bitwise AND operation:

Pixel 11111111 10110101
Mask 00000000 11111111
Pixel AND Mask 00000000 10110101

We do an AND operation between our pixel value and a value where only the last byte worth of bits are set to 1. That allows us to extract our red value.

In code, this is how it works:

                            Uint8 r = pixel >> 16 & 0xFF;
                            Uint8 g = pixel >> 8 & 0xFF;
                            Uint8 b = pixel & 0xFF;

The >> operator shifts bits to the right, and the & is a bitwise AND operator. Each colour byte is shifted to the last byte and then ANDed with the value 0xFF, which is hexadecimal notation for what would be 255 in decimal, or 11111111 in binary. That way, we can extract all three colours individually.

We can finally perform the actual grayscaling operation. A simple way to do this might be to average the three colours and set each component to that average:

                            Uint8 v = (r + g + b) / 3;

Then, we pack the individual colour bytes back into a 32-bit integer. We follow the opposite method that we used to extract them in the first place: they are each already at the last byte, so all we need to do is left-shift them into position. Once that is done, we replace the actual pixel in the surface with the grayscaled one:

                            pixel = (0xFF << 24) | (v << 16) | (v << 8) | v;
                            pixels[y * image->w + x] = pixel;

If we now run the program and press the ‘G’ key, this is what we get:

sdl2-grayscale-average-grayscale

It looks right, doesn’t it? Well, it’s not. There’s an actual formula for calculating the correct grayscale value (v in our code), which according to Real-Time Rendering is:

grayscale-formula

The origin of this formula is beyond the scope of this article, but it’s due to the fact that humans are sensitive to different colours in different ways – in fact there is a particular affinity to green, hence why it is allocated the greatest portion of the pixel colour. So now all we have to do is replace the declaration of v with the following:

                            Uint8 v = 0.212671f * r + 0.715160f * g + 0.072169f * b;

And with this, the image appears somewhat different:

sdl2-grayscale-correct-grayscale

This approach gives us a more even distribution of grey shades – in particular certain areas such as the trees are much lighter and we can make out the details more easily.

That’s all, folks! 🙂 In this article, we learned how to convert an image to grayscale by working on each individual pixel. To do this, we had to resort to converting an image surface to a pixel format we could work with, and then copy the pixels over to a texture for display in the window. To actually perform the grayscale conversion, we learned about bitwise operators which assisted us in dealing with the individual colours. Finally, although averaging the colour channels gives us something in terms of shades of grey, there is a formula that is used for proper grayscale conversion.

SDL2 Pixel Drawing

This article was originally posted on 13th February 2014 at Programmer’s Ranch. It has been slightly updated here. The source code for this article is available at the Gigi Labs BitBucket repository.

Greetings! 🙂

In “Handling Keyboard and Mouse Events in SDL2“, we saw how we could handle keyboard and mouse events to allow the user to interact with whatever we are displaying on the screen. In today’s article, we’ll learn how to draw individual pixels onto our window, and we’ll use mouse events to create a drawing program similar to a limited version of Microsoft Paint.

We’ll start off with some code similar to that in “Showing an Empty Window in SDL2“:

#include <SDL.h>

int main(int argc, char ** argv)
{
    bool quit = false;
    SDL_Event event;

    SDL_Init(SDL_INIT_VIDEO);

    SDL_Window * window = SDL_CreateWindow("SDL2 Pixel Drawing",
        SDL_WINDOWPOS_UNDEFINED, SDL_WINDOWPOS_UNDEFINED, 640, 480, 0);

    while (!quit)
    {
        SDL_WaitEvent(&event);

        switch (event.type)
        {
            case SDL_QUIT:
                quit = true;
                break;
        }
    }

    SDL_DestroyWindow(window);
    SDL_Quit();

    return 0;
}

Since we’re going to draw pixels directly rather than load an image, our course of action in this article is going to be a little different from past articles. First, we need a renderer, so we use SDL_CreateRenderer() as we have been doing all along:

    SDL_Renderer * renderer = SDL_CreateRenderer(window, -1, 0);

But then, rather than creating a texture from a surface, we’re now going to create one from scratch using SDL_CreateTexture():

    SDL_Texture * texture = SDL_CreateTexture(renderer,
        SDL_PIXELFORMAT_ARGB8888, SDL_TEXTUREACCESS_STATIC, 640, 480);

We pass in several parameters. The first one is the renderer, and the last two are the width and height of the texture.

The second parameter, which we have set to SDL_PIXELFORMAT_ARGB8888, is the pixel format. There are many possible formats (see SDL_CreateTexture() documentation), but in this case we’re saying that each pixel is a 32-bit value, where there are 8 bits for alpha (opacity/transparency), 8 bits for red, 8 bits for green and 8 bits for blue. These four items are collectively known as channels (e.g. the alpha channel), so each channel consists of one byte and it can range between 0 and 255. The arrangement below thus represents a single pixel:

Alpha Red Green Blue
8 bits 8 bits 8 bits 8 bits

The SDL_TEXTUREACCESS_STATIC defines a method of accessing the texture. Since we’re storing our pixels in CPU memory and then copying them over to the GPU, static access is suitable. On the other hand, streaming access is used to allocate pixels in a back buffer in video memory, and that’s suitable for more complex scenarios.

Finally, we initialise a set of pixels that we’ll be copying onto the window. When we draw stuff, we’ll modify these pixels, and then they’ll be copied onto the window to reflect the update.

    Uint32 * pixels = new Uint32[640 * 480];

We’ll need to clean up all the stuff we just allocated, so add the following just before the other cleanup calls at the end of the code:

    delete[] pixels;
    SDL_DestroyTexture(texture);
    SDL_DestroyRenderer(renderer);

At the beginning of the while loop, we may now add the following call:

        SDL_UpdateTexture(texture, NULL, pixels, 640 * sizeof(Uint32));

In this code, we are using SDL_UpdateTexture() to copy our pixels onto the window. We pass it our texture, a region of the texture to update (in our case NULL means to update the entire texture), our array of pixels, and the size in bytes of a single row of pixels (called the pitch). In our case, our window has a width of 640 pixels. Therefore a single row consists of 640 4-byte pixels, hence the multiplication.

At the end of our while loop, we may now render our texture as we have done in previous articles:

        SDL_RenderClear(renderer);
        SDL_RenderCopy(renderer, texture, NULL, NULL);
        SDL_RenderPresent(renderer);

Great. So far, we have… uh… this:

sdl2-pixel-drawing-grey

Let’s clear the background to white, so that we can draw black pixels over it. We could do that using SDL_SetRenderDrawColor() as we did in “Handling Keyboard and Mouse Events in SDL2“. But since we can now manipulate pixels directly, let’s try something. First, add this at the top:

#include <iostream>

Now, we can use the standard function memset() to overwrite our pixels. Add this right after the declaration of pixels:

memset(pixels, 255, 640 * 480 * sizeof(Uint32));

Good, it’s white now:

sdl2-pixel-drawing-white

Now, let’s add some code to draw black pixels when the mouse is clicked. First, add the following flag at the beginning of main():

    bool leftMouseButtonDown = false;

Then, add this inside the switch statement:

        case SDL_MOUSEBUTTONUP:
            if (event.button.button == SDL_BUTTON_LEFT)
                leftMouseButtonDown = false;
            break;
        case SDL_MOUSEBUTTONDOWN:
            if (event.button.button == SDL_BUTTON_LEFT)
                leftMouseButtonDown = true;
        case SDL_MOUSEMOTION:
            if (leftMouseButtonDown)
            {
                int mouseX = event.motion.x;
                int mouseY = event.motion.y;
                pixels[mouseY * 640 + mouseX] = 0;
            }
            break;

Right, so we’re keeping track of whether the left mouse button is pressed. When it’s pressed (SDL_MOUSEBUTTONDOWN), leftMouseButtonDown is set to true, and when it’s released (SDL_MOUSEBUTTONUP), leftMouseButtonDown is set to false.

If the mouse is moving (SDL_MOUSEMOTION) and the left mouse button is currently down, then the pixel at its location is set to black (or zero, which is the same thing). Note that I intentionally left out a break statement at the end of the SDL_MOUSEBUTTONDOWN case, so that the drawing code in SDL_MOUSEMOTION is executed along with its own.

So now we can draw our hearts out:

sdl2-pixel-drawing-final

Sweet! That was all we needed in order to draw pixels directly onto our window.

In this article, we learned how to draw pixels directly using SDL2. This involved first creating an SDL2 texture with a specified pixel format, then allocating an array to store those pixels, and finally copying the pixels from the array to the texture. We also used a variety of mouse events to allow the user to actually draw pixels onto the window with the mouse, which is like a simplified version of Microsoft Paint.

Handling Keyboard and Mouse Events in SDL2

This article was originally posted as “SDL2: Keyboard and Mouse Movement (Events)” at Programmer’s Ranch on 12th February 2014. It is slightly updated here. The source code and spaceship bitmap are available at the Gigi Labs BitBucket repository.

Hi there! 🙂

In this article, we’ll learn how to handle keyboard and mouse events, and we’ll use them to move an object around the window. Hooray! 🙂

We’ll start with an image. I made this 64×64 bitmap:

spaceship

As you can see, I can’t draw to save my life. But since this is a bitmap, we don’t need the SDL_image extension.

Once you have an image, you’ll want to create a new Visual Studio project, wire it up to work with SDL2, and then add some code to display a window and the spaceship in it. If you don’t remember how, these past articles should help:

  1. Setting up SDL2 with Visual Studio 2015
  2. Showing an Empty Window in SDL2
  3. Displaying an Image in an SDL2 Window

You should end up with code that looks something like this:

#include <SDL.h>

int main(int argc, char ** argv)
{
    // variables

    bool quit = false;
    SDL_Event event;
    int x = 288;
    int y = 208;

    // init SDL

    SDL_Init(SDL_INIT_VIDEO);
    SDL_Window * window = SDL_CreateWindow("SDL2 Keyboard/Mouse events",
        SDL_WINDOWPOS_UNDEFINED, SDL_WINDOWPOS_UNDEFINED, 640, 480, 0);
    SDL_Renderer * renderer = SDL_CreateRenderer(window, -1, 0);

    SDL_Surface * image = SDL_LoadBMP("spaceship.bmp");
    SDL_Texture * texture = SDL_CreateTextureFromSurface(renderer,
        image);
    SDL_FreeSurface(image);

    SDL_SetRenderDrawColor(renderer, 255, 255, 255, 255);

    // handle events

    while (!quit)
    {
        SDL_WaitEvent(&event);

        switch (event.type)
        {
        case SDL_QUIT:
            quit = true;
            break;
        }

        SDL_Rect dstrect = { x, y, 64, 64 };

        SDL_RenderClear(renderer);
        SDL_RenderCopy(renderer, texture, NULL, &dstrect);
        SDL_RenderPresent(renderer);
    }

    // cleanup SDL

    SDL_DestroyTexture(texture);
    SDL_DestroyRenderer(renderer);
    SDL_DestroyWindow(window);
    SDL_Quit();

    return 0;
}

You’ll also want to place spaceship.bmp into your Debug folder (along with SDL2.dll) so that the program can find the files it needs..

Once you actually run the program, you should see this:

sdl2-kbd-kickoff

I set the window’s background to white to match the spaceship’s white background by setting the clear colour using SDL_SetRenderDrawColor(), and then calling SDL_RenderClear() to clear the window to that colour.

In order to handle keyboard and mouse events, we need an SDL_Event. Well, what do you know: we have been using one all along, in order to take action when the window is closed. What we need now is to handle a different event type. So let’s add a new case statement after the one that handles SDL_QUIT:

            case SDL_KEYDOWN:

                break;

Within this case statement, let us now determine which key was actually pressed, and move the spaceship accordingly:

            case SDL_KEYDOWN:
                switch (event.key.keysym.sym)
                {
                    case SDLK_LEFT:  x--; break;
                    case SDLK_RIGHT: x++; break;
                    case SDLK_UP:    y--; break;
                    case SDLK_DOWN:  y++; break;
                }
                break;

If you now run the program, you’ll find that you can move the spaceship using the arrow keys:

sdl2-kbd-moving-slow

You’ll notice that it seems to move pretty slowly, and you have to keep pressing for quite a while to make any significant movement. Now, in your code, replace SDL_WaitEvent with SDL_PollEvent:

        SDL_PollEvent(&event);

Now, try running it again:

sdl2-kbd-moving-fast

Swoosh! In less than half a second, the spaceship hits the edge of the window. It’s actually too fast. To get this down to something manageable, add a small delay at the beginning of your while loop:

        SDL_Delay(20);

SDL_PollEvent() is better than SDL_WaitEvent() when you want to continuously check (i.e. poll) for events, but it consumes more CPU power (you can see this if you open Task Manager). SDL_WaitEvent() is okay when your window is mostly sitting idle so you don’t need to check for events that often.

Handling mouse events is also very easy. All you need to do is handle the appropriate event. Let’s see how to handle a mouse click:

            case SDL_MOUSEBUTTONDOWN:
                switch (event.button.button)
                {
                    case SDL_BUTTON_LEFT:
                        SDL_ShowSimpleMessageBox(0, "Mouse", "Left button was pressed!", window);
                        break;
                    case SDL_BUTTON_RIGHT:
                        SDL_ShowSimpleMessageBox(0, "Mouse", "Right button was pressed!", window);
                        break;
                    default:
                        SDL_ShowSimpleMessageBox(0, "Mouse", "Some other button was pressed!", window);
                        break;
                }
                break;

And this is what happens when you run it, and click somewhere in the window:

sdl2-kbd-left-click

You can also track mouse motion and obtain the current coordinates of the mouse pointer. This is useful when moving things with the mouse (e.g. moving an object by mouse-dragging it). The following code obtains the mouse coordinates and displays them in the window title:

            case SDL_MOUSEMOTION:
                int mouseX = event.motion.x;
                int mouseY = event.motion.y;

                std::stringstream ss;
                ss << "X: " << mouseX << " Y: " << mouseY;

                SDL_SetWindowTitle(window, ss.str().c_str());
                break;

Note that you’ll need to add the following at the top of your main.cpp to make the above code work:

#include <sstream>

You will now notice the mouse coordinates in the window title:

sdl2-kbd-mouse-coords

Wonderful! You should now have an idea of how to capture and handle keyboard and mouse events in SDL2. We will see more of these in an upcoming article dealing with drawing pixels in the window, so stay tuned to learn more! 🙂