Category Archives: Software development

C# AppSettings: Saving User Preferences in a WPF Browser application

This article was originally posted at Programmer’s Ranch on 23rd March 2014.

Hey Ya! 🙂

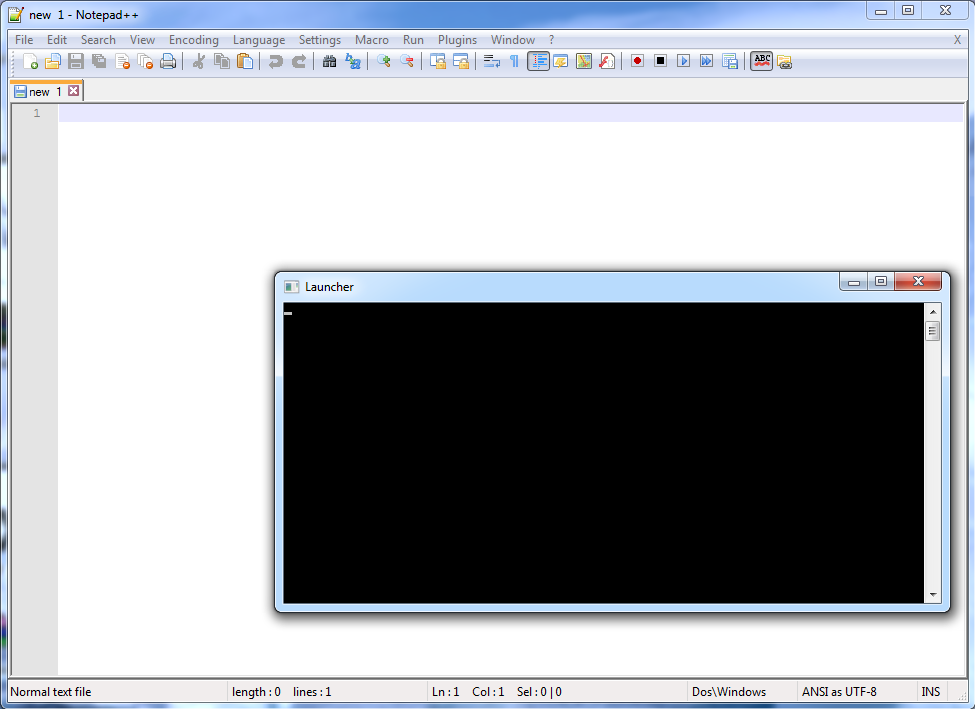
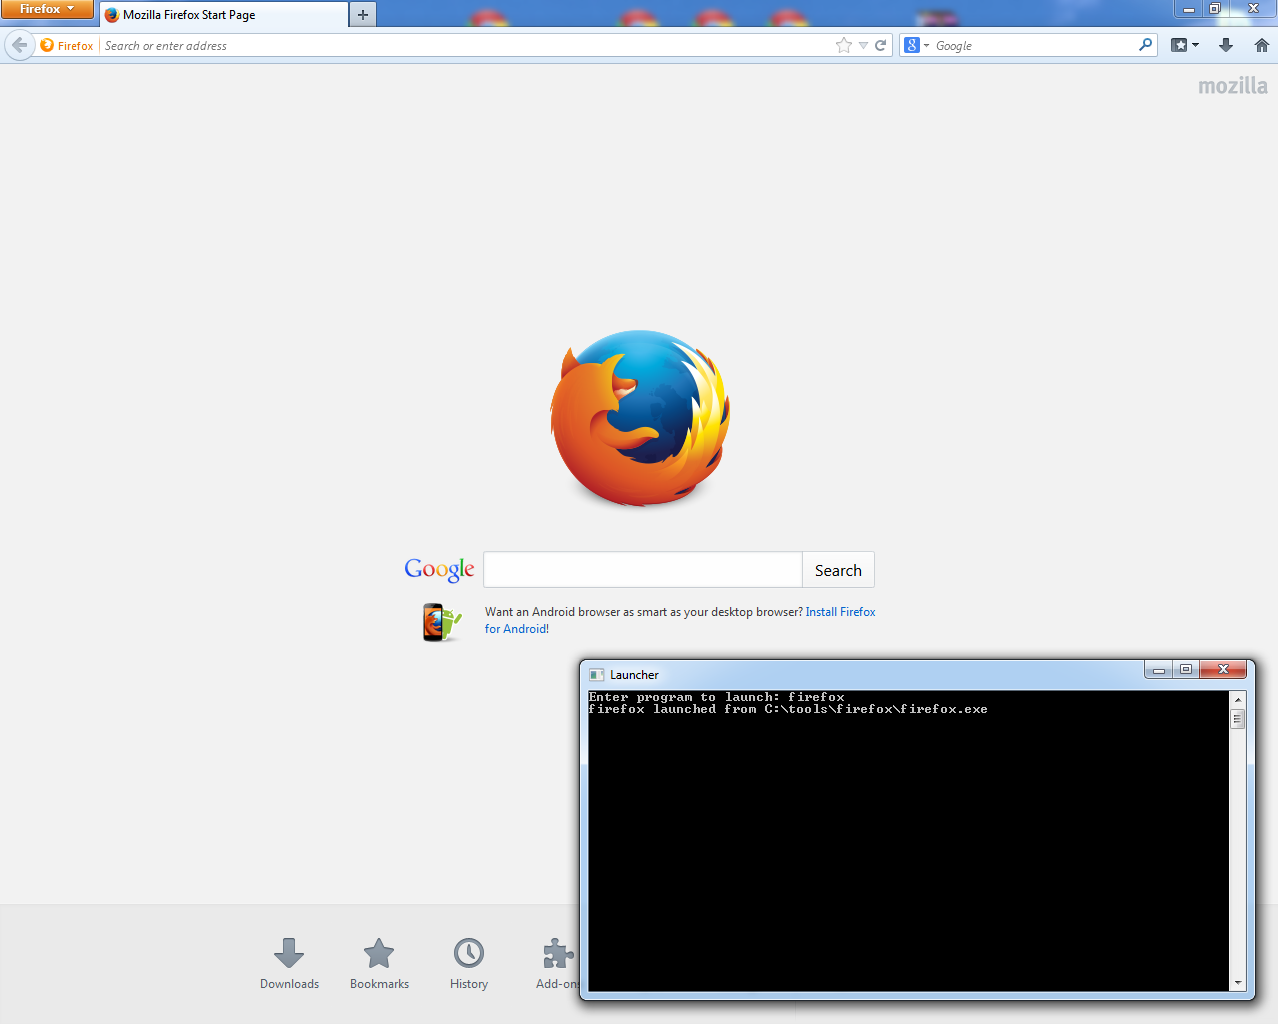
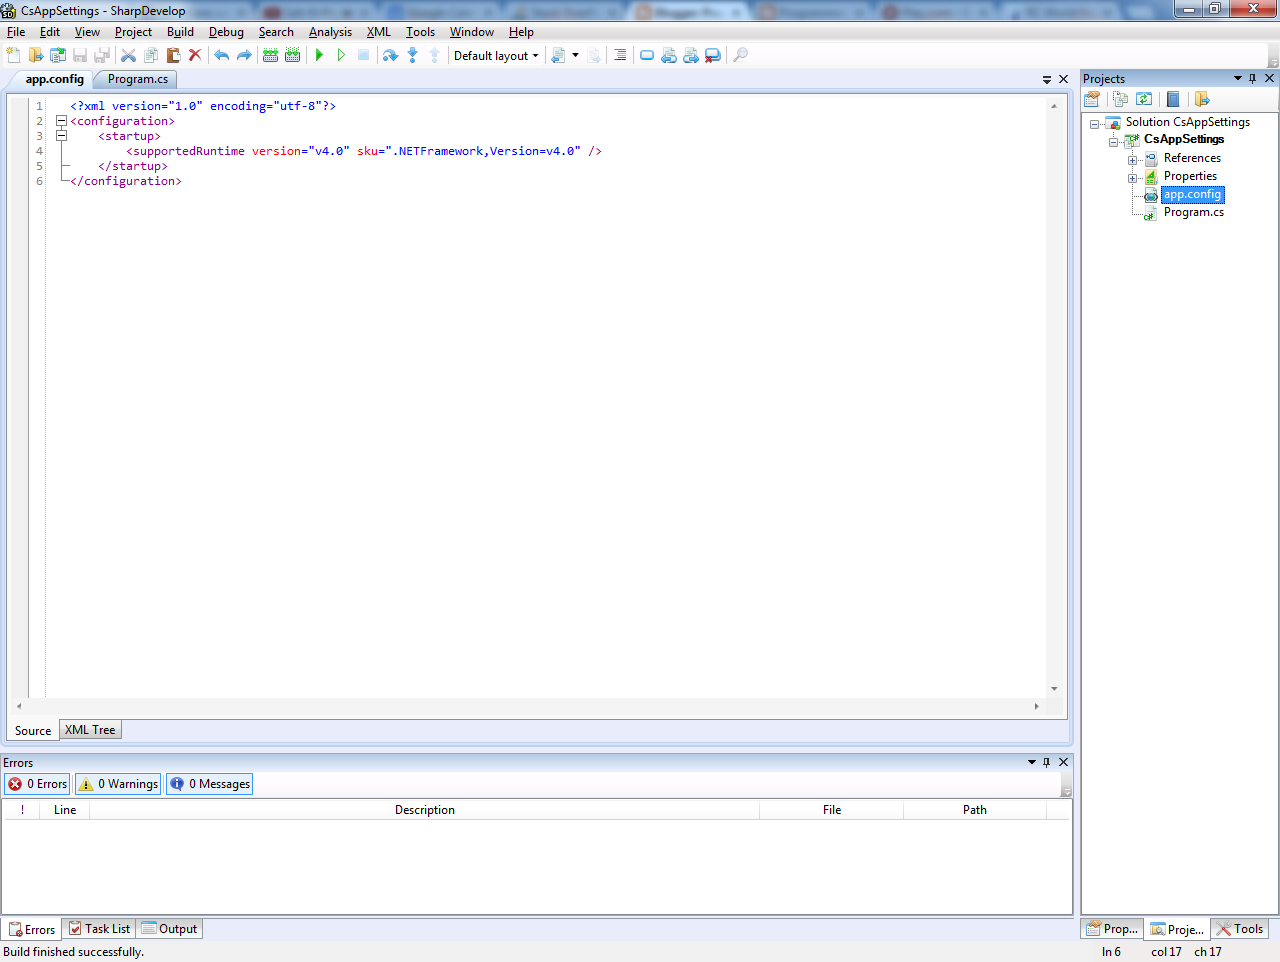
In yesterday’s article, “C# AppSettings: Launching Programs and Storing AppSettings“, we learned how you can store application settings in an App.config file so that they can be easily changed without having to recompile the program. This is useful for settings that don’t change very often, but is not the best way to store user preferences.

In today’s article, we will see how we can use a .NET Settings file in order to save user preferences. To do this, we will build a simple WPF browser application* and allow the user to save his homepage.

* For those who already know a little bit about WPF, we’re just going to make a simple application that includes a WebBrowser control – not an XBAP.

So, for starters, create a new WPF application using your favourite IDE. Aside from an App.xaml, you should also have a window – this would be Window1.xaml in SharpDevelop, or MainWindow.xaml in Visual Studio.

Change the window’s TitleWidth and Height properties to something decent (e.g. width of 800 and height of 600). Then, replace the default <Grid> in the window’s XAML with the following:

    <DockPanel>
        <DockPanel LastChildFill="True" DockPanel.Dock="Top">
            <Button Name="GoButton" DockPanel.Dock="Right" Margin="5 5 5 5" Click="Button_Click">Go</Button>
            <Button Name="SaveButton" DockPanel.Dock="Right" Margin="5 5 5 5">Save homepage</Button>
            <TextBox Name="Homepage" DockPanel.Dock="Left" Margin="5 5 5 5" />
        </DockPanel>
        <WebBrowser Name="Browser" VerticalAlignment="Stretch" />
    </DockPanel>

This isn’t a WPF tutorial so don’t worry about the above XAML; you’ll see what it does in a second. Find the window’s codebehind file by expanding your Window1.xaml (or MainWindow.xaml) node in Solution Explorer, and open it:

csbrowser-codebehind

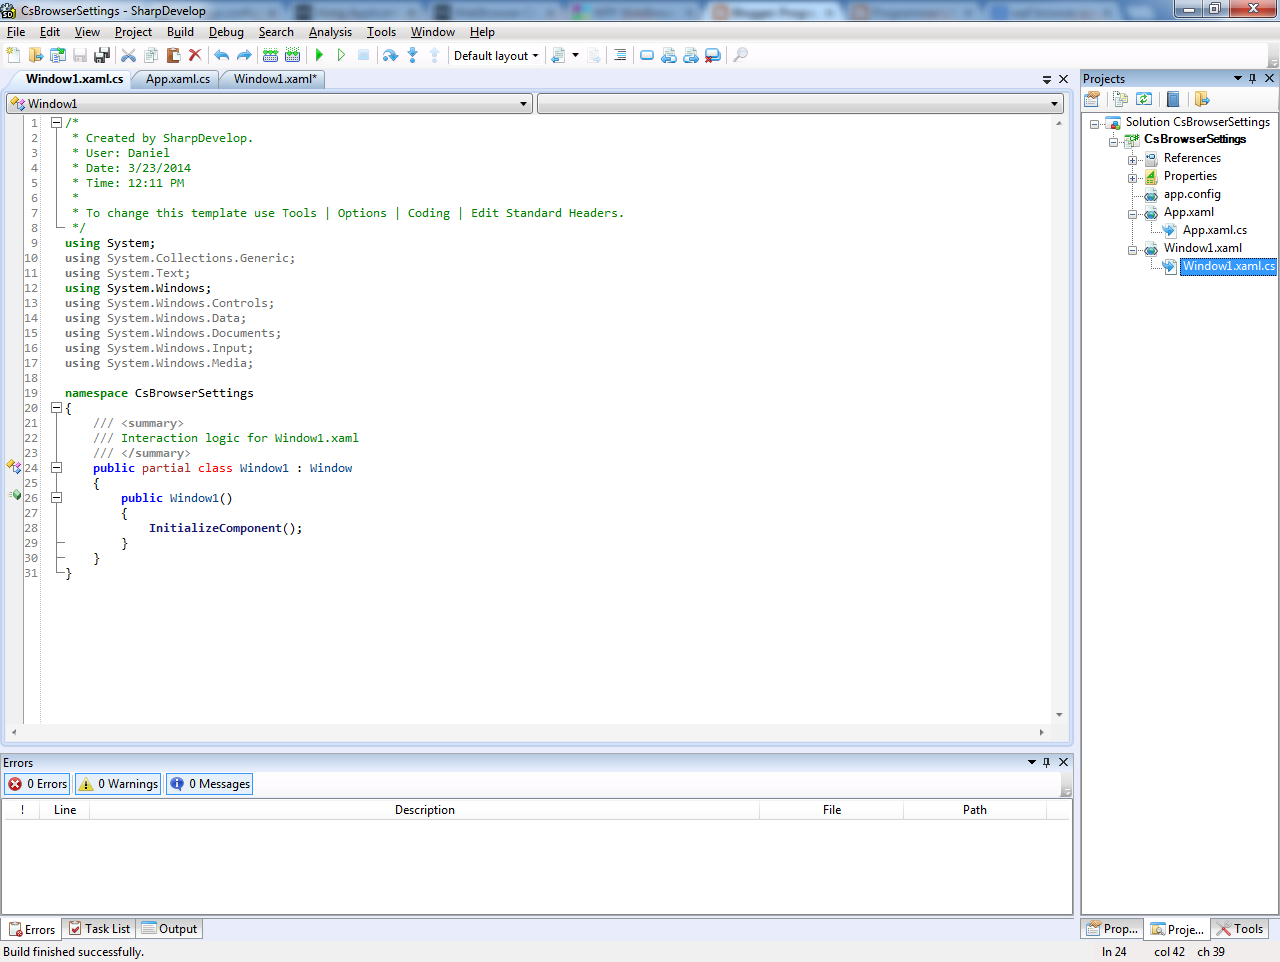
In the window class’s constructor, add the following code after InitializeComponent():

            string homePageUrl = "http://en.wikipedia.org/wiki/Main_Page";
            this.Homepage.Text = homePageUrl;
            this.Browser.Navigate(homePageUrl);

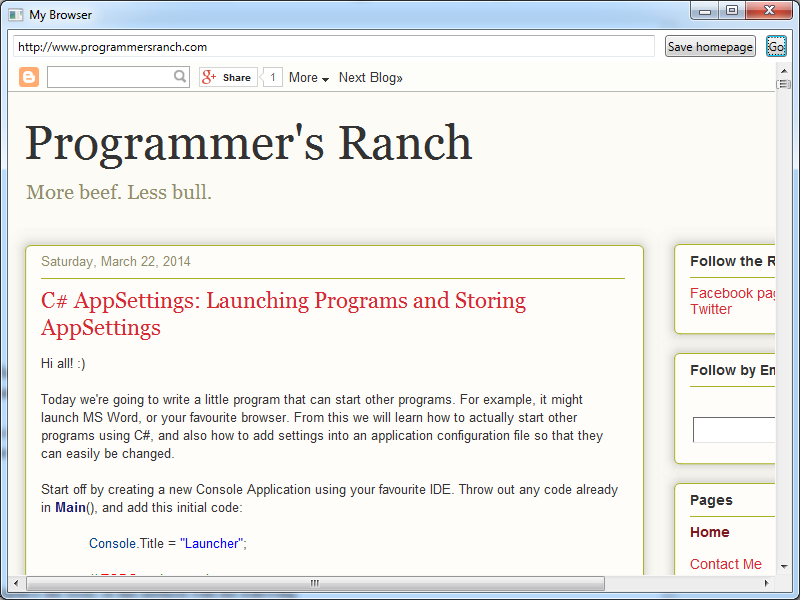
You can now run the application to see what it looks like:

csbrowser-browser

That was pretty easy! We set up the browser embedded in our window to load Wikipedia by default, and that’s what it did. Now, let’s get our program to actually do something.

In the XAML for the “Go” button, start typing the word “Click”, then press TAB twice. This should generate the following code in your window’s codebehind file (remember, it’s the .xaml.cs file):

        void GoButton_Click(object sender, System.Windows.RoutedEventArgs e)
        {
            throw new NotImplementedException();
        }

Replace the body of this method with the following:

this.Browser.Navigate(this.Homepage.Text);

We can now type in a URL and press the “Go” button to navigate there:

csbrowser-navigate

Now, let’s work on that “Save homepage” button. First, add a button handler as you did before – by starting to type the word “Click” in the XAML for the “Save homepage” button, pressing TAB, selecting “<new event handler>”, and then pressing TAB again. You should have an empty handler similar to the one you had for the “Go” button earlier:

        void SaveButton_Click(object sender, System.Windows.RoutedEventArgs e)
        {
            throw new NotImplementedException();
        }

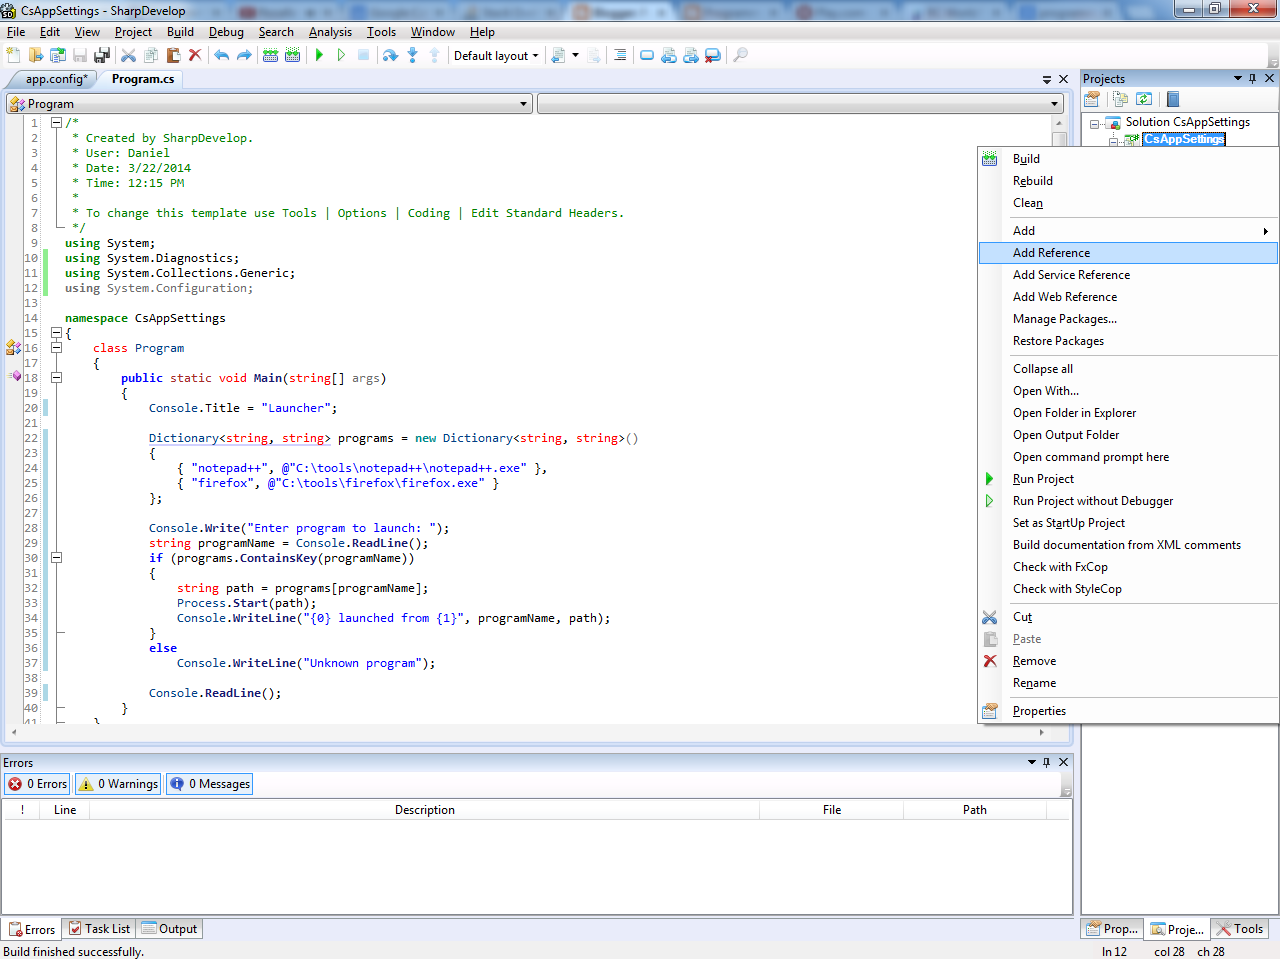
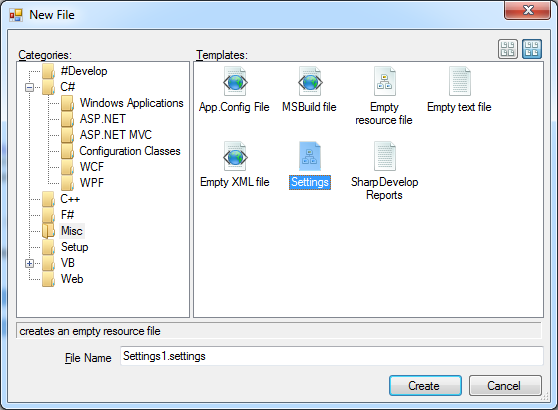
Next, right click on your project in Solution Explorer, and select Add -> New Item… and add a new Settings file. If you’re using SharpDevelop, you’ll find this under the Misc category:

csbrowser-addsettingsfile

This file opens up a table where you can add settings as you like. Let’s add one for the homepage:

csbrowser-editsettingsfile

You just need to set the name, data type, and default value of the property. The Scope can be either User or Application. This article at MSDN explains the difference:

Application-scope settings are read only, and can only be changed at design time or by altering the <AssemblyName>.exe.config file in between application sessions. User-scope settings, however, can be written at run time, just as you would change any property value. The new value persists for the duration of the application session. You can persist changes to user settings between application sessions by calling the Settings.Save method. These settings are saved in the User.config file.

In short, Application-scope settings are pretty similar to what we did yesterday in “C# AppSettings: Launching Programs and Storing AppSettings“, while User-scope settings are ideal for saving user preferences – which is what we want to do now.

In your window’s constructor, you can now load the homepage from your settings. You first need to build your project to allow the IDE to do some magic underneath (otherwise you won’t be able to find the property. Then, you can load the homepage setting like this:

            string homePageUrl = Settings1.Default.HomePage;

The good thing about these kinds of settings are that they are strongly-typed. This means that if you’re loading, for example, an integer, you can just assign it directly to an integer variable without further ado. Using regular AppSettings (see “C# AppSettings: Launching Programs and Storing AppSettings“), on the other hand, you first have to read values into strings and then convert them to the appropriate type.

Saving settings is also pretty straightforward. You assign them using the same notation as above, and then Save() them so that the settings can be remembered next time you run the application:

        void SaveButton_Click(object sender, System.Windows.RoutedEventArgs e)
        {
            Settings1.Default.HomePage = this.Homepage.Text;
            Settings1.Default.Save();
           
            MessageBox.Show("Settings have been saved", "Homepage update");
        }

So now, we can run our application, enter a new URL in the homepage, and click the “Save homepage” button:

csbrowser-savesettings

…and the next time we run our application, it loads our new homepage by default:

csbrowser-loadsettings

As you can see, the WPF WebBrowser control is actually some version of Internet Explorer – you can see it compared to a REAL browser in a previous screenshot. Still, Internet Explorer can sometimes be useful. To download another browser, for instance. 😀

Cool. 🙂 In this article, we saw how to use a .NET Settings file to load and save user preferences quickly and easily. We saw this in action by loading and saving the homepage in a simple WPF browser application. Thanks for reading, and see you in time for the next article! 🙂

C# AppSettings: Launching Programs and Storing AppSettings

This article was originally posted at Programmer’s Ranch on 22nd March 2014.

Hi all! 🙂

Today we’re going to write a little program that can start other programs. For example, it might launch MS Word, or your favourite browser. From this we will learn how to actually start other programs using C#, and also how to add settings into an application configuration file so that they can easily be changed.

Start off by creating a new Console Application using your favourite IDE. Throw out any code already in Main(), and add this initial code:

Console.Title = "Launcher";

// TODO code goes here

Console.ReadLine();

Now, to start a program from our code, we need to use the Process class. To be able to use it, we need to add the following to our usings:

using System.Diagnostics;

Starting a program is really easy. All we need to do is replace our “TODO” comment with the following:

string filePath = @"C:\tools\notepad++\notepad++.exe";
Process.Start(filePath);

And sure enough, when we run our program, Notepad++ is opened as well:

csappsettings-notepad++

Let us now take this a step further. We can allow the user to type in the name of an application, and the corresponding application will be launched. We could do this using a switch statement as in “C# Basics: Command Interpreter Using Methods“. Or even better, we can use a Dictionary to store the relationship between application names and their path. First, add the following using at the top if it’s not there already (e.g. if you’re using SharpDevelop):

using System.Collections.Generic;

Next, our Dictionary, using the collection initialiser syntax as in “Morse Code Converter Using Dictionaries“:

            Dictionary<string, string> programs = new Dictionary<string, string>()
            {
                { "notepad++", @"C:\tools\notepad++\notepad++.exe" },
                { "firefox", @"C:\tools\firefox\firefox.exe" }
            };

We can now accept user input and launch the appropriate program. Replace the two lines we wrote earlier (which include the call to Process.Start()) with this:

            Console.Write("Enter program to launch: ");
            string programName = Console.ReadLine();
            if (programs.ContainsKey(programName))
            {
                string path = programs[programName];
                Process.Start(path);
                Console.WriteLine("{0} launched from {1}", programName, path);
            }
            else
                Console.WriteLine("Unknown program");

The user gives us the name of the program he wants to launch. If that name exists in our dictionary, we get the corresponding path, and then launch it as we did before. If we try this now, it works pretty nicely:

csappsettings-firefox

Although this works pretty well, it isn’t very flexible to have the program names hardcoded in your program code. Imagine you give this program to a friend. It wouldn’t be very useful if he could only launch Firefox and Notepad++. What if he wanted to be able to launch SharpDevelop as well? And maybe in future he might want to add VLC as well. It obviously isn’t convenient for you to have to change the code, recompile, and give him an updated program each time.
One option could be to store these program settings in a file and read it, but .NET provides us with a simpler option that exists specifically for this kind of scenario. .NET applications can optionally come with an application configuration file, which is usually called App.config. In fact, if, like me, you’re using SharpDevelop 5 Beta 2, you should have one already (otherwise just add an Application Configuration File to your project):

csappsettings-appconfig

When you build the application, App.config gets renamed to the name of the executable, plus a “.config”, and is stored in the same folder:

csappsettings-appconfig2

In this App.config file, under the <configuration> node, we can add an <appSettings> node and store our settings. The settings have a key, which is a name that identifies them, and a value which is the value of the setting. Ours will be like this:

    <appSettings>
        <add key="notepad++" value="C:\tools\notepad++\notepad++.exe" />
        <add key="firefox" value="C:\tools\firefox\firefox.exe" />
    </appSettings>

With this done, we can now rewrite our program to use these settings. First, we need to add a reference to System.Configuration. To do this, right click on the name of the project in Solution Explorer, and select “Add Reference”:

csappsettings-addreference1

In the “Add Reference” window, locate “System.Configuration” and then click “OK”.

Next, add the following using statement at the top:

using System.Configuration;

We can now use ConfigurationManager to obtain our app settings, like this:

        public static void Main(string[] args)
        {
            Console.Title = "Launcher";
           
            string firefoxPath = ConfigurationManager.AppSettings["firefox"];
            Console.WriteLine(firefoxPath);
           
            Console.ReadLine();
        }

…And here’s what we see when we run this:

csappsettings-read-appsettings

So now, all we need to do is let the user tell us which program he wants to launch, and find it in the AppSettings:

        public static void Main(string[] args)
        {
            Console.Title = "Launcher";
           
            Console.Write("Enter program to launch: ");
            string programName = Console.ReadLine();
           
            string path = ConfigurationManager.AppSettings[programName];
            if (path == null)
                Console.WriteLine("Unknown program.");
            else
            {
                Process.Start(path);
                Console.WriteLine("{0} launched from {1}", programName, path);
            }
           
            Console.ReadLine();
        }

The only thing worth noting here is that if the specified key does not exist in the AppSettings, retrieving that key via ConfigurationManager.AppSettings[] returns null, allowing us to take appropriate action in that case.

So now, when you give this program to a friend, he can just add the following line in the CsAppSettings.exe.config file that conveniently comes with the program:

        <add key="fiddler" value="C:\tools\fiddler2\Fiddler.exe" />

…and without further ado, he can now launch Fiddler as well:

csappsettings-fiddler

Wonderful! 🙂

In this article, we learned how to start another program from our code, and we also learned how to work with application settings in an application configuration file.

Storing your application settings in an App.config file is convenient because they can be tweaked as needed, without having to recompile your program. These kinds of settings are best suited for settings that don’t change frequently, so you just set them when you need them, and forget about them. In the next article, we’ll learn about another kind of settings that are great for storing stuff like user preferences which can potentially change a lot.

Computing File Hashes in C#

This article was originally posted at Programmer’s Ranch as “C# Security: Computing File Hashes” on 2nd May 2014, which was the blog’s first anniversary. In this version of the article, I’ve removed anniversary references and made other slight edits where they were needed.

In this article, we’re going to learn a little about hashing: what it does, and how to use it to verify the integrity of a downloaded file (which is just one application where it is useful).

We’ve already seen seen in “C# Security: Securing Passwords by Salting and Hashing” that a hash function transforms an input string into a totally different piece of data (a hash):

cspwsec-hashfunc-1

If you make even a slight change to the input, such as changing the first character from uppercase to lowercase, you get a totally different output:

cspwsec-hashfunc-2

Also, if you use a decent hash function (i.e. not MD5), it is normally not possible to get the input string from the hash.

In today’s article, we’re going to use hashes for something much simpler than securing passwords. We’re going to hash the content of files, and then use that hash to check whether the file changed. Since I haven’t been very impressed with SharpDevelop 5 Beta, I’m going to ditch it and use Visual Studio 2013 instead. You can use whatever you like – SharpDevelop, Visual Studio Express for Desktop, or maybe even MonoDevelop.

Create a new Console Application, and add the following at the top:

using System.Security.Cryptography;

This will allow you to use a variety of hash functions, which all derive from the HashAlgorithm class.

We’ll also need a little helper function to convert our hashes from a byte array to a string, so that they may be displayed in hex in the command line. We’ll use the following, which is a modified version of the Hash() method from “C# Security: Securing Passwords by Salting and Hashing“:

        public static string ToHexString(byte[] bytes)
        {
            StringBuilder sb = new StringBuilder();
            foreach (byte b in bytes)
            sb.Append(b.ToString("x2").ToLower());

            return sb.ToString();
        }

Now, let’s create a text file in the same folder as our .sln file and name it “test.txt”, and put the following lyrics from the Eagles’ “Hotel California” in it:

So I called up the Captain,
"Please bring me my wine"
He said, "We haven't had that spirit here since nineteen sixty nine"
And still those voices are calling from far away,
Wake you up in the middle of the night
Just to hear them say...

Let’s read that file into memory. First, we need to add the following

using System.IO;

We can now read the contents of the file into a string:

string fileContents = File.ReadAllText(@"../../../test.txt");

…and quite easily compute the hash of those contents:

            using (HashAlgorithm hashAlgorithm = SHA256.Create())
            {
                byte[] plainText = Encoding.UTF8.GetBytes(fileContents);
                byte[] hash = hashAlgorithm.ComputeHash(plainText);
                Console.WriteLine(ToHexString(hash));
            }

            Console.ReadLine();

Note that I’m using SHA256 as the hash function this time – it’s a lot more robust than MD5. If you check the documentation for the HashAlgorithm class, you can find a bunch of different hash algorithms you can use. As it is, we get the following output:

cshashfile-output-1

Now, let’s see what happens if your little toddler manages to climb onto your keyboard and modify the file. Let’s remove the first character in the file (the initial “S”) – that might be within a toddler’s ability – and save the file. When we rerun the program, the output is quite different:

cshashfile-output-2

And here we have already seen how hashing gives us the means to verify a file’s integrity, or in other words, check whether it has been tampered with. In fact, popular Linux distributions such as Ubuntu distribute MD5 hashes for the files they release, so that the people who can download them can check that they are really downloading the file they wanted, and not some weird video of goats yelling like humans:

cshashfile-ubuntu-hashes

So let’s actually see this in action. After downloading an Ubuntu distribution, let’s change the filename to that of the Ubuntu file we downloaded, and the hash algorithm to MD5:

            string fileContents = File.ReadAllText(@"../../../../ubuntu-14.04-desktop-amd64.iso");

            using (HashAlgorithm hashAlgorithm = MD5.Create())

Now, let’s try to compute a hash of the Ubuntu file:

cshashfile-out-of-memory

Oops! We tried to read a ~1GB file into memory, and that’s a pretty stupid thing to do. Unless you’ve got a pretty awesome computer, you’ll see the memory usage spike until you get an OutOfMemoryException, as above. And even if you do have a pretty awesome computer, you shouldn’t load an entire massive file just to perform an operation on its contents.

In one of my first articles at Programmer’s Ranch, “C#: Working with Streams“, I explained how you could read a file bit by bit (e.g. line by line) and work on those parts without having to have the entire file in memory at any one time. And quite conveniently, the hash algorithms have a variant of the ComputeHash() method that takes a stream as a parameter.

So let’s change our code as follows:

        static void Main(string[] args)
        {
            using (FileStream fs = File.OpenRead(@"../../../../ubuntu-14.04-desktop-amd64.iso"))
            using (HashAlgorithm hashAlgorithm = MD5.Create())
            {
                byte[] hash = hashAlgorithm.ComputeHash(fs);
                Console.WriteLine(ToHexString(hash));
            }

            Console.ReadLine();
        }

And let’s run it:

cshashfile-streamed-hash

There are a few things to note from the output:

  • It computes pretty quickly, despite the fact that it’s going through a ~1GB file.
  • Memory levels remain at a pretty decent level (in fact the memory used by the program is negligible).
  • The output matches the first hash in the list of hashes on the Ubuntu webpage (in the background of the above screenshot).

In this article, we revisited the concept of hashing, and learned the following:

  • There are several different hash algorithms provided by .NET that you can use, including MD5, SHA256, and others.
  • A hash gives you a way to verify whether a file has been tampered with.
  • Streaming provides the ability to process large files quickly and with very little memory overhead.

Transforming Config Files and XML Documents

When you’re deploying an application to different servers representing different environments, manually updating configuration settings can get very messy. In .NET applications, one of the ways to keep configuration settings under control is by using configuration transforms.

These transforms are a set of rules that define how the App.config or Web.config is to change (e.g. add appsettings, replace connection strings, etc) for the particular environment.

Syntax

Typically, when you create a new web application in Visual Studio, you’ll get a little more than just a Web.config file. In fact, if you expand the Web.config node in Solution Explorer, you’ll find that there are another two files: Web.Debug.config and Web.Release.config.

config-transform-web-default

As shown in the screenshot above, the Web.Release.config has a similar structure to Web.config itself; however it defines rules that work on the Web.config to produce a different result. In this case, there is a transform that will remove the debug attribute from the compilation node. You can see the result of this if you right click on Web.Release.config and select Preview Transform:

config-transform-preview

One of the most common places where transforms come in handy is to change the value of appsettings when deploying. Let’s say, for example, that we have the following setting in our App.config or Web.config file:

  <appSettings>
    <add key="SomeFilePath" value="myfile.txt" />
  </appSettings>

In our transform file (which so far has been Web.Release.config), we could define the following transform:

  <appSettings>
    <add key="SomeFilePath" value="C:\data\productionfile.txt"
         xdt:Transform="Replace"
         xdt:Locator="Match(key)" />
  </appSettings>

This tells the transform engine to look for the matching key (in this case “SomeFilePath”), and replace it with what is specified in the transform file:

config-transform-preview2

Similarly, it is very common to replace database connection strings depending on the environment. In fact, the default Web.Debug.config and Web.Release.config (shown earlier) explain in comments how to do this.

Other than removing attributes and replacing values, transforms support various other operations which allow insertion and removal of nodes and attributes. See Web.config Transformation Syntax for Web Project Deployment Using Visual Studio (official documentation) for detail.

Despite the title of that article, transforms may also be used with App.config files (for non-web projects) and just about any arbitrary XML file (although not quite in the same way as shown above). For web applications, Visual Studio provides some support for creating and previewing transforms. For other application types and XML documents, it is necessary to resort to other tools.

Tools

One of the simplest ways to apply config transforms (in particular, the Release transform) is to Publish your web application. This will compile your web application in Release mode, apply config transforms, and put it in the destination you specify.

Unfortunately, this approach has several drawbacks:

  • It is only suitable for web applications (not e.g. console applications).
  • It can’t be used for arbitrary XML files.
  • It can’t be extended to various different environments.
  • Being embedded in Visual Studio, it can’t be automated or integrated with a continuous integration system.

In recent years, Microsoft released an XML Document Transformation (XDT) library that enabled a variety of tools to run these transforms. This is available as the Microsoft.Web.Xdt NuGet package, and the source code is available on CodePlex.

The Web.config Transformation Tester is a web application that is useful for testing transforms. It uses XDT internally (see its source code) and can transform web and application configs as well as arbitrary XML files.

Config Transformation Tool (ctt) or XDT Transformation Tool is a command-line utility launched in 2010 also based on Microsoft’s XDT library. Although its Codeplex site says it’s still Alpha, I’ve used it to transform Web.config, App.config and XML files.

Say we have this Web.config file:

<?xml version="1.0"?>
<configuration>
  <appsettings></appsettings>
  <connectionStrings>
    <add name="foo" connectionString="value"/>
  </connectionStrings>
  <system.web>
    <customErrors mode="Off"/>
  </system.web>
</configuration>

…and we have this transform file called Web.Debug.config:

<?xml version="1.0"?>
<configuration xmlns:xdt="http://schemas.microsoft.com/XML-Document-Transform">
  <appsettings>
    <add key="EnvironmentName" value="Debug"
        xdt:Transform="Insert" />
  </appsettings>
  <connectionStrings>
    <add name="foo" connectionString="differentValue"
        xdt:Transform="Replace" xdt:Locator="Match(name)" />
  </connectionStrings>
</configuration>

Then we can run ctt as follows:

ctt s:Web.config t:Web.Debug.config d:Web.Out.config i

I’m using the shorthand parameters here:

  • s: marks the source file.
  • t: marks the transform file.
  • d: marks the destination file.
  • i causes the output to be indented, because by default it’s minified and unreadable.

The output is as follows:

<?xml version="1.0"?><configuration>
    <appsettings>
        <add key="EnvironmentName" value="Debug" />
    </appsettings>
    <connectionStrings>
        <add name="foo" connectionString="differentValue" />
    </connectionStrings>
    <system.web>
        <customErrors mode="Off" />
    </system.web>
</configuration>

This also works on XML files. In fact, I’ve taken Microsoft’s sample books.xml file and applied the following transform file (books.transform.xml):

<?xml version="1.0"?>
<catalog xmlns:xdt="http://schemas.microsoft.com/XML-Document-Transform">
   <book id="bk113" xdt:Transform="Insert">
      <author>David Kushner</author>
      <title>Masters of Doom</title>
      <genre>Non-Fiction</genre>
      <price>10.95</price>
      <publish_date>2003-01-01</publish_date>
      <description>How two guys created an empire and transformed pop culture</description>
   </book>
</catalog>

This command applies the transformation:

ctt s:books.xml t:books.transform.xml d:books.out.xml i

As you can see, the insertion transform actually works:

config-transform-ctt-xml

Additionally, as a command line tool, ctt is great to automate transforms as part of a deploy script (e.g. in a batch file).

Aside from ctt, XDT’s open sourcing announcement lists a couple of other tools that use Microsoft’s XDT library. One is a Web Config Transform Runner which I haven’t tried but which is presumably similar to ctt. The other is SlowCheetah, a Visual Studio Extension which allows transforms to be previewed and added. The author discontinued development on SlowCheetah (see also Github thread) out of frustration that it wouldn’t become a first class citizen in Visual Studio, which ironically is what happened because the preview shown at the beginning of this article was created with Visual Studio 2015 without SlowCheetah installed.

Finally, this article would not be complete without a mention of TeamCity. Automating transformation of configuration settings is only one step in what should be a complete continuous integration solution running automated builds. TeamCity is just that, and it has support for transforms.

Calculating String Similarity with Levenshtein Distance

The source code for this article is available at the Gigi Labs BitBucket repository.

Levenshtein distance or edit distance is a metric used to measure the similarity between two strings. It works by calculating the number of edits needed to go from the first string to the second. For example:

  • To go from kitten to mitten, we need to replace the first letter. That’s just one edit.
  • To go from barrel to bard, we need to remove the last two letters, and replace an ‘r’ with a ‘d’. That’s three edits.
  • To go from bled to bleeding, we need to insert an ‘e’ in the middle and “ing” at the end. That’s four edits.
  • Transposition of characters also a valid operation.

To perform this calculation in code, there’s a simple algorithm. It starts off by initialising a matrix and setting initial values for the top row and left column. Let’s see how this looks in code.

We’ll start off with a simple prompt for the two strings to be compared:

            // input

            Console.Write("Input first string: ");
            string s = Console.ReadLine().ToLowerInvariant();
            Console.Write("Input second string: ");
            string t = Console.ReadLine().ToLowerInvariant();

Next, we create our matrix and set initial values for the top row and left column:

            // init

            var matrix = new int[s.Length + 1, t.Length + 1];

            for (int i = 0; i < s.Length + 1; i++)
                matrix[i, 0] = i;

            for (int j = 0; j < t.Length + 1; j++)
                matrix[0, j] = j;

Rather than explaining what this does in words, it’s better if we just draw the matrix in the console window so you can see for yourself. To do that, we’ll need a helper function. This might look like a lot of code, but it’s basically just drawing the matrix with one string at the top and the other at the side:

        static void DrawMatrix(string s, string t, int[,] matrix)
        {
            Console.WriteLine();
            Console.Write("   ");

            for (int i = 0; i < t.Length; i++)
                Console.Write("{0}", t[i]);
            Console.WriteLine();

            for (int i = 0; i < s.Length + 1; i++)
            {
                Console.Write("{0} ", i > 0 ? s[i - 1] : ' ');

                for (int j = 0; j < t.Length + 1; j++)
                    Console.Write(matrix[i, j]);

                Console.WriteLine();
            }

            Console.WriteLine();
        }

Back in our Main() method, we can now call this helper function to draw the matrix:

            // visualise

            DrawMatrix(s, t, matrix);

Here’s the output:

levenshtein-init

As you can see, the initialisation code we wrote earlier is creating a matrix based on the length of the strings. There’s an extra row and column at the beginning, which we fill with incrementing values.

Now the heart of the Levenshtein distance algorithm is made up of a calculation that starts with those initial values and uses them to populate the rest of the matrix. For each cell, we look at the value to its left, top and top left. We adjust that in a specific way defined by the algorithm (either adding 1 or adding a cost, which is based on comparing a character from each string), and take their minimum. The resulting code looks something like this:

            // calculate

            for (int i = 1; i <= s.Length; i++)
            {
                for (int j = 1; j <= t.Length; j++)
                {
                    int cost = s[i - 1] == t[j - 1] ? 0 : 1;

                    int topPlus1 = matrix[i - 1, j] + 1;
                    int leftPlus1 = matrix[i, j - 1] + 1;
                    int topLeftPlusCost = matrix[i - 1, j - 1] + cost;

                    var min = Math.Min(topPlus1, leftPlus1);
                    min = Math.Min(min, topLeftPlusCost);
                    matrix[i, j] = min;
                }
            }

With that done, the Levenshtein distance is the value in the bottom right of the matrix:

            int levenshteinDistance = matrix[s.Length, t.Length];
            Console.WriteLine("Levenshtein distance = {0}", levenshteinDistance);
            Console.WriteLine();

Here’s the final output:

levenshtein-calculation

As you can see, Levenshtein Distance gives us a way to measure the similarity (or difference) between two strings. This lends itself well to various text-related applications such as validation, spell checking and error correction.