Usually, the first thing I do when starting to work with a new programming language is to figure out how to debug it. So in this article I’m going to show you how to get yourself set up to debug Rust using Visual Studio Code (VS Code), and then you can use that as a starting point and take your learning journey in any direction that is comfortable for you.
Installing Rust
The first thing you need is to install the Rust language itself and associated tools. Simply follow the Installation part of the Rust book to set up Rust for your operating system.
The cargo tool which comes with the Rust installation is vital as it is used for various things from building and running Rust source code to managing packages (“crates”, in the Rust ecosystem).
Setting Up VS Code for Rust
If you don’t already have VS Code, head to its website and download it.
Then, you’ll need to install two extensions, based on the IDE Integration Using rust-analyzer section of the Rust book, and the Debugging section of the Rust with Visual Studio Code documentation:
rust-analyzer gives you most of the IDE integration you need between Rust and VS Code (e.g. Intellisense)
Either the Microsoft C/C++ extension (if you’re on Windows) or CodeLLDB (for Linux/Mac) – this gives you the ability to actually debug Rust code
Add the rust-analyzer extension from the Extensions tab in VS Code for basic IDE support.
Creating a New Rust Project
Use cargo to create a new Rust project as follows:
$ cargo new rust1
     Created binary (application) `rust1` package
Then, open the newly created rust1 folder using either the terminal (as follows) or VS Code’s File -> Open Folder… menu option.
$ cd rust1
$ code .
Note that if you’re following the “Hello, World!” part of the Rust book and created a Rust program without cargo, you won’t be able to debug it.
Debugging Rust with VS Code
You’ll find a “Hello world” program in src/main.rs under the folder you created (in this case rust1). Ensure you have that open in VS Code and the press F5. When prompted, select LLDB as the debugger to use.
After pressing F5, select the LLDB debugger.
At that point you get an error because you don’t have a launch configuration yet:
“Cannot start debugging because no launch configuration has been provided.”
But that’s alright, because once you click “OK”, you’re offered the possibility to have a launch configuration generated for you, which you should gratefully accept:
“Cargo.toml has been detected in this workspace. Would you like to generate launch configurations for its targets?” Click “Yes”.
When you click “Yes”, a file with launch configurations is generated for you:
Now you can switch back to main.rs and press F5 to debug the code. Click next to a line number to set a breakpoint if you want to stop anywhere. Try also hovering over parts of the code to get rich information about them.
Debugging Rust code: stopping at a breakpoint, and analysing the println macro.
Summary
If you prefer to debug Rust code in an IDE than do everything in the terminal, consider using VS Code. After installing both Rust and VS Code, all you need to do is install a couple of extensions, create a Rust project with cargo, and generate launch configurations for it. Then you can debug your Rust code and benefit from all the IDE comfort (e.g. Intellisense) you’re used to in other languages.
Logins that use Two-Factor Authentication (2FA) typically rely on the user’s password as the first factor, as well as a second factor that could be anything from an email/SMS to something biometric. Among all these options, the Time-Based One-Time Password (TOTP) protocol is a simple way to provide the benefits of 2FA without the disadvantages of other options (such as SMS gateways being unreliable and expensive, and biometrics being complex to implement).
The way TOTP works is that the client and server each generate a code, and these have to match. The codes are generated based on a shared secret and the current time, so as long as the client and server are using the same secret and generate the codes at roughly the same time, they will match.
The client usually takes the form of an authenticator app – such as Google Authenticator, Microsoft Authenticator, or Authy – on a mobile device. Once it acquires the shared secret from the server – typically by scanning a QR code – it then generates codes every 30 seconds. Usually the server will accept that code during these 30 seconds and also for an additional 30 seconds while the next code is displayed.
This might all sound a little abstract, but it will become clear shortly once we go through implementing TOTP on the server side and testing it out.
TOTP in Go – Getting Started
Before looking at TOTP, let’s first do the usual steps to create a simple program in Go:
Now we can start adding code in that main() function.
Generating a Shared Secret (Server Side)
To generate a shared secret, you call totp.Generate(), passing in a totp.GenerateOpts object. The Issuer and AccountName are required, and you can set other options if you need to.
	// generate shared secret

	options := totp.GenerateOpts{
		Issuer:      "My Web Application",
		AccountName: "me@example.com",
	}

	key, err := totp.Generate(options)
	if err != nil {
		fmt.Println("Failed to generate shared secret: ", err)
		return
	}
In order to do something with that key object, you have to convert it to base32, and you do that by simply calling its Secret() method:
	secret := key.Secret()
	fmt.Println(secret)
The output will change every time you run this, but the following is an example of what it looks like. In a real implementation, this would be saved in a database for each user.
QS4MXEE5AKT5NAIS74Z2AT3JPAGNDW7V
Generating QR Codes (Server Side)
The next step is to transmit the shared secret to the user. Normally, at some point during the registration process, the server generates the shared secret for the user, and sends it to the frontend, which displays it as a QR code. The user then scans the QR code with their authenticator app.
Although the server has no need to generate QR codes, it’s useful to do this for testing purposes, and it’s certainly faster than typing in the shared secret manually (which apps usually allow as a fallback option).
The otp library’s example code shows how to generate a QR code from the shared secret. Adapting this example a little, we get:
	// generate QR code

	var buf bytes.Buffer
	img, err := key.Image(200, 200)
	if err != nil {
		fmt.Println("Failed to save QR code: ", err)
		return
	}
	png.Encode(&buf, img)
	os.WriteFile("qr-code.png", buf.Bytes(), 0644)
Running this code generates a neat little QR code:
QR code for the shared secret.
Acquiring the Shared Secret (Client Side)
We can now pass the QR-encoded secret to the client. For this, we’ll need an authenticator app. Google Authenticator, Microsoft Authenticator and Authy should all work, but I personally prefer the latter because of its cloud backup feature, which is handy if your phone dies or goes missing.
Once the app is installed, locate the option to add a new account, after which you’ll be able to add a shared secret either by scanning a QR code or typing it manually. Excuse the quality of the next two pictures; none of these authenticator apps allow screenshots to be taken, so the closest thing I could do was take a photo with another phone.
Adding an account in Authy.
Generating Authenticator Codes (Client Side)
Once your app has acquired the shared secret, it will automatically start generating 2FA codes, typically six digits long at 30-second intervals:
Authy generating 2FA codes.
Alternatively, for testing purposes or if you need to develop a client with similar functionality, you can generate similar 2FA codes using the otp library itself. To do this, simply call totp.GenerateCode(), passing in the shared secret you generated earlier, and the current time:
The output is the same kind of six-digit 2FA code that you’d get with an authenticator app, for instance:
605157
In fact, if you run this while you also have the authenticator app set up, you’ll see the exact same codes.
Validating 2FA Codes (Server Side)
To complete the second factor part of the login process, a user grabs a 2FA code from their authenticator app and enters it in the prompt in the web application’s frontend, essentially sending it over to the server. The server’s job is to ensure that the code is valid. The otp library allows us to do this validation using the totp.Validate() function, which takes the input 2FA code, and the shared secret from earlier.
In order to test how this behaves over a period of time, we can do a little infinite loop that requests 2FA codes from the user and then validates them:
	for {
		fmt.Print("Enter 2FA code: ")

		var input2faCode string
		fmt.Scanln(&input2faCode)

		codeIsValid := totp.Validate(input2faCode, secret)
		fmt.Println("Code is valid: ", codeIsValid)
	}
While playing with this, you’ll notice that:
Entering a code shown by the authenticator app returns true
Entering the same code twice returns true
Entering the same code still returns true within 30 seconds after it has stopped displaying in the authenticator app
Entering the same code after that returns false
Entering anything else (other than the current or previous code) returns false
In theory, you should prevent the application from accepting the same code twice, because they’re supposed to be one-time-passwords. To do this, you’ll need to add additional state and logic to your application. Or, you can accept the security tradeoff knowing that the 2FA codes are only valid for a minute, giving little opportunity for an attacker to exploit them.
Summary
My earlier article showed how easy it is to work with 2FA codes using a TOTP library in C#, and in Go it’s no different. After generating a secret from the otp library, you can either share it with your authenticator app (e.g. by generating a QR code) to generate 2FA codes, or use it to generate 2FA codes directly. The library also allows you to validate the generated 2FA codes, assuming they are valid for two 30-second windows.
In the interest of simplicity, I’ve only shown basic usage of the library. If you have more complex requirements, you can customise the generation of secrets, generation of 2FA codes, and also the validation of 2FA codes.
Finally, one thing to keep in mind is that 2FA becomes a major headache when one of the factors goes missing (e.g. phone is lost or stolen). So you’ll need to consider how to handle this situation (e.g. recovery codes, reset shared secret, etc.), and how to handle normal password resets (you may want to reset the shared secret too).
I’ve recently written about how to use Cartography to collect infrastructural data from both AWS and Okta into a Neo4j graph database for security analysis.
Neo4j is a long-standing player in the graph database market, with a robust product, great documentation, and a massive following. However, its long legacy is in a way also a disadvantage, as it can be costly, slow, and resource-hungry (due in no small part to its reliance on the JVM). Sometimes people would like to use an alternative for any of these reasons.
Memgraph, on the other hand, is a relatively young graph database, and certainly not as fully-featured as Neo4j. A key difference is that it is written in C++, meaning it’s designed to be faster and more lightweight than Neo4j (whether it lives up to this is something you’ll need to evaluate for your own use cases). Memgraph also made a very wise decision to support the Bolt protocol and the Cypher language – both of which Neo4j uses – meaning that it’s compatible with existing Neo4j clients and queries. Although there are variations in Cypher dialect, the incompatibilities are few, and moving from Neo4j to Memgraph is significantly less painful than, say, transitioning to a graph database that uses Gremlin as its query language.
At the time of writing this article, Cartography requires Neo4j 4.x, and does not work with Memgraph. However, I’m going to show you how to make at least part of it (the Okta intel module) work with minor alterations to the Cartography codebase. This serves as a demonstration of how to get started migrating an existing application from Neo4j to Memgraph.
Running Memgraph
Before we start looking at Cartography, let’s run an instance of Memgraph. To do this, we’ll take a tip from my earlier article, “Using the Neo4j Bolt Driver for Python with Memgraph“, and run it under Docker as follows (drop the sudo if you’re on Mac or Windows):
That --bolt-server-name-for-init=Neo4j/ is a first critical step in Neo4j compatibility. As explained in that same article, the Neo4j Bolt Driver (i.e. client) for Python (which Cartography uses) checks whether the server sends an “agent” value that starts with “Neo4j/”. By setting this, Memgraph is effectively posing as a Neo4j server, and the Neo4j Bolt Driver for Python can’t tell the difference.
Update 19th September 2023: as of Memgraph v2.11, --bolt-server-name-for-init has a default value compatible with the Neo4j Bolt Driver, and therefore no longer needs to be provided.
If it’s successful, you should see output such as the following:
Memgraph is running. You can also execute queries directly from here.
Cloning the Cartography Repo
The next thing to do is grab a copy of the Cartography source code from the Cartography GitHub repo:
git clone https://github.com/lyft/cartography.git
Next, run the following command to install the necessary dependencies:
pip3 install -e .
Note: in the past, I’ve usually had to upgrade the Neo4j Bolt Driver for Python to 5.2.1 to get anything working, but as I try this again, it seems to work even with the default 4.4.x that Cartography uses. If you have problems, try changing setup.py to require neo4j>=5.2.1 and run the above command again.
Creating a Launch Configuration in Visual Studio Code
In order to run Cartography from its source code, you could run it directly from the terminal, for instance:
cd cartography/cartography
python3 __main__.py
However, as I’ve recently been using Visual Studio Code for all my polyglot software development needs, I find it much more convenient to set up a launch configuration that allows me to easily debug Cartography and pass whatever command-line arguments and environment variables I want.
You might notice we’re telling Cartography to connect to Neo4j (Memgraph actually) with username and password both set to “ignore”. The reason for this is that while the Community Edition of Memgraph does not require (or support) authentication, the Neo4j Bolt Driver for Python (i.e. Neo4j client) does require a username and password to be provided. So, as a second critical compatibility step, we pass any arbitrary value for the Neo4j username and password so long as they are not left empty.
As for the Okta configuration, remember to replace the Organisation ID and API Token with real ones.
Incompatible Index Creation Cypher
Pressing F5, we can now run Cartography from inside Visual Studio Code, and we immediately run into the first problem:
The error says: “no viable alternative at input ‘CREATEINDEXIF'”.
Memgraph is choking on the index creation step in indexes.cypher (in VS Code, use Ctrl+P / Command+P to quickly locate the file) because the index creation syntax is one aspect of Memgraph’s Cypher implementation that is not compatible with that of Neo4j. If we take the first line in the file, the Neo4j-compatible syntax is:
CREATE INDEX IF NOT EXISTS FOR (n:AWSConfigurationRecorder) ON (n.id);
…whereas the equivalent on Memgraph would be:
CREATE INDEX ON :AWSConfigurationRecorder(id);
Note: in Memgraph, the “IF NOT EXISTS” bit is implicit: an index is created if it doesn’t exist; if it does, the operation is a no-op that does not cause any error.
Fortunately, this syntactic difference is easily resolved by replacing (using VS Code search & replace syntax, with regex enabled) this:
CREATE INDEX IF NOT EXISTS FOR \(n:(.*?)\) ON \(n.(.*?)\);
…with this:
CREATE INDEX ON :$1($2);
Tip: although not in scope here, you’ll need to make a similar change also in querybuilder.py and tx.py if you also want to get other intel modules (e.g. AWS) working.
Neo4j Result Consumption
After fixing the index creation syntax and rerunning Cartography, we run into another problem:
The error says: “The result is out of scope. The associated transaction has been closed. Results can only be used while the transaction is open.”
I’m told that consume() is used to fix a problem in which Neo4j connections hang in situations where internal buffers fill up, although the Cartography team is re-evaluating whether this is necessary. In practice, I have seen that removing this doesn’t seem to cause problems with datasets I’ve tested with, although your mileage may vary. Let’s fix this problem by removing usage of consume() in statement.py.
First, we drop the .consume() at the end of line 76 inside the run() function:
    def run(self, session: neo4j.Session) -> None:
        """
        Run the statement. This will execute the query against the graph.
        """
        if self.iterative:
            self._run_iterative(session)
        else:
            session.write_transaction(self._run_noniterative)
        logger.info(f"Completed {self.parent_job_name} statement #{self.parent_job_sequence_num}")
Then, in the _run_iterative() function, we remove the entire while loop (lines 120-128) except for line 121, which we de-indent:
        # while True:
        result: neo4j.Result = session.write_transaction(self._run_noniterative)

            # Exit if we have finished processing all items
            # if not result.consume().counters.contains_updates:
            #     # Ensure network buffers are cleared
            #     result.consume()
            #     break
            # result.consume()
When we run it again, it should finish the run without problems and return control of the terminal with the prompt showing:
...
INFO:cartography.sync:Finishing sync stage 'duo'
INFO:cartography.sync:Starting sync stage 'analysis'
INFO:cartography.intel.analysis:Skipping analysis because no job path was provided.
INFO:cartography.sync:Finishing sync stage 'analysis'
INFO:cartography.sync:Finishing sync with update tag '1689401212'
daniel@andromeda:~/git/cartography$
Querying the Graph
The terminal we’re using to run Memgraph has the mgconsole client running (that’s the memgraph> prompt you see in the earlier screenshot), meaning we can try running queries directly there. For starters, we can try the ubiquitous “get everything” Cypher query:
memgraph> match (n) return n;
Note: if you get a “mg_raw_transport_send: Broken pipe”, just run the query again and it should reconnect.
This gives us some data back:
Querying Memgraph using mgconsole.
As you can see, this is not great to visualise results. Fortunately, Memgraph has its own web client (similar to Neo4j Browser) called Memgraph Lab, that you can access on http://localhost:3000/:
Memgraph Lab: Quick Connect page.
On the Quick Connect page, click the “Connect now” button. Then, switch to the “Query Execution” page using the left navigation sidebar, and you can run queries and view results more comfortably:
Seeing some nodes in Memgraph Lab.
Unlike Neo4j Browser, Memgraph Lab does not return relationships by default when you run this query. If you want to see them as well, you can run this instead:
match (a)-[r]->(b)
return a, r, b
Nodes and relationships in Memgraph Lab.
If the graph looks too cluttered, just drag the nodes around to rearrange them in a way that is more pleasant.
More Cartography with Memgraph
Cartography is a huge project that gathers data from a variety of data sources including AWS, Azure, GitHub, Okta, and others.
I’ve intentionally only covered the Okta intel module in this article because it’s small in scope and easy to digest. To use Cartography with other data sources, additional effort is required to address other problems with incompatible Cypher queries. For instance, at the time of writing this article, there are at least 9 outstanding issues that need to be fixed before Cartography can be used with Memgraph for AWS (that’s quite impressive considering that the AWS intel module is the biggest). Other intel modules may have other problems that need solving; nobody has explored them with Memgraph yet.
Summary
In this article, I’ve shown how one could go about taking an existing application that depends on Neo4j and migrating it to Memgraph. I’ve used Cartography with its Okta intel module to keep things relatively straightforward. The steps involved include:
Running Memgraph with --bolt-server-name-for-init=Neo4j/
Using the same Bolt-compatible Neo4j client, providing arbitrary Neo4j username and password values
Fixing any incompatible Neo4j client code (in this case, consume()), if applicable
Cartography is a great security tool that gathers infrastructure and security data from various sources for subsequent analysis. Last year, I wrote an article about Getting Started with Cartography for AWS. Although Cartography focuses mostly on AWS, it also gathers data from several other sources including major cloud and SaaS providers.
In this article, we’ll use Cartography to ingest Okta data. For the unfamiliar, Okta is an enterprise identity management tool that is great for its Single Sign On (SSO) capability. From a single dashboard, it provides seamless access to many different services (e.g. AWS, Gmail, and many others), without having to login every time. See also: What is Okta and What Does Okta Do?
It’s worth noting before we start this journey that Cartography’s support for Okta isn’t great. It only supports a handful of types, and it uses a retired version of the Okta SDK for Python. Nonetheless, it retrieves the most important types, and they enable analysis of some more interesting attack paths (e.g. an Okta user gaining unauthorised access to resources in AWS).
Creating an Okta Developer Account
We’ll first need an Okta account. There are a few different options including a trial, but for development, the best is to sign up for an Okta Developer account as follows.
Click on the Sign up button in the top-right.
In this confusing selection screen, go for the Developer Edition on the right.
Fill the sign-up form and proceed.
Once you get to the sign-up form, fill in the four required fields, and then either sign-up via email or use your GitHub or Google account. Note that Okta demands a “business email”, so you can’t use a Gmail account for this.
After signing up, you’ll get an email to activate your account. Follow its instructions to choose a password, and then you will be logged in and redirected to your Okta dashboard.
Go to Security -> API via the left navigation menu.
Switch to the “Tokens” tab.
Click the “Create token” button.
Security -> API, Tokens tab, Create token button.
You will then be prompted to enter a name for the API token, and subsequently given the token itself. Copy the token and keep it handy. Take note also of your organisation ID, which you can find either in the URL, or in the top-right under your name (but remove the “okta-” prefix). The organisation ID for a developer account looks like “dev-12345678”.
Running Neo4j
Before we run Cartography, we need a running instance of the Neo4j graph database, because that’s where the data gets stored after being retrieved from the configured data sources (in this case Okta). When I wrote “Getting Started with Cartography for AWS“, Cartography only supported up to Neo4j 3.5. Thankfully, that has changed. The Cartography Installation documentation specifically asks for Neo4j 4.x, further remarking that “Neo4j 5.x will probably work but Cartography does not explicitly support it yet.” The latest Neo4j Docker image at the time of writing this article seems to be 5.9, and I’m feeling adventurous, so let’s give it a try.
I did explain in “Getting Started with Cartography for AWS” how to run Neo4j under Docker, but we’ll do it a little better this time. Use the following command:
Here’s a brief explanation of what all this means:
sudo: I’m on Linux, so I need to run Docker with elevated privileges. If you’re on Windows or Mac, omit this.
docker run: runs a new Docker container with the image specified at the end.
--rm: destroys the container after you shut it down. This is because we’re just doing a quick test and don’t want to keep containers around. If you want to keep the container, remove this.
-p 7474:7474 -p 7473:7473 -p 7687:7687: maps ports 7473, 7474 and 7687 from the Docker container to the host, so that we can access Neo4j from the host machine. 7474 in particular lets us access the Neo4j Browser, which we’ll see in a moment.
-e NEO4J_AUTH=neo4j/password: sets up the initial username and password to “neo4j” and “password” respectively. This bypasses the need to reset the password from the Neo4j Browser as I did in the earlier article. Remember it’s just a quick test, so excuse the silly “password” and choose a better one in production.
neo4j:5.9: This is the image we’re going to run – neo4j with tag 5.9.
Note that any data will be lost when you stop the container, regardless of the --rm argument. You’ll need to use Docker volumes if you want to retain the data.
Once the container has started, you can access the Neo4j Browser at http://localhost:7474/, and login using the username “neo4j” and password “password”. We’ll use this later to run Cypher queries, but for now it is a sign that Neo4j is running properly.
As per Cartography’s Okta Configuration documentation, assign the Okta API token you created earlier to an environment variable (the following will set it only for your current terminal session):
--neo4j-uri bolt://localhost:7687: specifies the Neo4j URI to connect to
--neo4j-user neo4j: will login with the username “neo4j”
--neo4j-password-prompt: means that you will be prompted for the Neo4j password and will have to type it in
--okta-org-id dev-xxxxxxxx: will connect to Okta using the organisation ID “dev-xxxxxxxx” (replace this with yours)
--okta-api-key-env-var OKTA_API_TOKEN: will use the value of the OKTA_API_TOKEN environment variable as the API token when connecting to Okta
If you see “cartography: command not found” when you run this (especially on Linux), there’s a very good Stack Overflow answer that explains why this happens and offers a simple solution:
export PATH="$HOME/.local/bin:$PATH"
When you manage to run Cartography with the earlier command, enter the Neo4j password (it’s “password” in this example). It will take some time to collect the data from Okta and will write to the terminal periodically as it makes progress. You’ll know it’s done because you’ll see your terminal’s prompt again, and hopefully won’t see any errors.
Querying the Graph
You should now have data in Neo4j, so open your Neo4j Browser at http://localhost:7474/ and run some queries to look at the data. The easiest to start with is the typical “get everything” query:
match (n) return n
On a fresh new account, this gives you back a handful of nodes and the relationships between them:
Okta data in the Neo4j Browser.
Although this is not great for analysis, it’s all you need to get started using Cartography for Okta. You can get more data to play with by either building out your directory (users, groups, etc) via the Okta Dashboard, or else connecting to a real production account with real data.
If you want to analyse attack paths from Okta to AWS, then do the necessary AWS setup (see my earlier article, “Getting Started with Cartography for AWS“), and follow Cartography’s Okta Configuration documentation to set up the bridge between Okta and AWS.
Summary
To get Cartography to collect your Okta data:
Sign up for an Okta account if you don’t have one already.
Create an Okta API Token, and take note of your Okta Organisation ID
Run Neo4j
Run Cartography, providing settings to access Neo4j and Okta
Once the data is in Neo4j, you can analyse it and visualise how the nodes are connected. This can help you understand the paths that an attacker could take to breach the critical parts of your infrastructure. In the case of Okta, this is particularly useful when considering how an attacker could exploit the privileges of an Okta user to access resources in other cloud or SaaS providers.
Strolling through the 11th level of Eye of the Beholder (1991).
It’s been almost two years since I wrote “First Person Grid Movement with Unity3D“, in which I showed how to use Unity3D to replicate the grid-based movement typical of “blobbers” like Eye of the Beholder. The most common question I’ve had about that article is how to implement collisions. So that’s what I’m going to show you in this article, using Unity Editor 2021.3.25f1 LTS.
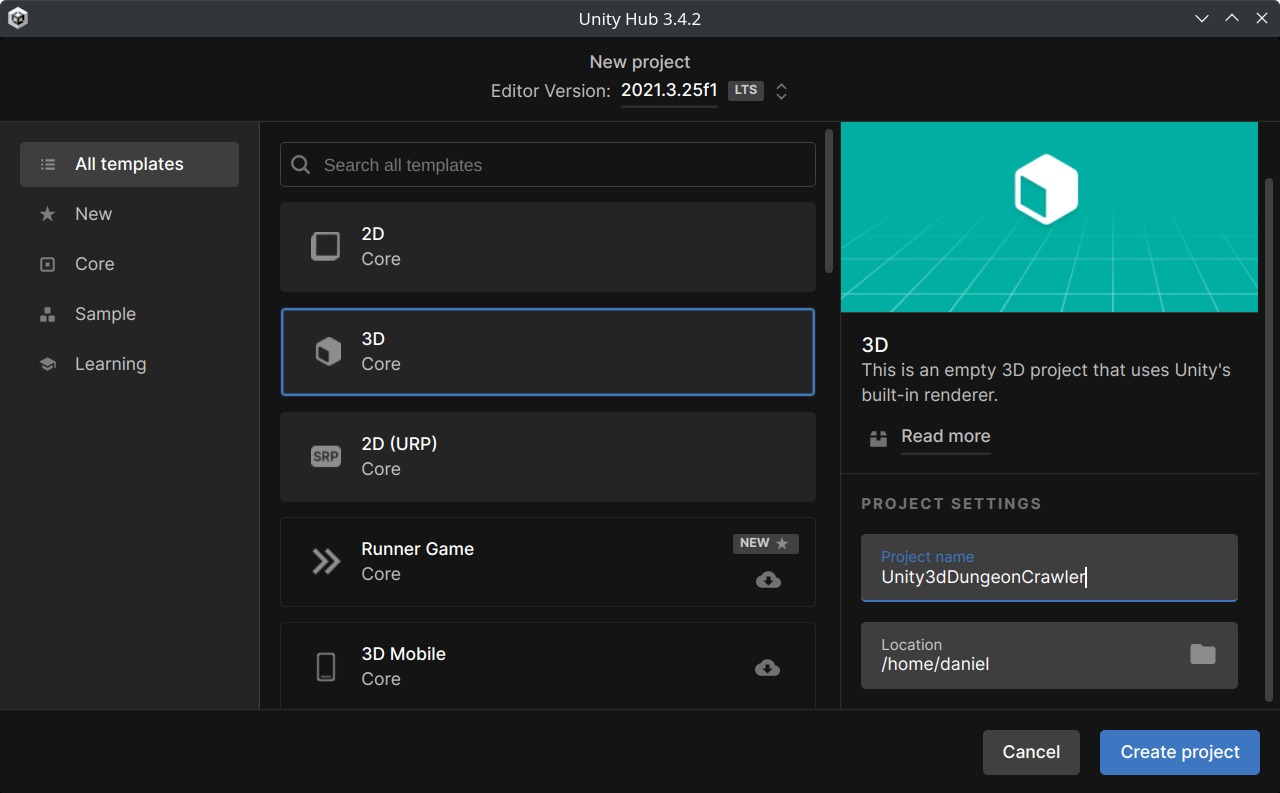
Creating a Project
Creating a new Unity3D project.
Open the Unity Hub and create a new project. Make sure you select the 3D template, and call it whatever you want.
Adding the Game Script
Attach the new Game script to the Main Camera object.
In the Assets pane, right-click and select Create -> C# Script. You can call it whatever you want, but I’ll call it Game.
Drag it onto your Main Camera object.
Double-click the script to open it in your IDE (e.g. Visual Studio Code).
void Update()
{
    if (Input.GetKeyDown(KeyCode.W))
        this.transform.position += this.transform.rotation * Vector3.forward;
    else if (Input.GetKeyDown(KeyCode.S))
        this.transform.position += this.transform.rotation * Vector3.back;
    else if (Input.GetKeyDown(KeyCode.A))
        this.transform.position += this.transform.rotation * Vector3.left;
    else if (Input.GetKeyDown(KeyCode.D))
        this.transform.position += this.transform.rotation * Vector3.right;
    else if (Input.GetKeyDown(KeyCode.Q))
        this.transform.rotation *= Quaternion.Euler(0, -90, 0);
    else if (Input.GetKeyDown(KeyCode.E))
        this.transform.rotation *= Quaternion.Euler(0, 90, 0);
}
Adding a Map
So now we can move the camera, but we don’t have collisions yet. In fact, we don’t even have anything to collide with yet.
Unity3D comes with its own set of colliders you can use, but since we’re assuming movement in a 2D grid, then it’s much easier to just store a simple map in a 2D array and check what’s in the destination cell before moving into it. We’ll use this same 2D array to generate walls in the scene rather than putting cubes manually into the scene as we did in the earlier article. The following should do:
    private string[] map = new[] {
        "XXXXXXXXXXXX",
        "X          X",
        "XX XX  XX XX",
        "XX XX XXX XX",
        "XX  XXX    X",
        "XXX X X XX X",
        "X     X  X X",
        "X XXXXXXXX X",
        "X      X   X",
        "XXX XX    XX",
        "X    X XX  X",
        "XXXXXXXXXXXX",
    };
Since a string behaves like an array of characters, it’s good enough to use an array of strings instead of a 2D array of characters.
Generating Walls
After the map, let’s also add a field that we can use to set the prefab we’ll use as a wall:
    [SerializeField]
    GameObject wallPrefab;
Use the Wall prefab as the input GameObject to the Game script.
Back in the Unity Editor:
Create a cube (GameObject menu -> 3D Object -> Cube) in the scene.
Drag it from the Hierarchy pane into your Assets pane to create a prefab.
Rename the Cube prefab in your Assets pane to Wall.
Delete the cube in the scene.
Select the Main Camera, then drag the Wall prefab into the Wall Prefab slot of the Game script as shown above.
Now that we have the Wall prefab set up, let’s go back into the script and add some code that will create the walls on startup:
    void Start()
    {
        for (int z = 0; z < map.Length; z++)
        {
            for (int x = 0; x < map[z].Length; x++)
            {
                if (map[z][x] == 'X')
                {
                    Vector3 position = new Vector3(x, 0, z);
                    Instantiate(wallPrefab, position, Quaternion.identity);
                }
            }
        }
    }
Because the Y-axis points upwards and we’re dealing with a flat 2D grid, it’s useful to note that Y is always zero and we’re dealing with the X- and Z-axes when moving.
Positioning the Camera
Press Play and we can get a first peek at the generated walls:
An initial view of the generated walls.
It’s clear that the camera is a little off, but we can already see that we’ve successfully generated some sort of maze. Thanks to the movement script we copied earlier, you can move around (WASD for forward, backward, left and right movement, Q to turn left, and E to turn right) and find a good starting point for the camera, e.g. (X, Y, Z) = (5, 0, 1):
The view from (X, Y, Z) = (5, 0, 1).
Implementing Collision Detection
So now we come to the original problem: we’re able to walk through the walls. Now that we have a map, all we need to do to detect collisions is to check what’s in the square we’re moving to, before we move into it. For this, we’ll add a little helper function:
    private void updatePositionIfNoCollision(Vector3 newPosition)
    {
        var x = System.Convert.ToInt32(newPosition.x);
        var z = System.Convert.ToInt32(newPosition.z);

        if (map[z][x] == ' ')
            this.transform.position = newPosition;
    }
This function takes the position of the square we’re about to move into as an input, then if that square is clear on the map, it updates the camera’s position. Conversely, if that square contains an ‘X’, then nothing will happen.
So in the Update() function, instead of updating the position directly when we handle the movement keys, we instead call this helper function to move only on condition that the target square is clear:
    void Update()
    {
        if (Input.GetKeyDown(KeyCode.W))
            updatePositionIfNoCollision(this.transform.position + this.transform.rotation * Vector3.forward);
        else if (Input.GetKeyDown(KeyCode.S))
            updatePositionIfNoCollision(this.transform.position + this.transform.rotation * Vector3.back);
        else if (Input.GetKeyDown(KeyCode.A))
            updatePositionIfNoCollision(this.transform.position + this.transform.rotation * Vector3.left);
        else if (Input.GetKeyDown(KeyCode.D))
            updatePositionIfNoCollision(this.transform.position + this.transform.rotation * Vector3.right);
        else if (Input.GetKeyDown(KeyCode.Q))
            this.transform.rotation *= Quaternion.Euler(0, -90, 0);
        else if (Input.GetKeyDown(KeyCode.E))
            this.transform.rotation *= Quaternion.Euler(0, 90, 0);
    }
That’s all. If you press Play now, you’ll find that you can roam freely around the map, but you can’t move into walls.
Conclusion
Collision detection on a 2D grid is pretty easy. You just need to keep track of where you are and what’s in the square you’re moving into.
"You don't learn to walk by following rules. You learn by doing, and by falling over." — Richard Branson