My first website, Dino’s Ultima Page, turned 18 years old last week. As a website about games, it’s got hundreds of images, mostly screenshots or other images of in-game objects and people. I spent a lot of time manually making thumbnails for most of the larger images, so that pages would load quickly and larger screenshots would be loaded only when requested.
Now, hopefully a little wiser, I know that such things can be automated. I recently showed how to extract regions of an image using ImageMagick, and this software, which I’m growing to love more and more, is also capable of resizing images (among many other operations).
Resizing a Single Image
Many of the games I remember from the early 1990s ran at a resolution of 320×200. Although they would often be scaled up during gameplay, taking a screenshot (in DOSBox, for instance) results in an image that is 320 pixels wide and 200 pixels high.
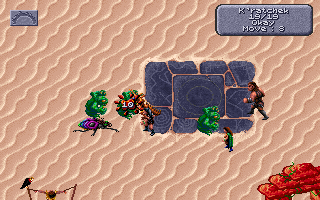
For an image that I’d like to display on a website, the size is a little annoying. It’s too small to make out much of the details, but possibly slightly too large to use as a thumbnail. I’d like to scale it down to create a thumbnail, but then link to a scaled up version of the image.
Using ImageMagick, it’s pretty easy to resize an image. Assuming the image above is called dsun_003.png, we can create the smaller and larger version as follows:
convert dsun_003.png -resize 640x400 dsun_003-large.png
convert dsun_003.png -resize 200x125 dsun_003-small.png
We call the convert command, passing the following as arguments:
- The name of the original image we’d like to resize
- The
-resizeparameter, followed by the new size - The name of the output file where the resized image will be saved
Note that I intentionally chose the new image sizes such that the aspect ratio is preserved (which is usually what you want). If you need to change the aspect ratio, check the Resizing documentation for more advanced examples.
This leaves us with a nice thumbnail and a larger image where we can savour the graphics of 1993:

Resizing all images in a Folder
If we can resize a single image from the terminal, then we should be able to automate this process for a large number of images in a folder, saving a lot of time that would otherwise be spent clicking stuff in an image editor.
For instance, I have a few screenshots from King’s Quest 6 in a folder called kq6. Each image has a size of 640×440 and is of type .png.

I’d like to resize all images in this folder regardless of how many there are. I can achieve this using a loop in bash:
for filename in $1/*.png; do
    convert $filename -resize 320x220 "$1/$(basename "$filename" .png)-sm.png"
done
Actually, the trickiest part of this is to extract the filename without the extension. That’s the part where we’re using basename, which takes the filename as the first argument, and the suffix to trim off as the second. This solution works where we know the image type a priori and all images in the folder are the same type.
You’ll also note the use of $1. That’s simply the first argument to the script, so that we can use the same script in different places, just passing the name of the folder as an argument. In fact, after saving the script as resizeall.sh and giving it execute permissions, let’s call it on our kq6 folder:
./resizeall.sh kq6
This has the effect of creating smaller versions of all the images in the folder, which have the same name except for a -sm suffix before the file extension:

Conclusion
We’ve seen again that ImageMagick is really handy for image manipulation, and the ability to do things from the terminal makes it really easy to automate operations on large numbers of images. In this case, we found it was really easy to resize game screenshots to create thumbnails and larger images to display on a website.
One thought on “Resizing Images and Creating Thumbnails with ImageMagick”